Category: Learning Methods

  • Mastering Dynamics: How to Soften Loud Notes on Piano with Pedals

    Mastering Dynamics: How to Soften Loud Notes on Piano with Pedals

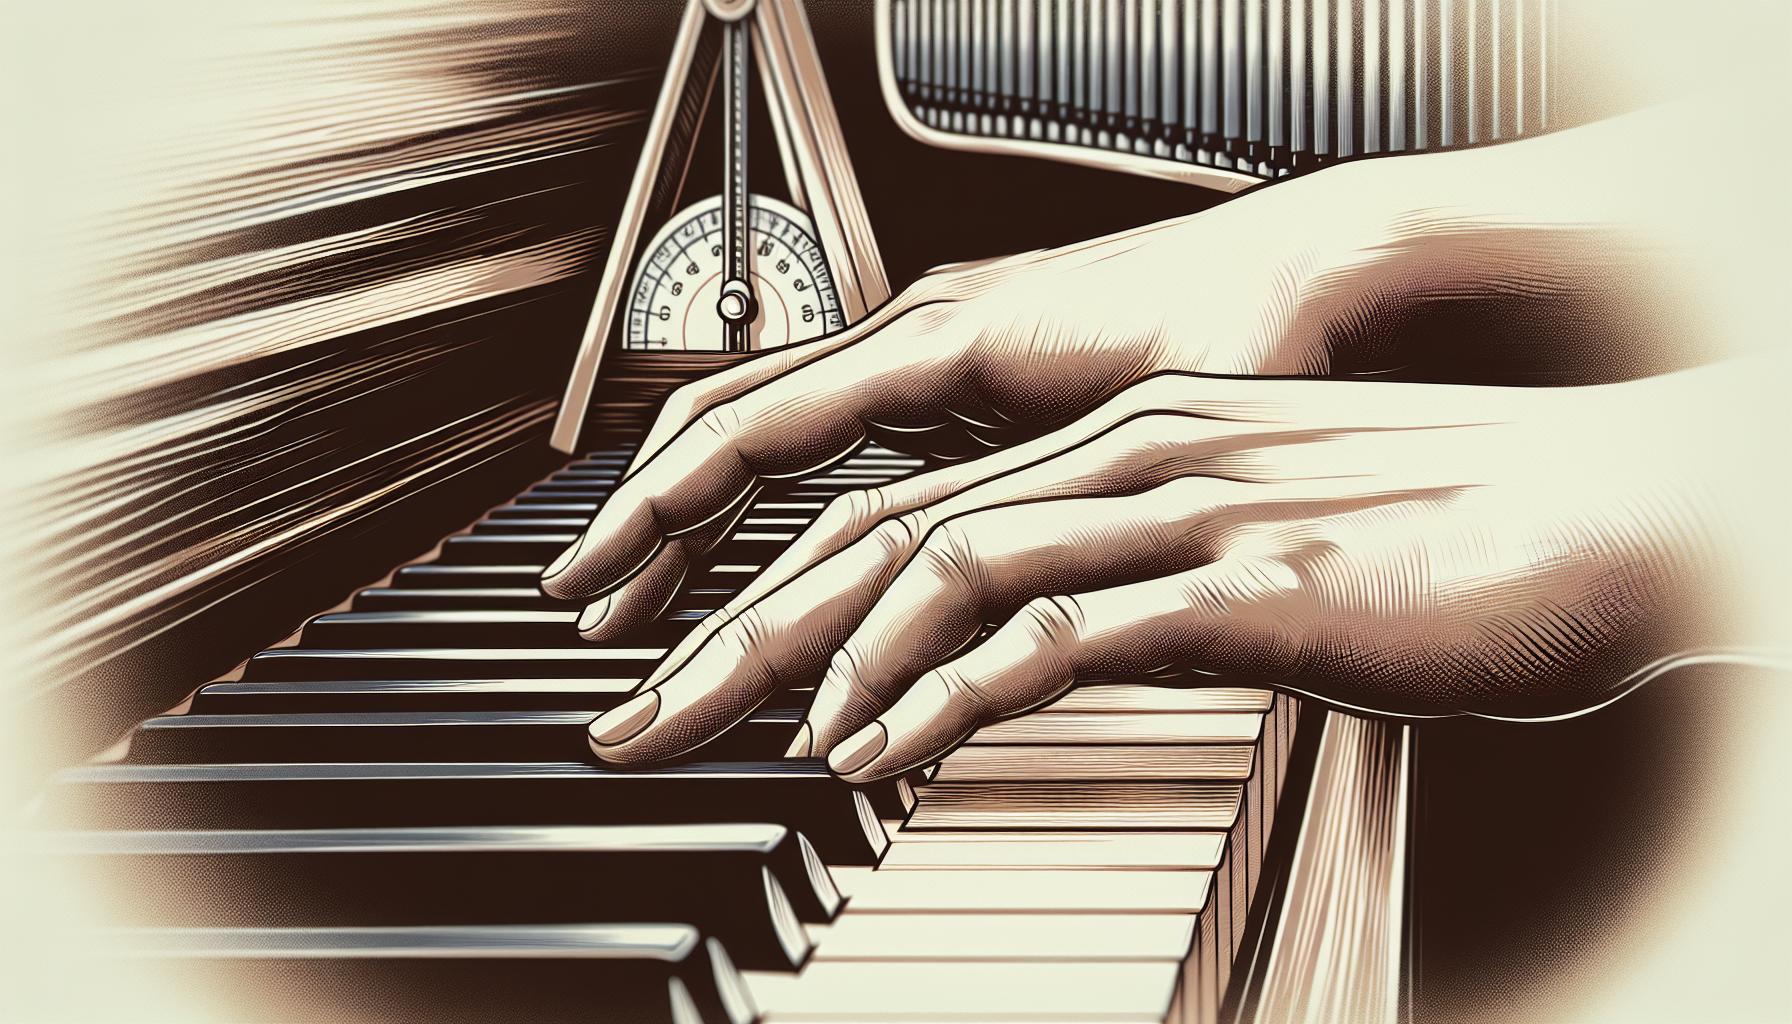
    Playing the piano beautifully isn’t just about hitting the right notes; it’s also about mastering the art of dynamics. One common challenge pianists face is softening loud notes to create a more expressive and nuanced performance. Whether you’re tackling a delicate piece or aiming to add depth to your playing, controlling volume is key.

    Fortunately, there are tried-and-true techniques that can help. From adjusting finger pressure to experimenting with pedal use, pianists have several tools at their disposal. Let’s dive into how you can soften those loud notes and bring a touch of finesse to your piano playing.

    Understanding Dynamics in Piano Playing

    Mastering dynamics in piano playing is not just about hitting the keys with different amounts of pressure. It involves a deeper understanding of the emotional expression of music. Dynamics can transform a simple piece into a powerful narrative that captivates the listener’s heart. They must consider dynamics as an integral part of their musical expression, akin to adding colors to a painting. Specifically, softening loud notes offers a unique challenge that requires both technical skill and emotional sensitivity.

    When it comes to dynamics, pianists often struggle with controlling the volume of their play, especially in transitioning from loud passages to softer ones. It’s not merely a matter of playing notes at a lower volume but entails a delicate process of expressing the same intensity and emotion at a softer dynamic level. This skill distinguishes outstanding pianists from the average, marking their performances with a signature touch of expressiveness and depth.

    Several techniques play a crucial role in achieving this finesse:

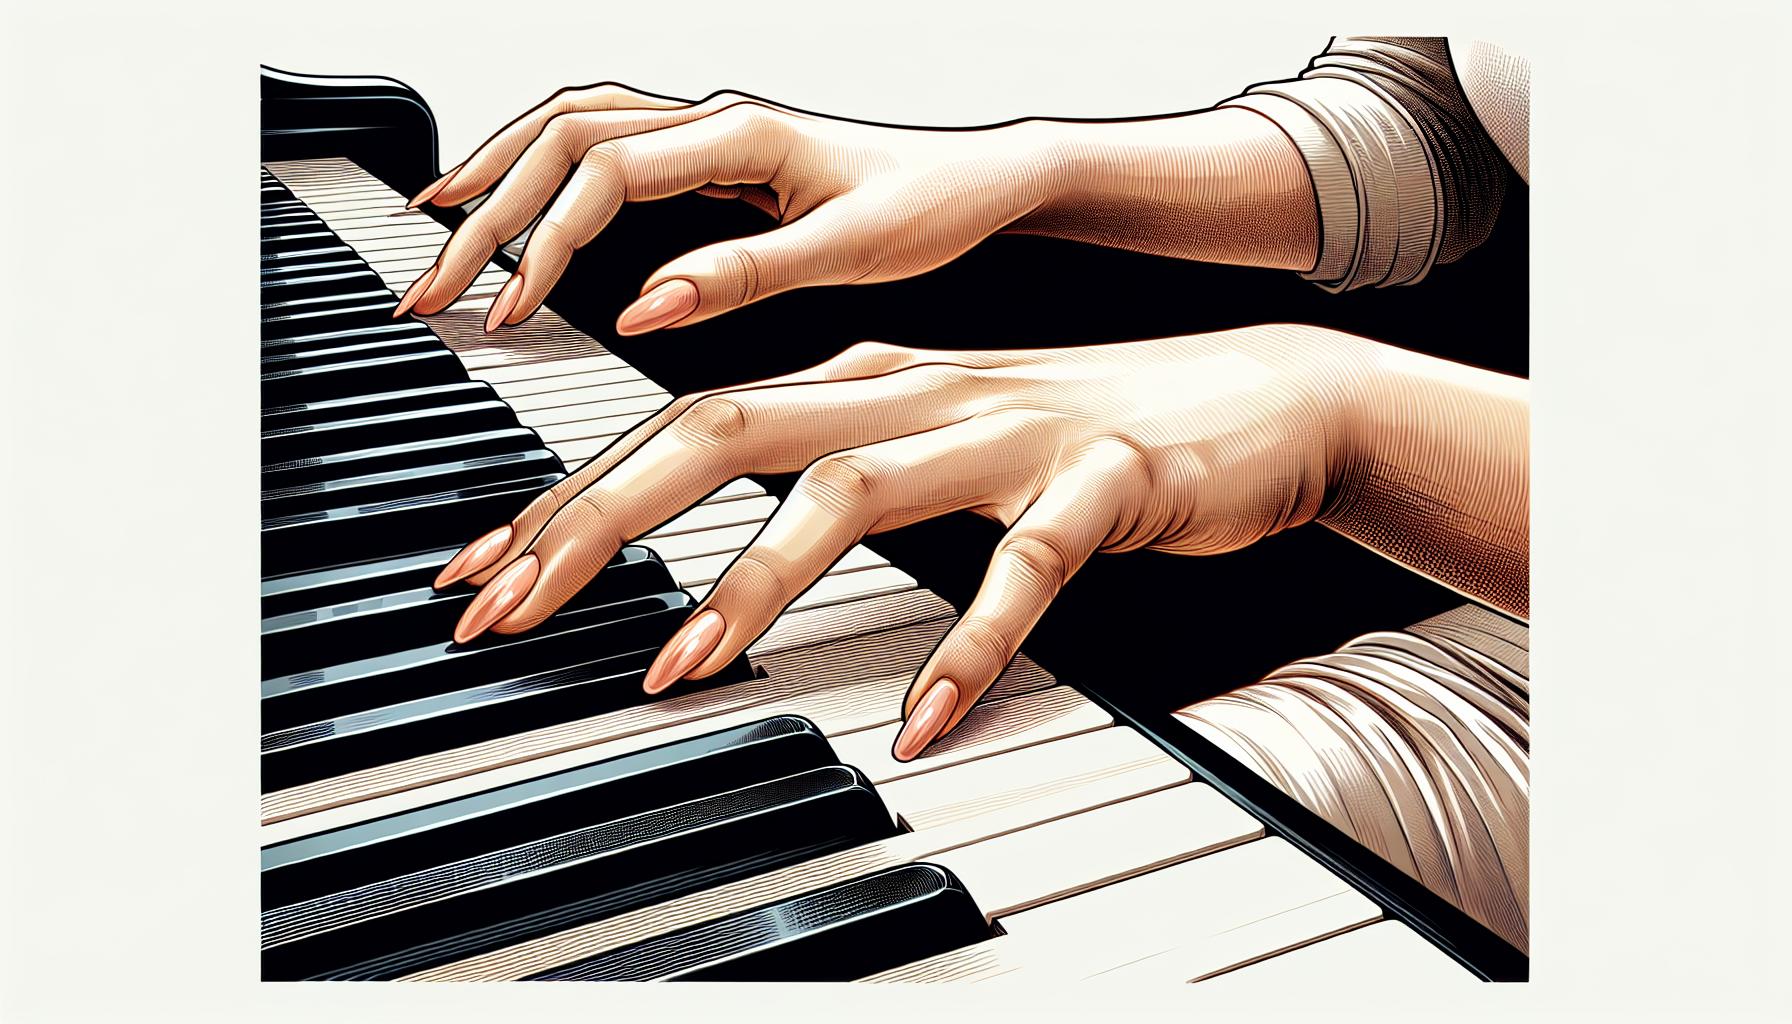
    • Adjusting Finger Pressure: Lightening the touch on the keys can reduce the volume without losing the note’s clarity. It’s about finding the right balance, where the sound is gentle yet still fully formed.
    • Efficient Use of the Pedals: The sustain pedal, when used judiciously, can help maintain a note’s presence without the need to strike the key hard. This technique is particularly useful for creating a smoother transition between dynamic levels.
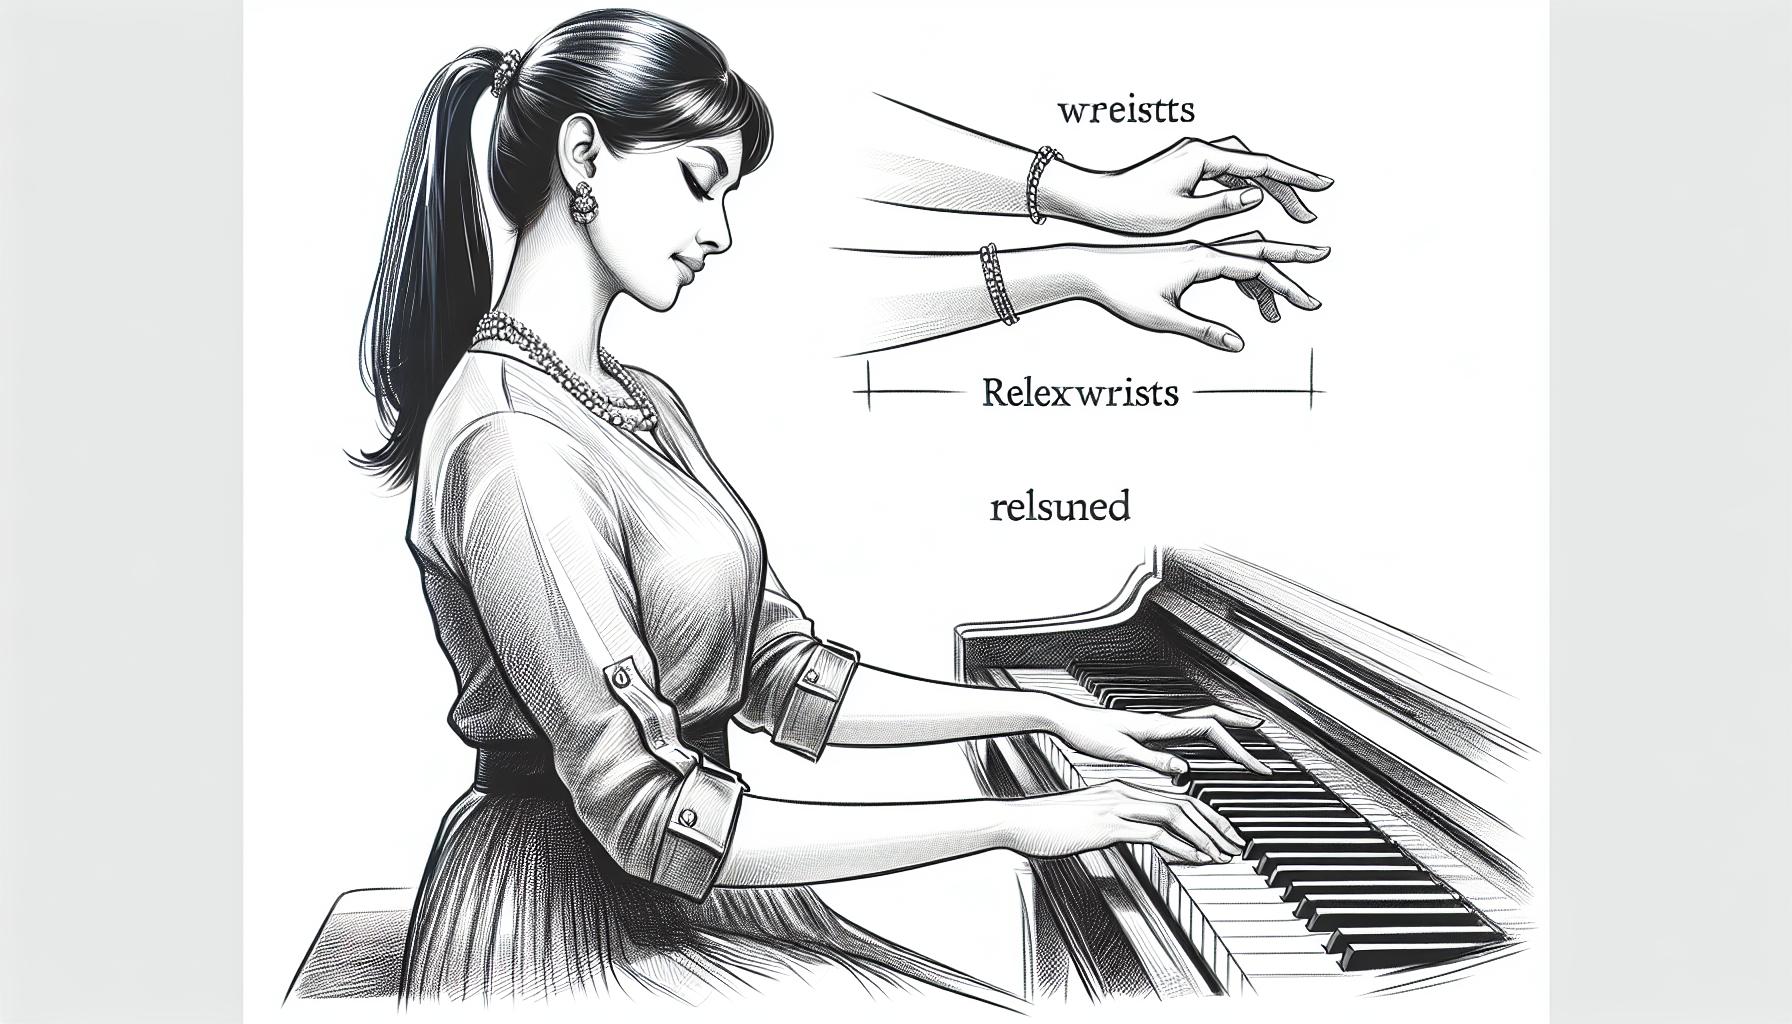
    • Arm Weight and Movement: Controlling the arm’s weight allows for a more nuanced dynamic range. A relaxed arm can produce a soft sound, whereas a more forceful movement generates volume. Learning to modulate this aspect can vastly expand one’s expressive capabilities on the piano.

    Incorporating these techniques into one’s playing is not an overnight process. It requires mindful practice and a keen ear for detail. Listening critically to one’s playing and adjusting accordingly can lead to significant improvements. Moreover, recording sessions and seeking feedback from teachers or peers can provide invaluable insights into how effectively one is expressing dynamics.

    A common mistake is to focus solely on the technical aspects, forgetting the emotional intent behind the music. Pianists should always aim to convey the composer’s emotional narrative through their dynamics. For instance, a piece may call for a sudden softening of volume to evoke a sense of intimacy or reflection. Achieving this effect genuinely requires not only technical control but also an emotional connection to the piece.

    Importance of Controlling Volume

    In the world of piano playing, the ability to control volume isn’t just a technical skill—it’s an art form. Controlling volume is essential for conveying the emotional depth and subtlety that pieces of music demand. It’s the difference between a performance that is merely played and one that breathes life into the composer’s notes, creating a compelling narrative for the audience.

    Pianists who master volume control can navigate through the nuances of a piece, like whispering through the quiet moments and soaring in the crescendos. This dynamic range is what makes a performance memorable. It’s about Communicating Feelings, where the intensity of a passage can elicit joy, sorrow, tension, or relief in the listener.

    Achieving this requires meticulous attention to detail. Pianists must develop a keen sense of touch, able to adjust the force applied to the keys with precision. This is not about playing softly across the board but knowing when to apply gentle pressure to specific keys to soften loud notes without losing their intensity. The use of the pedals, especially the Soft Pedal and Sostenuto Pedal, plays a crucial role in this. The former changes the timbre and volume of the notes played, while the latter sustains selected notes at a softer volume.

    Additionally, controlling volume is not solely for the sake of dynamics. It’s also about Balance and Harmony within a piece. When playing pieces with complex textures or layers, pianists must ensure that the melody stands out over the harmony without overpowering it. This balance allows every note and chord to find its rightful place in the overall sound.

    For pianists, the journey to mastering volume control is ongoing. It involves:

    • Practicing Specific Techniques: Such as adjusting finger pressure, effective use of pedals, and managing arm weight.
    • Active Listening: Pianists should constantly evaluate their playing, listening to recordings of their performances to identify areas for improvement.
    • Feedback from Teachers and Peers: Objective feedback can provide invaluable insights into how well a pianist controls volume.
    Reason Description
    Emotional Depth Volume control allows for the expression of a wide range of emotions in music.
    Performance Nuance Mastery over loud and soft notes adds a layer of sophistication to a performance.

    Techniques to Soften Loud Notes

    To achieve a more nuanced performance on the piano, softening loud notes is crucial. This delicate balancing act requires not only physical control but also an emotional connection to the music. Here are some effective techniques pianists can use to master the gentle touch necessary for softening notes without sacrificing clarity or expression.

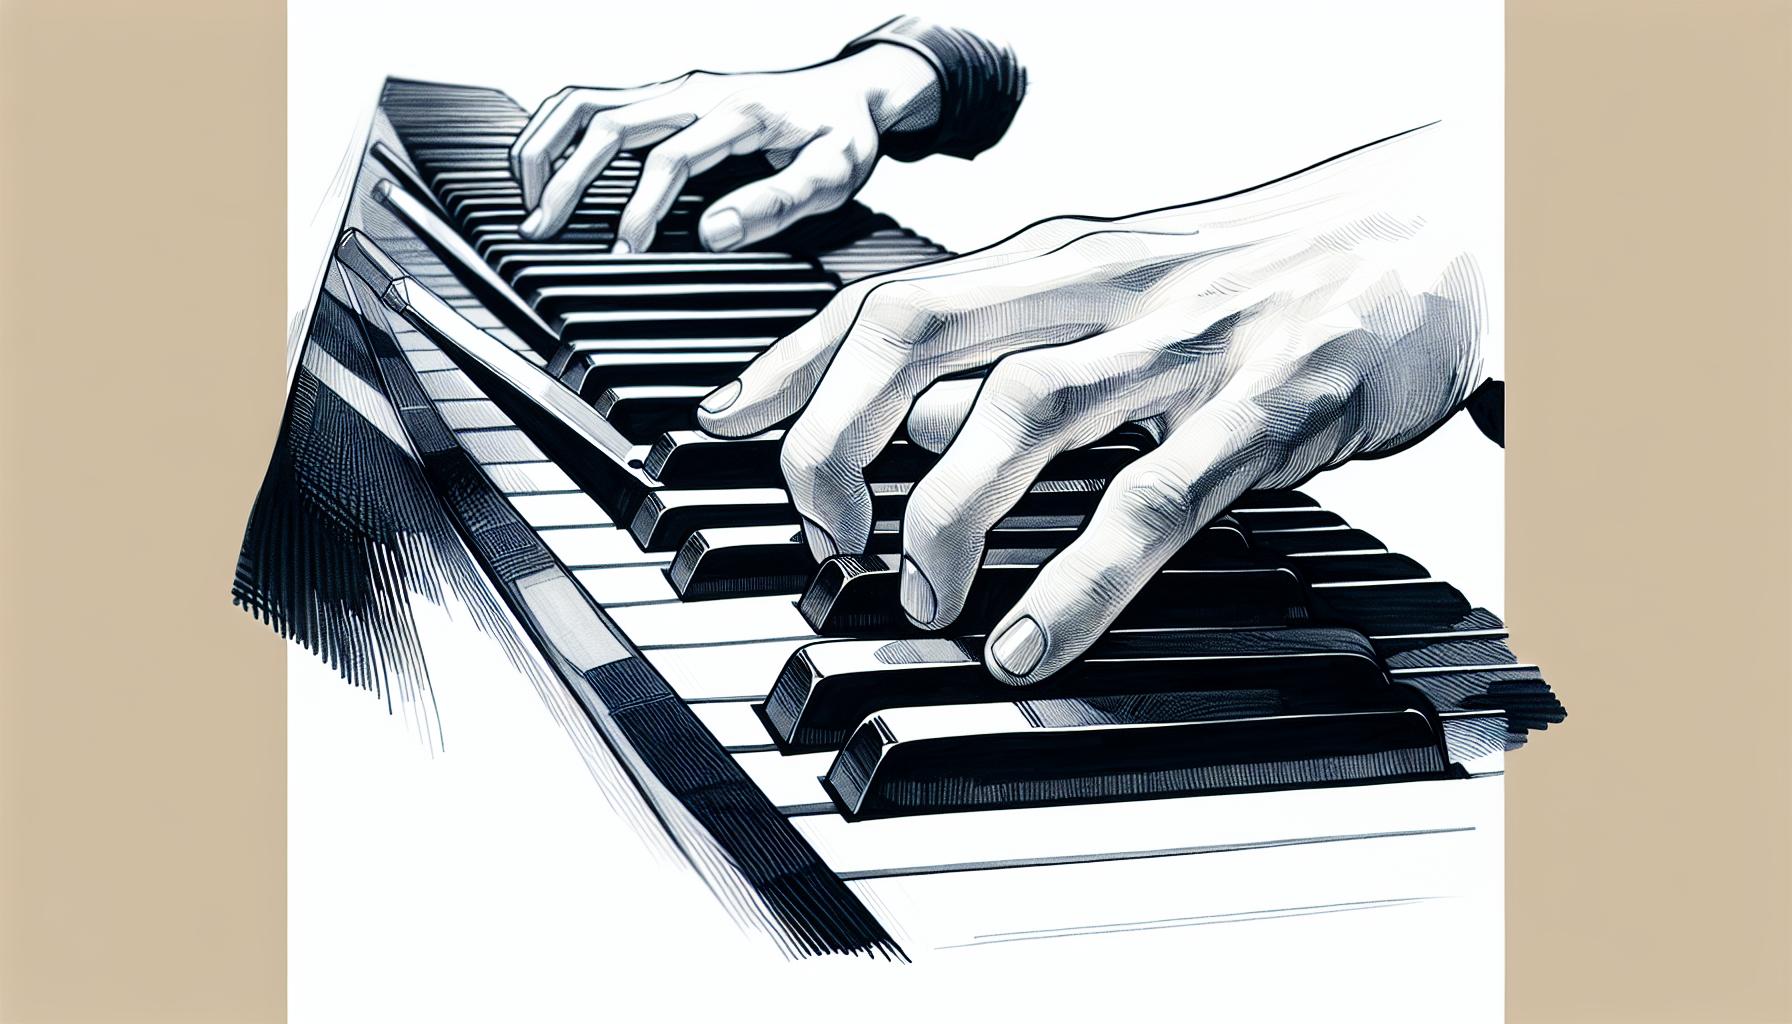
    Finger Control: At the heart of softening loud notes is the pianist’s ability to adjust finger pressure. Lighter touch on the keys results in a softer sound. However, this doesn’t mean a loss of control. Skilled pianists maintain precision in their movements, ensuring each note is hit accurately but with less force.

    • Practice with Varied Dynamics: Regular practice sessions should include playing pieces with varying dynamics. Start by playing a piece loudly and then gradually decrease the volume, focusing on maintaining the same level of expressiveness and clarity. This helps in developing a sensitive touch.

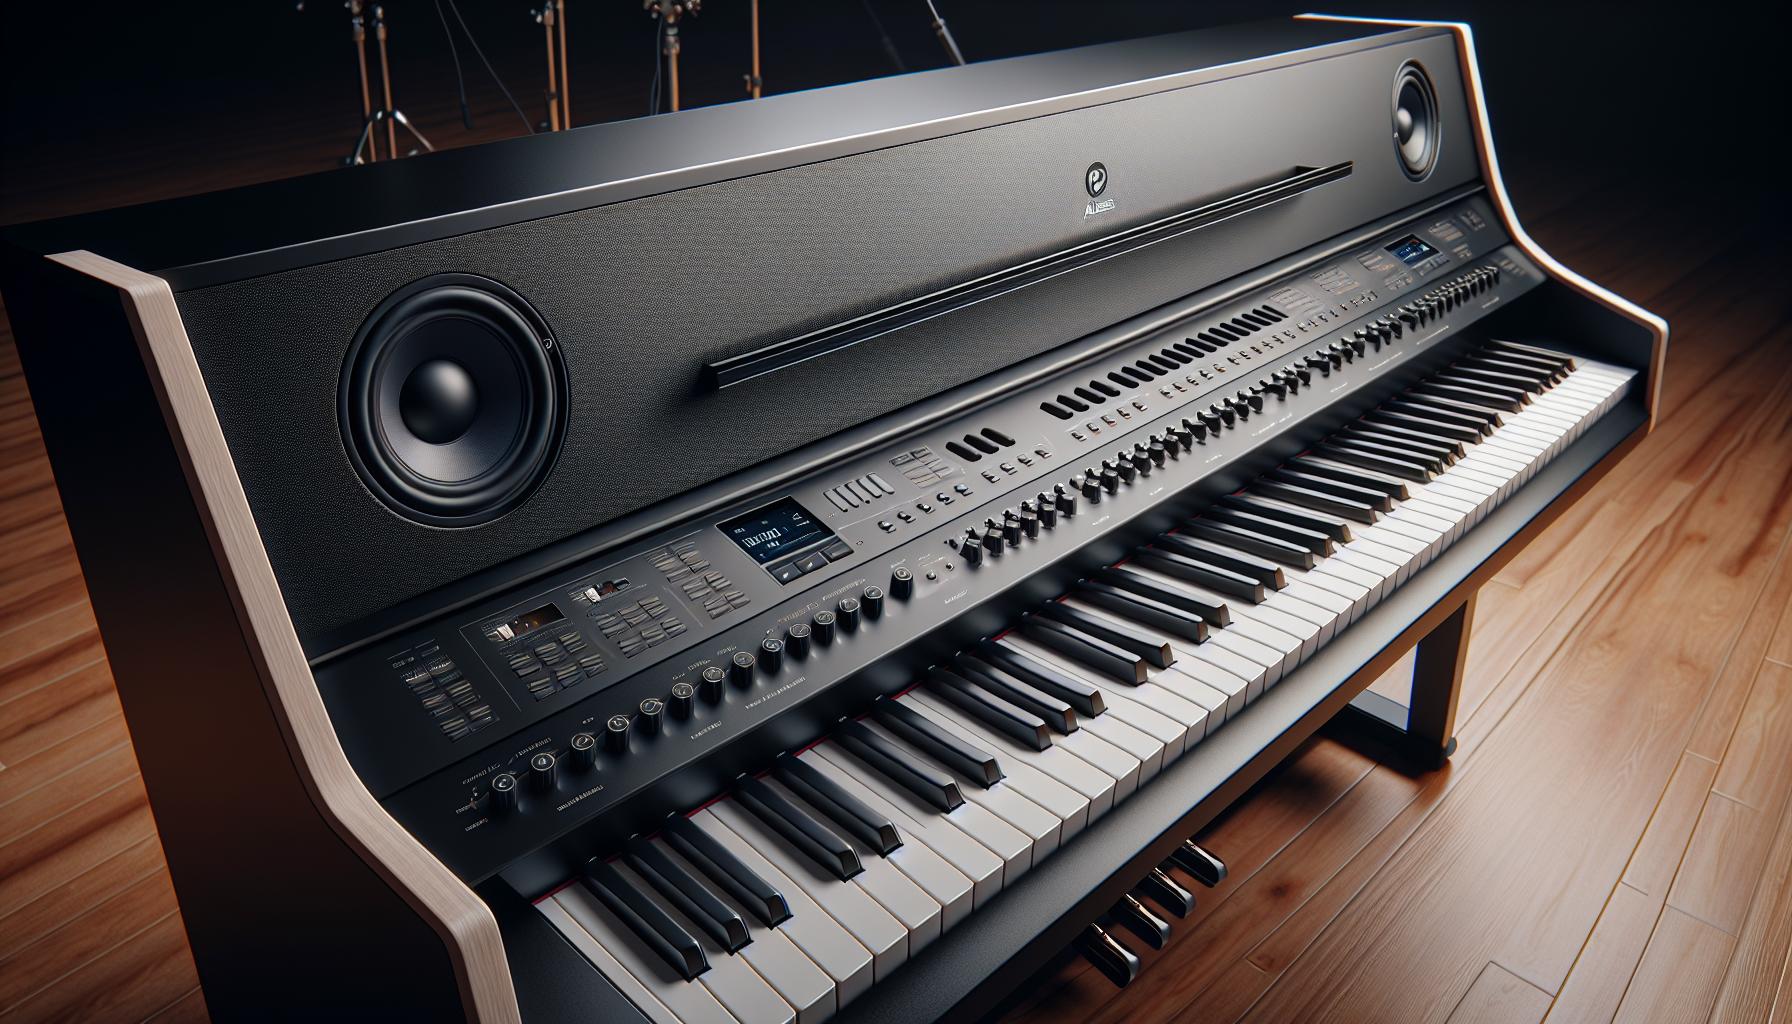
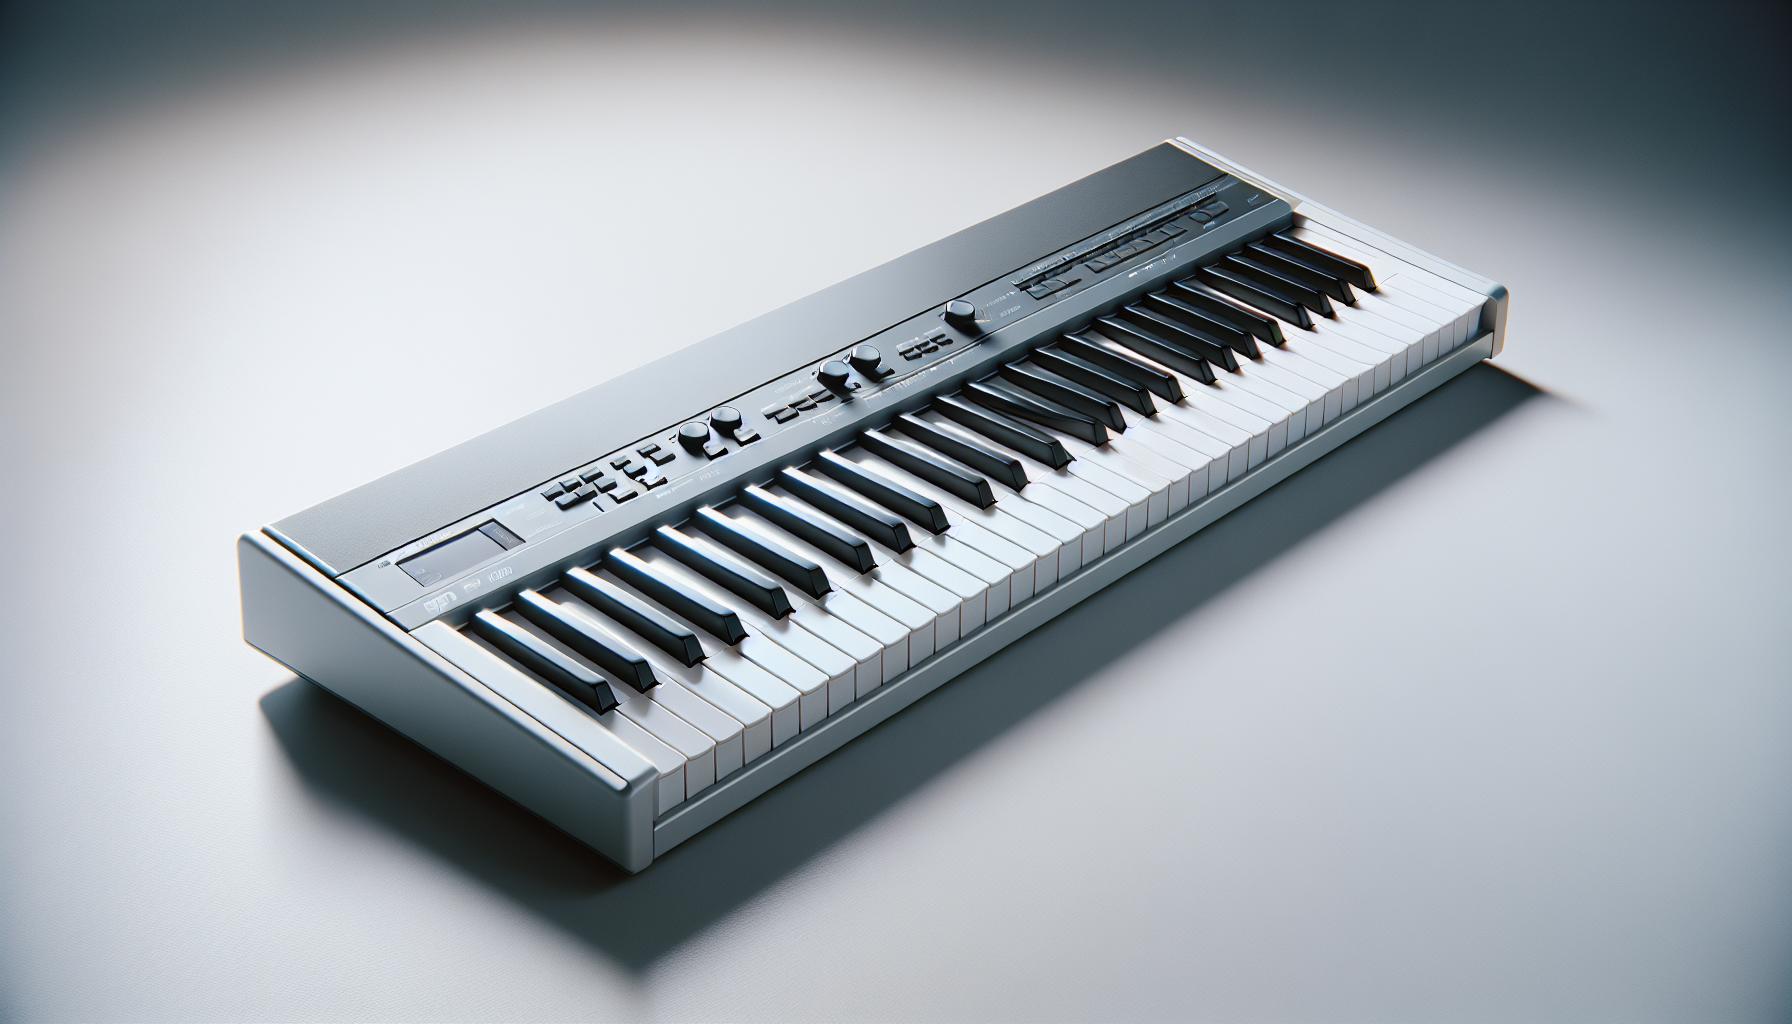
    Use of the Una Corda Pedal: The una corda pedal, found on the left side of the piano, is a valuable tool for softening notes. When pressed, it shifts the piano’s action so the hammers strike fewer strings, resulting in a softer, more muted sound. Pianists should experiment with this pedal to understand its effect on the music and learn when its use is most appropriate.

    • Adjust Arm Weight: Managing arm weight is another technique to soften loud notes. By reducing the weight transferred from the arms to the fingers when playing, pianists can achieve a lighter sound. It’s about finding the balance between enough weight for control and too much weight that results in overly loud notes.

    Strategic Use of the Sustain Pedal: While the sustain pedal is typically used to prolong the sound of the notes, it can also assist in softening them if used judiciously. By carefully timing the release of the pedal, pianists can create a softer tail-off of sound, adding to the overall gentleness of the piece.

    Listening and Adjustment: Finally, one of the most crucial techniques is the ability to listen critically to one’s playing and adjust accordingly. Playing softly requires constant adjustment and fine-tuning based on what the pianist hears. This might mean changing finger pressure, adjusting arm weight, or even modifying the use of pedals midway through a piece.

    Adjusting Finger Pressure

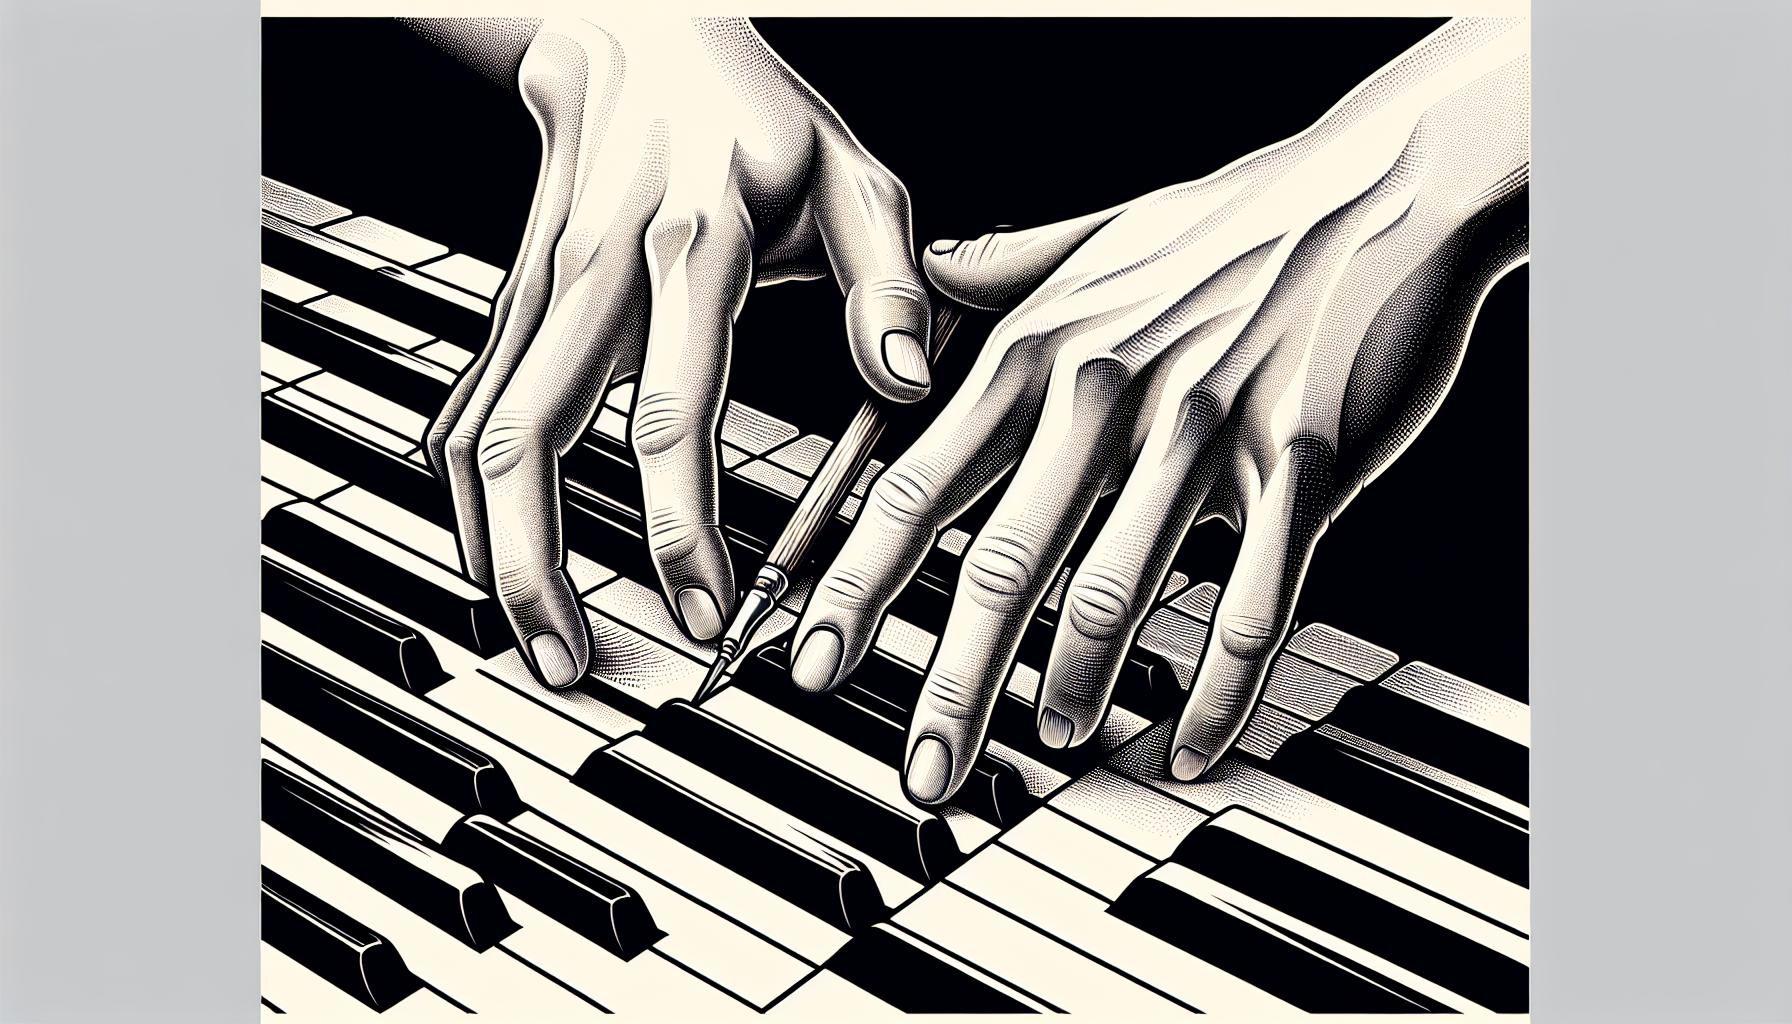
    One of the most direct methods to soften loud notes on the piano involves adjusting finger pressure. It’s a technique that seems simple on the surface but requires a nuanced understanding of touch and how it translates into sound. By varying the amount of pressure applied to the keys, pianists can directly impact the volume and tone of the notes they produce. This control is fundamental for achieving a dynamic and emotive performance.

    To begin mastering this technique, pianists should start by experimenting with the extremes of soft and loud playing. This practice helps them become acutely aware of the range of pressure their fingers can exert. It’s not just about pressing the keys more gently; it’s about understanding how slight variations in pressure can produce profoundly different sounds.

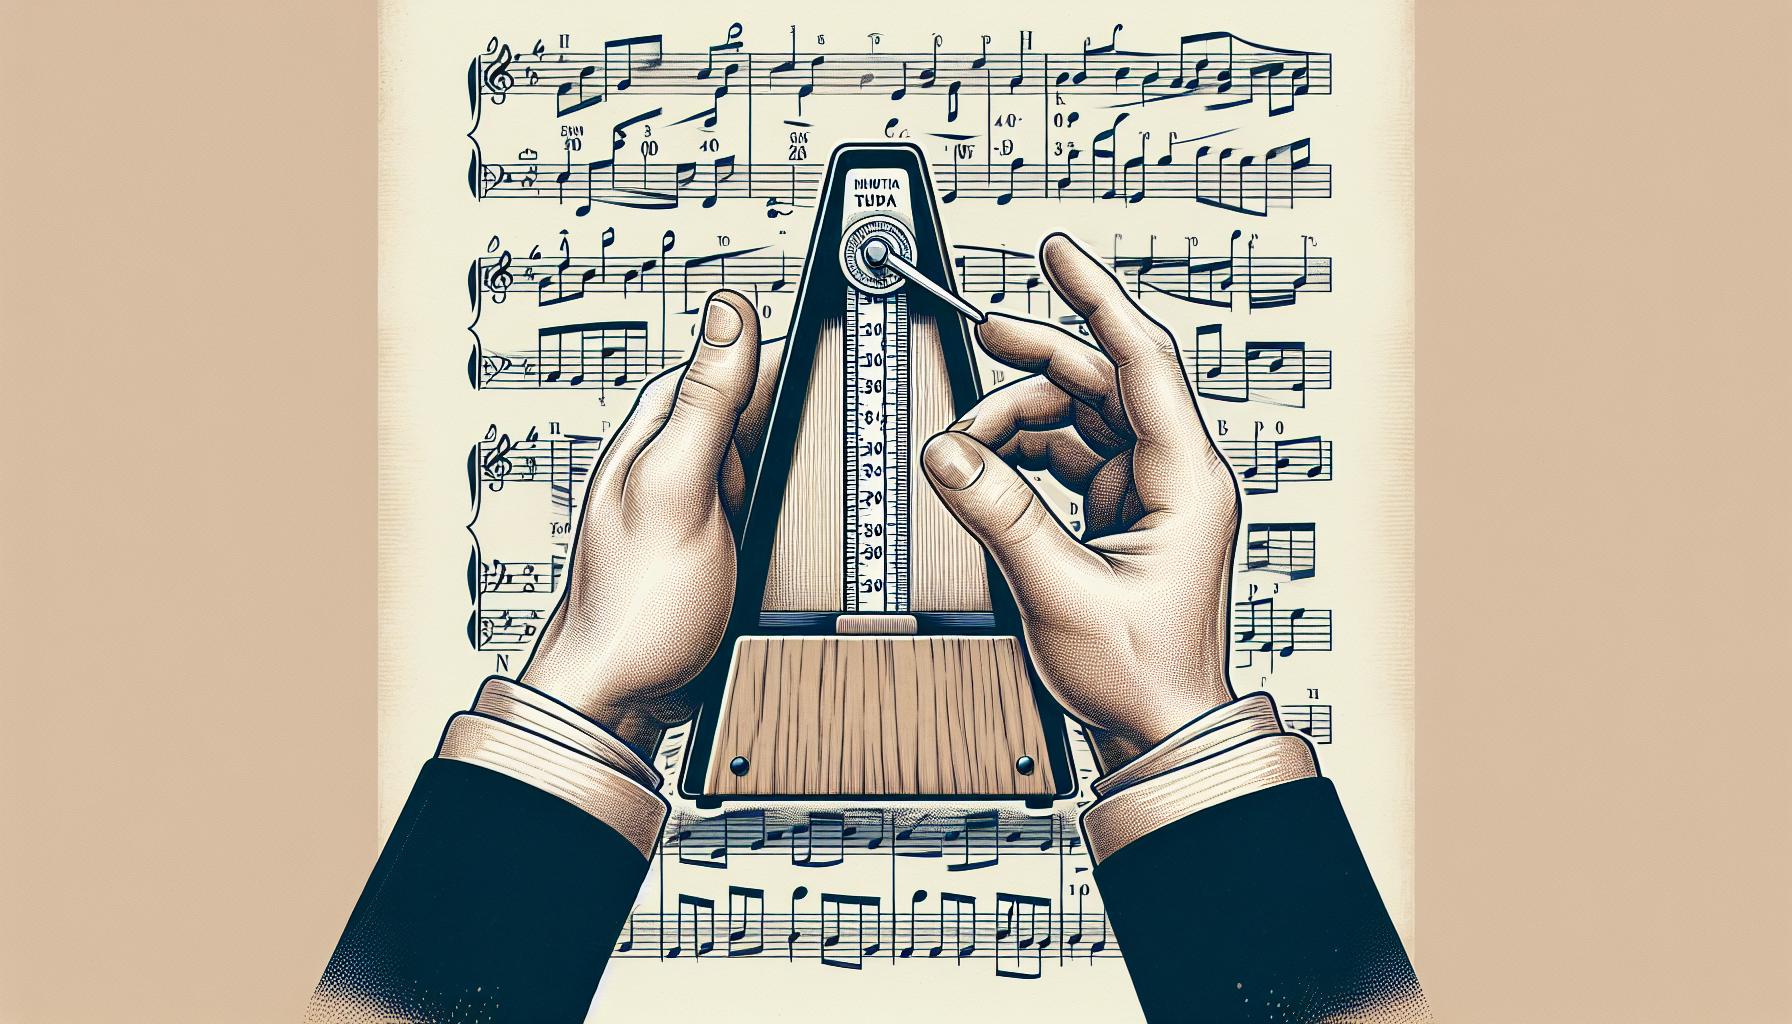
    • Start Slowly: Begin practicing at a slow tempo to give yourself time to feel the pressure of each finger on the keys.
    • Mindful Practice: Pay close attention to how different degrees of pressure affect the sound. It’s about developing a sensory connection between your fingers and the piano.
    • Consistent Pressure: Ensure even pressure across all fingers for balanced dynamics. Uneven pressure can lead to a disjointed and erratic performance.

    Practicing with scales and simple pieces allows for a focused approach to adjusting finger pressure. Attention should be paid not just to the downward motion but also to the release of the keys. A smooth, controlled release contributes significantly to the overall softness of the sound. Incorporating exercises that emphasize this aspect can lead to more refined control over dynamics.

    Another crucial aspect of adjusting finger pressure is the recognition that different pianos respond uniquely to touch. A technique that works on one instrument may produce a different effect on another. Therefore, pianists must learn to adapt their touch based on the specific characteristics of the piano they are playing. This adaptability is a hallmark of a versatile and sensitive musician.

    Adjusting finger pressure isn’t just about playing softly; it’s about creating a palette of sound that can express a wide range of emotions. The ability to do so with intention and precision can truly elevate a pianist’s performance. It transforms the piano from a mere instrument into a voice that speaks with infinite shades of nuance and color.

    Experimenting with Pedal Use

    When pianists venture into the nuanced realm of dynamics, the pedals beneath their feet become invaluable tools, not just footrests. The sustain pedal, or damper pedal, is particularly instrumental when it comes to softening loud notes. By skillfully deploying it, pianists can add a layer of subtlety to their sound that goes beyond mere finger pressure adjustments.

    The magic of the sustain pedal lies in its ability to blur the lines between notes, creating a cohesive, softer sound. However, timing is everything. Pressing the pedal too early or too late can result in a muddled or harsh sound, respectively. The key is to press the pedal right after the notes are played, allowing them to ring out and blend smoothly with subsequent sounds. This technique, known as “pedal overlapping” or “legato pedaling,” ensures a continuous, fluid sound without any unintended harshness.

    Yet, the sustain pedal is not a one-size-fits-all solution. Pianists must engage in mindful experimentation, adjusting their pedaling techniques to suit the piece they’re playing, the acoustic environment, and the specific piano. For instance, a lightly damped pedal might be perfect for a soft, intimate piece in a small room but entirely inappropriate for a powerful, resonant performance in a large hall.

    Moreover, the use of the soft pedal, or una corda pedal, provides another avenue for exploration. When pressed, the soft pedal shifts the piano’s action slightly, causing the hammers to strike fewer strings. This not only reduces the volume but also alters the timbre of the notes, giving them a softer, more delicate quality. It’s a subtle effect, one that requires finesse and a keen ear to employ effectively.

    Incorporating pedal use into the quest to soften loud notes opens up a world of creative possibilities. By experimenting with different pedaling techniques, including how long to hold the pedal and how fully to depress it, pianists can discover the perfect balance for each piece. It’s an ongoing process, one that demands patience, practice, and a willingness to listen intently to the nuances of the sound.

    Conclusion

    Mastering the art of softening loud notes on the piano can elevate a musician’s performance from good to mesmerizing. By understanding and applying the nuanced techniques of pedal use, pianists can achieve a level of expressiveness that truly resonates with their audience. It’s all about the delicate balance of timing, touch, and experimentation. As they continue to explore and refine these skills, they’ll find their own unique sound, making each piece not just played, but profoundly felt. Remember, the journey to dynamic mastery is ongoing, but with patience and practice, it’s within reach.

  • Master Relaxed Wrists in Piano Playing: Tips & Techniques

    Master Relaxed Wrists in Piano Playing: Tips & Techniques

    Playing the piano beautifully isn’t just about hitting the right notes; it’s also about how you hit them. One key element that often goes overlooked is the importance of having relaxed wrists. It’s a simple concept that can make a world of difference in your playing, transforming stiff, robotic movements into smooth, expressive passages.

    Many pianists, from beginners to the more experienced, find themselves struggling with tension in their wrists, which can lead to discomfort and even injury over time. But don’t worry, mastering the art of playing with relaxed wrists is within reach. With a few adjustments and mindful practice, anyone can learn to play more fluidly and comfortably.

    The Importance of Relaxed Wrists in Piano Playing

    When it comes to the delicate art of piano playing, the wrists play a pivotal role that’s often understated. They’re not just a bridge connecting the fingers to the rest of the arm; they are instrumental in creating the flowing, effortless sound that defines expert playing. Maintaining relaxed wrists is not merely a suggestion but a crucial element in achieving both the technical and expressive qualities that music demands.

    One of the main reasons relaxed wrists are so important is their impact on dynamics and expression. Firm, rigid wrists limit the range of motion, making it difficult to execute soft, flowing passages or powerful, emphatic chords with the same ease. In contrast, relaxed wrists can move freely, allowing for nuanced control over the volume and quality of each note.

    Furthermore, the health and longevity of a pianist’s career can heavily depend on their ability to play without tension. Chronic tension can lead to discomfort and, more severely, repetitive strain injuries such as tendinitis or carpal tunnel syndrome. These conditions not only cause pain but can also necessitate breaks from playing or, in extreme cases, lead to the end of a pianist’s playing days. By fostering relaxation in the wrists, players can significantly reduce their risk of these injuries, ensuring they can continue to enjoy playing for years to come.

    Risk Factor Without Relaxed Wrists With Relaxed Wrists
    Dynamics and Expression Limited Enhanced
    Risk of Injury High Reduced

    To cultivate relaxed wrists, it’s essential to begin with proper posture and hand positioning at the piano. The forearms should be roughly parallel to the floor, with the wrists neither drooping down nor arched too high. This neutral position promotes natural, fluid movements and reduces tension. Additionally, incorporating specific exercises and stretches into one’s practice routine can further develop wrist flexibility and strength, making it easier to maintain relaxation even during challenging pieces.

    Mindful practice is another key component. Players should regularly check in with their bodies, ensuring they’re not holding unnecessary tension in the wrists or elsewhere. Sometimes, tension can creep in without notice, especially when focusing intently on learning a new piece or perfecting a difficult passage. By staying aware and making adjustments as needed, pianists can gradually train themselves to play more relaxedly.

    Common Issues with Tension in Wrists

    Playing the piano requires not just intellectual acumen but also physical harmony, particularly in one’s wrists. However, many pianists, from beginners to seasoned professionals, encounter issues related to wrist tension. Understanding these problems is the first step toward achieving the goal of playing with relaxed wrists.

    Impact on Musicality

    Firstly, wrist tension significantly hampers musical expression. A relaxed wrist allows for better control over dynamics, enabling pianists to produce a wide range of volumes and tones. In contrast, a tense wrist results in a played note or chord sounding flat or forced, stripping the music of its intended emotional impact.

    Risk of Injury

    Secondly, the risk of injury escalates with continuous wrist tension. Tendinitis and carpal tunnel syndrome are common conditions among pianists who don’t adopt relaxed wrist techniques. These injuries not only cause pain and discomfort but can also lead to prolonged periods away from the piano, hindering progress and growth as a musician.

    Condition Description Prevalence Among Pianists
    Tendinitis Inflammation of the tendon due to overuse or strain. High
    Carpal Tunnel Syndrome Compression of the nerve within the carpal tunnel, leading to numbness and tingling in the hand. Moderately High

    Hindrance to Technical Development

    Moreover, tension in the wrists acts as a roadblock to technical advancement. Techniques such as scales, arpeggios, and octave jumps require fluidity and flexibility which can’t be achieved if the wrists are stiff. This limitation not only affects a pianist’s ability to execute complex pieces but also slows down the learning process overall.

    Psychological Effects

    The psychological aspect of playing with wrist tension cannot be overlooked. Frustration and a lack of confidence often accompany the inability to play as expressively or accurately as desired. Over time, this can lead to a diminishing passion for playing, as every practice session or performance becomes a reminder of the physical limitations being faced.

    • Mindful Practice: Incorporating mindfulness into practice sessions helps in recognizing when and where tension occurs.
    • Proper Posture and Hand Positioning: Ensuring the correct posture and hand positioning lays the foundation for relaxed wrists.
    • Stretching and Strengthening Exercises: Regular exercises designed

    Techniques for Playing Piano with Relaxed Wrists

    Relaxed wrists are integral for pianists, not just for improving the quality of their music but also for preventing injuries that can sideline their passion. Achieving and maintaining this relaxed state, however, requires a conscious effort and a set of techniques that should become second nature over time.

    One fundamental approach is to Always Start with Proper Posture. The height of the piano bench and the distance from the keyboard are crucial. They should sit in such a way that their forearms are parallel to the floor when playing. This position promotes wrist relaxation and allows for better control and flexibility.

    Mindful Practice Sessions play a critical role in developing relaxed wrists. Pianists should start their sessions with the intention of keeping their wrists loose. This involves being acutely aware of their body’s tension and consciously relaxing their wrists as they play. Incorporating slow practice pieces specifically focusing on wrist movement can significantly improve flexibility and relaxation.

    Hand Positioning and Movements are also key. Fingers should curve naturally, allowing the hand to form a rounded shape over the keys. This encourages the wrist to stay flexible. Pianists should avoid flat-fingered playing, which often leads to tension. Instead, they should aim for a fluid motion from their fingers through their wrists, as if lightly bouncing off the keys with each note.

    Exercises aimed at Strengthening and Stretching the wrists can’t be overlooked. Interval training, where intense periods of playing are followed by rest and stretching exercises, helps in muscle recovery and flexibility. Simple stretches, like gently bending the wrist forwards and backwards or rotating them in circles, can be immensely beneficial if done consistently before and after practice sessions.

    Incorporating Dynamic Playing into Practice routines is another essential technique. Dynamic playing involves varying the volume and intensity of the music, which in turn, requires a pianist to adjust their touch and wrist tension. By practicing pieces with varying dynamics, pianists can learn how to fluidly adjust their wrist tension, thus enhancing their ability to maintain relaxed wrists across all playing styles.

    Lastly, Breaks are Essential. No matter how immersed one gets in the music, taking regular breaks to rest and reset the wrists is crucial. Short breaks during practice sessions give the muscles time to relax and reduce built-up tension. This not only helps in maintaining relaxed wrists but also in preventing fatigue and injuries.

    Exercises to Help Relax and Strengthen Wrist Muscles

    Playing the piano with relaxed wrists isn’t just about avoiding stiffness during performances; it’s also about strengthening the muscles around the wrists to support fluid, graceful movements. Incorporating specific exercises into daily practice can significantly enhance both the flexibility and strength of a pianist’s wrists, making playing more enjoyable and reducing the risk of injury.

    Stretching Exercises

    Stretching is essential for maintaining wrist flexibility. These simple exercises can be done before and after practice sessions:

    • Wrist Rotations: Extend the arms in front with palms down. Gently rotate the wrists clockwise, then counterclockwise, 10 times in each direction. This exercise promotes joint mobility.
    • Palm Pushes: With palms facing each other in front of the chest, gently push the palms together while keeping the elbows out to the sides. Hold for 5-10 seconds, then release. This stretch works on the muscles and tendons that run across the back of the hand and forearm.
    • Finger Stretches: Extend one arm out with the palm facing up and gently pull back on the fingers with the opposite hand, stretching the underside of the forearm. Hold for 15 seconds, then switch hands.

    Strengthening Exercises

    To complement flexibility, developing strength in the wrists and forearms is crucial. Here are exercises geared toward building that necessary muscle:

    • Wrist Curls: Using a light weight (a small dumbbell or a can of food), sit with the forearm on the thigh, palm facing up. Curl the weight towards the body, then lower it back down. Aim for 2 sets of 12-15 reps on each side.
    • Reverse Wrist Curls: Similar to wrist curls, but with the palm facing down. This exercise targets the extensor muscles on the back of the forearm. Again, aim for 2 sets of 12-15 reps on each side.
    • Grip Strengthening: Squeeze a stress ball or a grip strengthener for 5-10 seconds, then release. Repeat 10 times. This simple exercise improves grip strength and endurance, essential for pianists.

    Tips for Maintaining Relaxed Wrists While Playing

    Maintaining relaxed wrists is crucial for pianists who wish to play gracefully and avoid injury. Several strategies can help achieve this, ensuring long-term comfort and performance quality.

    Proper Posture and Bench Positioning play pivotal roles in facilitating wrist relaxation. Sitting at the correct height so that the forearms are parallel to the floor allows the wrists to remain loose and fluid. Adjusting the bench so that it’s neither too close nor too far from the keyboard is equally important. This optimal positioning supports the natural curvature of the hands and prevents excessive strain.

    Incorporating Mindful Practice Sessions into one’s routine is another effective strategy. Being conscious of the tension in the wrists while playing can help identify bad habits that may lead to stress and strain. Musicians should take frequent breaks during practice to stretch and relax the wrists. These pauses not only reduce the likelihood of injury but also enhance focus and performance.

    Technique refinement is essential for maintaining relaxed wrists. Developing a touch that’s light and responsive, rather than heavy and forceful, can significantly reduce tension. Techniques such as the drop-roll method, where the pianist allows the weight of the arm to fall onto the keys and rolls the wrist gently with each note, encourage fluidity and ease of movement.

    Warm-ups and Cool-downs should never be neglected. Just as athletes stretch before and after their activities to prevent injuries, pianists should too. Starting each practice session with gentle wrist stretches and concluding with relaxing exercises ensures the muscles are well-prepared for the demands of playing and have time to recover afterward.

    Incorporating Relaxation Techniques Beyond the Keyboard

    Relaxation does not solely arise from physical actions; mental state plays a considerable role. Practicing breathing exercises or engaging in short meditative sessions before playing can significantly lower tension levels throughout the body, including the wrists. Visualization techniques, where one imagines playing with effortless grace and fluidity, can also prep the mind and body for a relaxed playing session.

    Understanding the importance of hydration and nutrition is often overlooked in discussions about playing techniques. Yet, staying hydrated and maintaining a diet rich in magnesium, which supports muscle relaxation, can profoundly affect overall muscle health and indirectly contribute to more relaxed wrists.

    Conclusion

    Mastering the art of playing piano with relaxed wrists is a journey that requires patience, dedication, and consistent practice of the techniques discussed. By focusing on proper posture, bench positioning, and integrating the drop-roll method into practice sessions, pianists can significantly reduce tension. Remember, incorporating warm-ups, cool-downs, and relaxation exercises, along with paying attention to hydration and nutrition, plays a crucial role in maintaining healthy wrists. With time and mindful practice, achieving fluidity and ease in piano playing becomes not just a possibility but a reality. Keep these tips in mind, and enjoy the harmonious blend of relaxation and music.

  • Mastering Piano: How to Count Rhythms & Elevate Your Play

    Mastering Piano: How to Count Rhythms & Elevate Your Play

    Mastering the art of counting rhythms in piano music can transform a good pianist into a great one. It’s the backbone of music, giving it structure and emotion. Yet, for many, cracking the code of rhythmic patterns feels like deciphering an ancient language. Fear not, because it’s much simpler than it seems at first glance.

    Imagine being able to glide through complex pieces, your fingers dancing across the keys in perfect harmony with the beat. That’s the power of understanding rhythm. It’s not just about hitting the notes but feeling the pulse of the music. This guide is your first step towards achieving rhythmic mastery, making music that doesn’t just sound good but feels right.

    Understanding Basic Time Signatures

    Delving into the world of rhythms in piano music, one cannot overlook the significance of time signatures. They are the roadmap that guides musicians through the timing of each piece, determining the pace and flow of the notes. Understanding time signatures is crucial for any pianist aspiring to master the art of rhythm.

    Time signatures are found at the beginning of a piece of music, right after the clef and key signature. They consist of two numbers, one stacked above the other. The top number indicates how many beats are in each measure, while the bottom number reveals what note value is given one beat. The most common time signatures are 4/4, 3/4, and 2/4, though there are many others, each imparting a unique feel to the music.

    4/4 Time Signature, often referred to as common time, is the most frequently encountered. In this time signature, there are four beats in each measure, and the quarter note gets one beat. This means that any combination of notes adding up to four quarter notes fits into each measure.

    3/4 Time Signature is another widely used time signature, known for its waltz-like rhythm. Each measure has three beats, with the quarter note again being the beat note. This gives the music a distinctive “one-two-three, one-two-three” feel, ideal for dances and ballads.

    2/4 Time Signature is simpler, with only two beats per measure. It’s often found in march music and is best understood by counting “one-two, one-two.” Despite its simplicity, it requires the pianist to maintain a steady tempo to convey the piece’s intended energy.

    To effectively count rhythms in piano music, pianists should start by tapping the beat with their foot or metronome. For beginners, saying the beats out loud as they play can also be a helpful exercise. It’s essential to practice with a variety of time signatures to become comfortable with the feel and pacing of each.

    Let’s take a look at how different time signatures might appear in music:

    Time Signature Beats per Measure Note Given One Beat
    4/4 4 Quarter Note
    3/4 3 Quarter Note
    2/4 2 Quarter Note

    Identifying Note Values

    Once pianists have a grasp on time signatures, the next crucial step is to understand and master the different note values. In the realm of piano music, each note holds a distinct duration of sound, contributing to the overall rhythm of the piece. Recognizing these different note values is key to effectively counting rhythms.

    Note values range from whole notes, which sustain for four beats, to sixteenth notes, which last for a mere quarter of a beat. Each type of note has a specific symbol that musicians can quickly learn to identify. This visual recognition, combined with an understanding of time signatures, enables pianists to decipher how long each note should be held in the context of the music.

    • Whole Notes: Sustain for four beats
    • Half Notes: Hold for two beats
    • Quarter Notes: Last for one beat
    • Eighth Notes: Extend for half a beat
    • Sixteenth Notes: Maintain for a quarter of a beat

    To enhance rhythm counting skills, it’s beneficial for pianists to practice identifying these note values in various pieces of music. By looking at a piece of sheet music and pointing out different note values, they can build a mental map of how the rhythm unfolds.

    In addition to standard notes, other symbols like dots and ties affect the duration of a note. A dot placed after a note extends its duration by half of its original value, adding another layer of rhythm complexity. For example, a dotted half note would be held for three beats, adding one more beat to the original two beats of a half note. Ties, on the other hand, connect two notes of the same pitch, effectively lengthening the note’s duration by combining the values of the tied notes.

    Note Type Symbol Duration in Beats
    Whole Note O 4
    Half Note o- 2
    Quarter Note 1
    Eighth Note 0.5
    Sixteenth Note 0.25
    Dotted Half Note o-. 3 (2+1)

    Learning to Count Beats

    Learning to count beats in piano music is a foundational skill that all pianists must master. This ability allows players to interpret the rhythm of a piece accurately, thereby ensuring that their performance is both musical and expressive. The process starts with understanding the time signature of a piece, which dictates how many beats are in each measure and what note value constitutes one beat.

    Time Signatures: The Basics

    Time signatures are notated at the beginning of a piece and consist of two numbers. The top number indicates the number of beats in each measure, while the bottom number reveals the note value that represents one beat. Common time signatures include 4/4, 3/4, and 6/8, each creating unique rhythmic patterns.

    • 4/4 Time (Common Time): This time signature means there are four quarter notes per measure.
    • 3/4 Time (Waltz Time): Here, each measure contains three quarter notes.
    • 6/8 Time: Six eighth notes fill each measure, often creating a lilting rhythm.

    The Metronome: A Pianist’s Guide

    A metronome is an invaluable tool for pianists learning to count beats. By setting a metronome to a specific tempo, players can practice maintaining a steady beat, which is crucial for rhythmic accuracy. Starting slow and gradually increasing the tempo can help pianists build both confidence and skill in counting beats.

    Practicing With Clapping and Counting

    Before even sitting down at the piano, musicians can benefit from clapping and counting out rhythms. By clapping the rhythm and speaking the beat aloud, pianists internalize the rhythmic pattern, making it easier to execute when playing. This method also aids in highlighting any syncopation or off-beat rhythms that may be present in the music.

    Note Value Counting Technique
    Whole Note Count 1-2-3-4
    Half Note Count 1-2, 3-4
    Quarter Note Count 1, 2, 3, 4
    Eighth Note Count 1 & 2 & 3 & 4 &

    Practicing Syncopation

    Syncopation in piano music can initially seem like a daunting hurdle for learners. When the expected rhythm is disrupted, and emphasis is placed on normally weak beats, the usual flow of the music shifts. But mastering syncopation is not just a challenge; it’s an opportunity to bring excitement and variety to piano performances. To tackle this, several strategies can prove immensely helpful.

    First and foremost, understanding the concept of syncopation is key. It’s when the accent or stress moves from the strong beats to the weaker beats or offbeats. This shift can transform a straightforward rhythm into something more complex and intriguing. To internalize this concept, pianists should start by listening. Finding pieces rich in syncopation and simply listening to them attentively can provide a sense of how syncopation feels and sounds. Jazz and ragtime are genres particularly known for their extensive use of syncopation, offering a wide array of listening options.

    Secondly, slow practice is invaluable. When encountering syncopated rhythms, slowing down the tempo allows the pianist to process and understand the placement of each note. They should focus on counting out loud, emphasizing the syncopated beats to ensure accuracy. A metronome is an indispensable tool in this phase, as it provides a steady beat against which the pianist can align the syncopated rhythms.

    Here’s a useful tip: Clapping out syncopated rhythms before playing them on the piano can bridge the gap between understanding a rhythm intellectually and physically executing it. This method helps in internalizing the rhythm, making it easier for the pianist to replicate it on the instrument.

    Incorporating hand independence exercises is also critical when practicing syncopation. Oftentimes, one hand will be playing a steady rhythm while the other hand plays a syncopated pattern. To cultivate this skill, pianists can practice the hands separately at first, gradually bringing them together as they become more confident in their ability to maintain the syncopation.

    Finally, repetition plays a fundamental role in mastering syncopation. Through repetitive practice, the initially perplexing rhythms become familiar, eventually feeling as natural as any other rhythm.

    • Clap and count out loud syncopated rhythms from sheet music before playing.
    • Use a metronome to practice syncopated rhythms at slow speeds, gradually increasing the tempo as confidence grows.
    • Listen to recordings of pieces

    Applying Rhythmic Techniques to Piano Pieces

    Once pianists grasp the basics of rhythm and syncopation, applying these techniques to actual piano pieces becomes the next step. Integrating rhythm into piano music elevates the piece, infusing it with emotion and dynamic movement. It’s all about taking the theory and converting it into practice, which requires patience, focus, and a strategic approach.

    The first crucial step is to select pieces that incorporate various rhythmic patterns. This diversity allows pianists to experience firsthand the myriad of ways rhythm can shape music. Choosing pieces with varying levels of difficulty will also help them gradually build their rhythmic abilities. Here’s a suggested approach:

    • Start with simple pieces that have a clear and straightforward rhythm.
    • Gradually move on to more complex pieces that include syncopation and irregular time signatures.
    • Focus on pieces by composers known for their rhythmic complexity, such as Scott Joplin or George Gershwin.

    Practicing with a metronome is indispensable. It helps maintain a steady tempo, which is vital when mastering rhythms. Initially, it might feel restrictive, but over time, it teaches the pianist to internalize the tempo, making rhythm more natural and intuitive. The metronome should become a pianist’s steady companion, especially when working through tricky rhythmic passages.

    Another effective method is to break down the piece into manageable sections. Tackling a whole piece can feel overwhelming due to its rhythmic complexity. By focusing on small sections, pianists can give each part the attention it needs, mastering it before moving on to the next. This segmented approach ensures a more thorough understanding and execution of the rhythm.

    Incorporating rhythm-based exercises into daily practice can also fortify a pianist’s rhythmic skills. These exercises might include:

    • Clapping out rhythms before playing them on the piano.
    • Playing rhythmically challenging sections with each hand separately before combining them.
    • Using rhythm software or apps designed to improve rhythmic accuracy and understanding.

    Finally, listening and analyzing plays a critical role. Listening to recordings of the pieces being learned, with a particular focus on the rhythm, can provide valuable insights. Pianists should pay attention to how professional musicians navigate rhythmic challenges and try to emulate these techniques. Analyzing the piece’s rhythm away from the piano can also offer a new perspective, helping to internalize the rhythm and understand its role within the piece.

    Conclusion

    Mastering rhythm in piano music is a journey that requires patience, practice, and a keen ear. By adopting the strategies outlined, pianists can elevate their performances, infusing them with the emotion and movement that only rhythm can provide. It’s about more than just hitting the right notes; it’s about breathing life into them. So grab those pieces with challenging rhythms, set your metronome, and dive into the world of syncopation and irregular time signatures. Remember, every professional was once a beginner, and with each rhythmic challenge overcome, you’re one step closer to mastering the art of piano music. Happy playing!

  • Top Common Piano Fingering Mistakes Beginners Make

    Top Common Piano Fingering Mistakes Beginners Make

    Learning to play the piano is like embarking on a musical journey, filled with highs, lows, and everything in between. For beginners, it’s a world where melodies come to life under their fingertips. However, it’s not without its challenges. One of the most common hurdles they face is mastering the art of piano fingering. It’s the foundation upon which beautiful music is built, yet it’s often where many stumble.

    From using the wrong fingers for certain keys to inconsistent hand positioning, these mistakes can turn a harmonious experience into a frustrating one. They not only affect the quality of the music but can also lead to bad habits that are hard to break. Let’s dive into the world of piano fingering mistakes, shedding light on these common blunders so beginners can sidestep them and continue making beautiful music.

    Using Incorrect Fingers for Keys

    One of the most prevalent challenges that beginners face when learning to play the piano is using incorrect fingers for keys. This mistake often stems from a lack of understanding of proper fingering techniques which are crucial for efficient and fluid piano playing. Proper fingering allows for smoother transitions between notes, keeps the hand in a comfortable position, and ultimately contributes to a more pleasant musical sound.

    At the heart of this issue is the tendency for beginners to use whatever finger feels most convenient at the moment without considering the musical phrases that follow. For instance, they might use their thumb to play a key because it’s nearest, not realizing that it traps the hand in an awkward position for the next sequence of notes. This can lead to choppy and disjointed music rather than a smooth, flowing melody.

    To illustrate, here’s a common scenario:

    • A beginner attempts to play a scale or a simple melody.
    • They start with proper fingering but soon resort to using random fingers.
    • The music sounds uneven, and they struggle to transition smoothly between notes.

    Correct Fingering is Crucial

    Learning and adhering to correct fingering is not merely a suggestion; it’s a necessity for anyone wishing to play the piano well. Every piece of piano music has fingering suggestions that cater to the most natural hand movements and transitions. Ignoring these suggestions often results in inefficient hand positions and movements, leading to increased difficulty with speed and accuracy as the music becomes more complex.

    • Using the same finger for consecutive notes: This can severely limit the fluidity of the music.
    • Overusing the thumb or pinky: Relying too much on these fingers can lead to awkward transitions.
    • Not using the full hand: Failing to utilize all fingers leads to unnecessary hand movements.

    To combat these mistakes, teachers often emphasize the importance of slow, deliberate practice with a focus on proper fingering from the very beginning. It’s not uncommon for beginners to find this approach tedious, but the payoff is undeniable. As muscle memory develops, the correct finger placements start to feel more natural, and the quality of the music improves markedly.

    Additionally, various exercises, such as scales and arpeggios, are designed to reinforce correct fingering patterns. These exercises not only help in mastering the movements of the fingers across the keyboard but also in understanding the reasoning behind each fingering choice.

    Poor Hand Positioning

    One major obstacle that often impedes a beginner pianist’s progress is Poor Hand Positioning. Proper hand placement isn’t just about aesthetics; it’s a fundamental aspect that influences the ease with which one can reach the keys and transition smoothly between notes. Without correct positioning, players find themselves struggling with even the simplest of pieces, rendering their practice sessions less effective and far more frustrating than they need to be.

    For starters, the wrists should remain flexible yet stable, allowing the fingers to glide across the keyboard with minimal effort. A common mistake is either elevating the wrists too high or letting them drop too low, both of which can lead to unnecessary tension in the hands and forearms. This tension not only hampers movement but can also contribute to long-term discomfort or even injury. Additionally, fingers should curve slightly, as though cupping an invisible ball, to strike the keys with their pads rather than their tips or sides. This position optimizes control and touch sensitivity, enabling nuances in dynamics and articulation.

    Another aspect often overlooked is the angle of the arms. Ideally, they should form a roughly straight line from the elbow through the wrist to the hand, without any sharp bends. Such alignment ensures that the force applied when pressing the keys comes from the arms and the body, not just the fingers, preventing fatigue and promoting endurance.

    Beginners might also misjudge their distance from the keyboard, either crowding too close or stretching too far. A comfortable distance allows the arms to extend slightly forward, so the fingers can reach all the keys without strain. Adjusting the bench height and location can make a significant difference in achieving this optimal positioning.

    To correct these common mistakes, beginners are encouraged to:

    • Keep their wrists flexible and at a moderate height
    • Curve their fingers for better control
    • Maintain a straight arm line for efficient force use
    • Adjust their sitting distance for comfortable reach

    Incorporating these adjustments requires mindfulness and patience, as old habits can be hard to break. Regular monitoring and adjustments can help ensure that proper hand positioning becomes a natural part of a pianist’s technique. Visual aids, such as mirrors placed to the side of the keyboard, can offer immediate feedback on one’s posture and hand shape, serving as a useful tool during practice.

    Neglecting Finger Independence

    One often overlooked aspect of learning the piano is developing finger independence. Many beginners find themselves struggling with pieces that require simultaneous action from multiple fingers, each moving in its own rhythm and direction. Finger independence is crucial for executing complex melodies and harmonies that are the hallmark of proficient piano playing. Without it, players are likely to hit a plateau early on in their learning journey.

    The root of this problem lies in the natural tendency of fingers to move in sympathy with one another. It’s common for beginners to move fingers in a group or to rely heavily on their dominant fingers, neglecting the weaker ones. This leads to a lack of control and precision when playing. To combat this, it’s essential for pianists to engage in specific exercises that target the independence of each finger. These exercises, often simple and repetitive, can significantly improve dexterity and control over time.

    • Daily Exercises: Incorporating finger independence exercises into daily practice is vital. Scales, arpeggios, and Hanon exercises are particularly effective in isolating each finger’s movements.
    • Slow Practice: Playing slowly allows for the conscious correction of finger movements, ensuring that each finger acts independently of the others.
    • Varied Dynamics: Practicing the same piece or exercise with different dynamics (loud, soft, crescendo, decrescendo) for each finger further enhances control and independence.

    Here’s a brief overview of exercises to improve finger independence:

    Exercise Type Description Benefit
    Scales Playing scales slowly and precisely. Improves strength and agility.
    Arpeggios Breaking chords into single notes. Enhances reach and precision.
    Hanon Specific exercises for finger control. Builds endurance and dexterity.

    Encouraging beginners to focus on these aspects can lead to a significant improvement not just in their ability to play complex pieces but in their overall technique as well. It’s not just about playing notes accurately but playing them with the right expression, timing, and dynamics. Developing finger independence is a stepping stone towards achieving that musicality and technical skill.

    Overlooking Finger Strength and Agility

    For many beginners at the piano, there’s a tendency to focus solely on learning the notes and perfecting rhythm. While these are undoubtedly crucial aspects of playing the piano, novices often overlook the importance of finger strength and agility. This oversight can lead to a host of issues that might hinder their progress and limit their expressive capabilities on the instrument.

    Finger strength and agility are the bedrock of good piano technique. They enable pianists to execute complex passages, maintain evenness in scales and arpeggios, and produce a wide range of dynamics and articulations. Without robust finger development, players may find themselves struggling with inconsistency and unevenness in their playing.

    Common Missteps in Developing Finger Strength and Agility

    One frequent mistake is the over-reliance on certain fingers, especially the thumb and index finger, which are naturally stronger. This imbalance often leaves the weaker fingers lagging, leading to uneven scales and chords. Another oversight is not dedicating time to specific exercises aimed at building finger independence and control. Practices such as scales, arpeggios, and Hanon exercises are essential for cultivating the agility and strength required to tackle more challenging repertoire.

    In addition to neglecting specific technical exercises, beginners might not realize the role that slow practice plays in enhancing finger strength and agility. Playing slowly allows pianists to concentrate on the equal contribution of each finger, ensuring that none are overworked or ignored. This careful, deliberate approach to practice lays a solid foundation for more advanced skills.

    Furthermore, varying dynamics during practice is another aspect often overlooked by novices. They might not appreciate how playing passages at different volumes can significantly improve finger control and sensitivity. Soft playing, in particular, demands a high level of precision and strength, as it requires the pianist to depress the keys with enough force to sound a note while controlling the pressure to keep the volume low.

    • Scales and Arpeggios: Practice them slowly, focusing on evenness and control. Gradually increase the speed while maintaining precision.
    • Hanon and Czerny Exercises: These classical exercises are designed to improve finger strength and independence. They should be played with attention to detail, adhering to recommended fingerings.
    • **Stacc

    Failing to Practice Scales and Arpeggios

    One of the most common piano fingering mistakes for beginners is skipping over the practice of scales and arpeggios. It’s often seen as monotonous or less engaging compared to learning new songs. However, this overlooks their fundamental importance in developing not only finger agility and strength but also in understanding musical keys and improving sight-reading skills.

    Scales and arpeggios are the building blocks of music. They provide pianists with a framework to understand and play various pieces more effectively. When beginners ignore these exercises, they miss the chance to familiarize themselves with patterns that recur in compositions. This can lead to difficulties in playing more complex pieces that require a strong knowledge of scales and the ability to navigate the keyboard effortlessly.

    Moreover, practicing scales and arpeggios contributes significantly to finger independence. Each finger is trained to move with precision and strength, reducing the reliance on more dominant fingers, which is a common pitfall among beginners. The repetitive nature of these exercises also enhances muscle memory, making it easier for pianists to execute pieces without the need to constantly look at their hands.

    The Importance of Correct Fingering

    The right fingering technique is crucial when practicing scales and arpeggios. Incorrect fingering can lead to bad habits that are hard to unlearn and may hinder a pianist’s progress. Each scale and arpeggio has recommended fingering that aims to make the execution as smooth and efficient as possible. They’re designed to ensure that hand movements across the keyboard are fluid, minimizing awkward hand positions that can lead to strain or injury.

    Beginners might find it tempting to use fingering that feels more comfortable in the short term but doing so can limit their playing speed and expression in the long run. Adhering to the recommended fingering patterns encourages pianists to develop a versatile technique that’s applicable to a wide variety of musical contexts.

    Incorporating Scales and Arpeggios into Daily Practice

    Including scales and arpeggios in daily practice sessions is essential. It doesn’t have to be lengthy; even a few minutes dedicated to these exercises can make a noticeable difference. The key is consistency and attention to detail. Varying the dynamics and practicing at different speeds can keep the exercises engaging while challenging finger control and sensitivity.

    • Start slowly, focusing on evenness and accuracy.
    • Grad

    Conclusion

    Mastering the piano is a journey filled with learning and growth. For beginners, paying attention to the little details, like proper fingering techniques, can make a significant difference in their musical development. By dedicating a portion of their daily practice to scales and arpeggios, they’re not just improving their finger dexterity but also laying a solid foundation for more advanced pieces. Remember, every great pianist started with the basics, and with patience and consistent practice, those tricky passages will soon feel like second nature. Keep at it, and let each note guide you closer to your musical aspirations.

  • Why Do My Shoulders Hurt When Playing Piano? Stretching & Posture Tips

    Why Do My Shoulders Hurt When Playing Piano? Stretching & Posture Tips

    Playing the piano should be a symphony of comfort and melody, yet for some, it’s accompanied by an unwelcome guest: shoulder pain. It’s a common complaint that can turn a beautiful hobby into a source of discomfort, leaving many to wonder why their passion for playing leads to pain.

    The reasons behind shoulder pain while tickling the ivories are as varied as the music produced. From poor posture to inadequate breaks, the factors contributing to this discomfort can often go unnoticed. But understanding these causes is the first step toward making beautiful music pain-free.

    Incorrect Posture While Playing

    Playing the piano should be an activity that brings joy and relaxation, but when shoulder pain creeps in, it’s often a sign that something is not right. Many pianists, both beginners and experienced, may find themselves battling discomfort. One of the primary culprits behind this issue is incorrect posture. Understanding and correcting one’s posture can be a game-changer in enjoying pain-free piano sessions.

    When sitting at the piano, the way a person holds their body plays a significant role in their overall well-being. Often, pianists might slouch, lean too far forward, or place their shoulders in an unnatural position, leading to strain. Such habits, over time, place unnecessary stress on the shoulder muscles and joints. The correct posture involves sitting upright, with feet flat on the ground, and shoulders relaxed but not drooping. The arms should be at a natural angle, allowing the hands to float over the keys without tension.

    Another aspect often overlooked is the height of the bench and its distance from the piano. If the bench is too low, too high, or too far from the instrument, it forces the pianist to overreach or adjust their body awkwardly to access the keys. This misalignment can quickly lead to shoulder pain. The ideal setup should enable the pianist to sit comfortably with their forearms parallel to the floor when their fingers are on the keys.

    Several strategies can be employed to correct bad posture habits:

    • Take Frequent Breaks: Incorporating short breaks during practice sessions helps to reset the body’s posture, reducing the risk of developing pain.
    • Exercise and Stretch: Regular shoulder and back exercises strengthen the muscles, making it easier to maintain good posture. Stretching before and after playing also helps in preventing stiffness and pain.
    • Adjust the Piano Setup: Ensuring the bench is at the correct height and distance from the piano is crucial. It may require some experimentation to find the perfect setup, but the effort is well worth it.
    • Seek Professional Guidance: A teacher or a physical therapist can provide personalized advice and exercises tailored to an individual’s specific needs.

    By tackling the issue of incorrect posture, pianists can significantly reduce the risk of experiencing shoulder pain. It’s not just about making adjustments but also about being mindful of one’s body while playing. Recognizing the signals of discomfort early and taking proactive steps to address them can help maintain the joy and comfort piano playing is supposed to bring.

    Overuse of Shoulder Muscles

    When piano players dive into long practice sessions or perform challenging pieces, they often focus so intently on perfecting their music that they may overlook the physical toll it takes on their bodies. Specifically, the shoulders bear a significant portion of this strain due to the overuse of muscles that occurs during repetitive movements. This overexertion can lead to shoulder pain, a common complaint among pianists.

    The mechanics of playing the piano require a complex interplay of muscles, not just in the fingers and arms but also in the shoulders. These muscles work together to control the arms’ movements, allowing for the precise keystrokes needed to produce music. However, when the shoulders are constantly raised or tensed – an easy habit to slip into when focusing on playing correctly – it puts undue stress on these muscles.

    • Soreness and pain in the shoulders during or after playing.
    • A feeling of fatigue in the shoulder muscles, even with little to no physical activity.
    • Reduced range of motion or stiffness in the shoulders.

    Addressing the issue of overuse begins with awareness. Pianists must become mindful of their posture and the way they engage their shoulder muscles while playing. Incorporating breaks into practice sessions allows the muscles to relax and recover. Stretching exercises, specifically designed for musicians, can also be beneficial in alleviating tension and promoting muscle health.

    Adding to the regimen, strengthening exercises targeting the shoulder muscles can help in building endurance. This doesn’t mean transforming practice sessions into workout routines; rather, it’s about incorporating small, effective exercises into daily life to support the physical demands of playing the piano.

    Here’s a quick overview of Useful Practices To Prevent Overuse:

    • Taking Regular Breaks: Short pauses during practice sessions to relax the shoulders.
    • Stretching: Engaging in daily stretching routines focused on the arms, shoulders, and back.
    • Strengthening Exercises: Simple exercises geared toward improving shoulder muscle endurance.

    Professional guidance from a physiotherapist familiar with musicians’ challenges can also provide tailored advice and exercises. They can offer insights into improving posture and developing a playing style that minimizes the risk of injury.

    Lack of Proper Stretching

    Playing the piano involves more than just the hands and fingers; it engages the entire body, especially the shoulders. Shoulder pain among pianists can often be traced back to a Lack of Proper Stretching before and after practice sessions. This oversight can lead to tension, soreness, and even injury over time.

    Stretching plays a critical role in preparing the muscles for the demands of playing the piano. It warms up the muscles, increases blood flow, and enhances flexibility, all of which are crucial for minimizing the risk of strain and injury. Without adequate stretching, pianists may find their shoulders becoming a site of chronic pain and discomfort.

    Essential Stretches for Pianists

    To combat shoulder pain, incorporating a series of stretches focusing on the shoulders, neck, and upper back is essential. These stretches should be gentle yet effective, aiming to loosen tight muscles and promote relaxation. Here are a few recommended stretches every pianist should consider:

    • Neck Side Stretch: Tilting the head to one side to stretch the neck and shoulder muscles, holding for 15-20 seconds on each side.
    • Shoulder Rolls: Rolling the shoulders forward and backward in a slow, circular motion to release tension.
    • Arm Cross Stretch: Stretching one arm across the body and using the other arm to apply gentle pressure, enhancing the stretch in the shoulder.
    • Upper Back Stretch: Interlacing the fingers and reaching forward, rounding the upper back to feel a stretch between the shoulder blades.

    Each of these stretches should be performed slowly and with care, paying close attention to any signs of discomfort. It’s also important for pianists to listen to their bodies and adjust the intensity of the stretches accordingly.

    Regular Stretching Schedule

    For maximum benefits, pianists should integrate stretching into their daily routine, dedicating time both before and after practicing. Starting with a 5-10 minute stretching session can significantly reduce the risk of shoulder pain and stiffness. Moreover, incorporating breaks during practice sessions to perform brief stretches can further prevent muscle overuse and fatigue.

    Regular stretching not only aids in preventing shoulder pain but also enhances overall playing technique. Improved flexibility and range of motion allow for more fluid and expressive playing, ultimately enriching the musical experience.

    Impact of Stress and Tension

    Playing the piano involves not just the hands and fingers but the entire body. When pianists sit down to practice, they’re not just engaging in a musical exercise; they’re undertaking a physical one as well. It’s essential to recognize how stress and tension, particularly in the shoulders, can significantly impact a pianist’s performance and overall well-being.

    Stress, whether it’s from the challenge of mastering a new piece or from external factors, often finds its way into the shoulders. Tension in this area during play not only affects technique but can also lead to discomfort and, over time, injury. When pianists are stressed, their bodies react by tightening up, which can decrease blood flow and reduce the efficiency of muscle use. This strain not only hampers the fluidity of movement but may also contribute to a cycle of pain and stress that’s hard to break.

    For many pianists, the realization that their posture contributes significantly to their shoulder pain comes as a revelation. Slouching or leaning too far forward can place undue stress on the shoulders, neck, and upper back. Maintaining a correct posture is paramount; it allows for better breathing, enhances concentration, and reduces unnecessary strain on the body. Here are a few signs that stress and tension might be affecting a pianist’s posture and play:

    • Hunching over the keys
    • Gripping the bench tightly
    • Raising shoulders while playing

    Incorporating mindfulness and awareness into practice sessions can help musicians recognize when tension starts to build. Taking regular breaks to stretch and relax the shoulders can prevent the buildup of stress, making it easier to maintain good posture and reduce the risk of pain.

    Understanding the body’s signals is key to managing stress and tension. When pianists feel their shoulders tightening or pain beginning to creep in, it’s a sign that they need to pause, reassess their posture, and perhaps do a few stretches. Ignoring these signals can lead to more severe issues down the line, such as chronic pain or even conditions like tendinitis or carpal tunnel syndrome.

    Conclusion

    Recognizing the role of proper stretching and posture can’t be overstated for pianists looking to avoid shoulder pain. It’s all about listening to what your body’s telling you and taking those necessary steps to ensure you’re playing in a way that’s healthy and sustainable. Remember, incorporating mindfulness and regular breaks into your practice isn’t just good for your shoulders—it’s good for your overall performance and well-being. By staying vigilant and proactive about tension and stress, you’ll not only keep those pesky shoulder pains at bay but also enhance your playing experience. So, let’s keep those stretches going and make every note pain-free.

  • What is the best Yamaha Keyboard for Beginners?

    What is the best Yamaha Keyboard for Beginners?

    Best Yamaha Keyboard Models for Beginner Pianists


    Finding the right keyboard for a beginner can feel tricky, but it doesn’t have to be. We’ve checked out plenty of options and found that Yamaha offers some excellent choices. For those just starting their musical curiousity to, keyboards that are affordable, easy to use, and packed with learning functions are key. Yamaha gets this right, especially with models designed for initial-time players and even those with a bit more challenge for excited learners.

    Consider features like built-in lessons and weighted keys when you pick. These features help a lot as they mimic the feel of a real piano and guide through the learning process. Plus, Yamaha provides options that are budget-friendly without skimping on quality. For beginners under $500, you can find lighted keys and adapters that make starting easy and fun. And for those with small spaces, Yamaha’s compact keyboards are a perfect fit, ensuring that lack of room isn’t a barrier to learning piano.

    At last, Yamaha’s keyboard bundles for beginners, which include a stand and headphones, offer great value. They make definitely that you have everything needed to start playing right away. From electric keyboards that are easy on the wallet to entry-level models that come with learning functions, Yamaha has made definitely there’s something for every new musician. When you start on this musical adventure, having the right equipment makes all the difference. We believe Yamaha keyboards strike that perfect chord for beginners, setting them up for success from their very initial note.

    Yamaha EZ-300

    For those just starting their musical curiousity to, we understand the importance of choosing an instrument that’s not only complete but also encourages growth and creativity. Our model is packed with over 600 unique sounds, granting novices a broad sonic palette to explore and enjoy. This diversity not only makes practice sessions more engaging but also opens up a world of musical genres to play with. From classical piano to dynamic synths, learners have the freedom to find their sound preferences and develop a personal playing style.

    Plus, this keyboard is celebrated for its user-friendly features designed to assist beginners. Among these, the option to light up its keys stands out. This innovative feature guides learners through songs and exercises, making the learning curve smoother and more enjoyable. It’s like having a personal tutor available at any time, ready to illuminate the path towards musical proficiency. The combination of a vast sound library and interactive learning tools presents an ideal platform for budding musicians to start their musical curiousity to on the right note.

    We also consider portability an necessary feature for a beginner’s keyboard. Our model’s design ensures it’s light enough for easy transport yet strong enough to withstand the rigors of travel. This means learners can bring their music wherever they go, from practice sessions at a friend’s house to performances at school. The flexibility to play anywhere encourages consistent practice, an indispensable part of mastering any instrument.

    Yamaha P-45

    Starting on the piano curiousity to excites us all. Choosing the right instrument makes this adventure even more thrilling. Our initial option offers everything a beginner needs without overwhelming them. It boasts fully weighted keys, a feature necessary for developing the proper finger technique from the start. This model, celebrated for its simplicity, ensures learners grasp the basics without distraction.

    Explore our selection of quality instruments, tailored for newcomers. Their affordable nature does not compromise on giving an authentic playing experience. It strips back the non-necessary, focusing on what truly matters — touch and sound.

    For those of us venturing into music, it’s an ideal starting point. Its design emphasizes the essentials, making each practice session rewarding. We believe in making learning enjoyable and straightforward. With this model, we’re convinced beginners will find a reliable companion in their musical curiousity to.

    Yamaha PSR-E373

    For beginners stepping into the world of music, finding the right instrument can be a game-changer. We understand the importance of a keyboard that is not only affordable but also packed with features that encourage learning and creativity. This model stands out for its value, offering a variety of sounds and functions that cater to beginners.

    Also, its user-friendly design makes it easy for newcomers to navigate and explore different melodies and rhythms. The vast array of sounds allows beginners to experiment and find their style. For those looking to explore deeper into their musical curiousity to, finding the perfect fit is necessary, and our choices aim to make that search a bit easier by presenting options that blend quality with ease of use.

    Among our top picks for beginners, this option shines, thanks to its blend of functionality and budget-friendliness. With its versatile features, beginners can enjoy a wide range of musical genres and styles, making the learning process engaging and fun. This makes it an excellent choice for those excited to start their musical curiousity to on the right note. Explore more details at Portland Music Company.

    Affordable Yamaha Keyboards for First-Time Players

    When starting on the piano curiousity to, finding the right instrument is necessary. We understand how overwhelming it can be with so many options out there. That’s why we recommend Yamaha keyboards for beginners. They offer a range of models that fit perfectly into the category of quality, affordability, and user-friendliness. For those just beginning, a model like the Yamaha EZ-300 stands out. It’s packed with over 600 sounds and designed to grow with you as you learn.

    For beginners, the ease of use is a top priority. Yamaha keyboards shine here with their intuitive interfaces. These keyboards are not just tools for playing; they’re learning aids too. With built-in lessons and easy-to-navigate functions, they are perfect for self-taught musicians and those taking formal lessons. If you have a small space at home or you’re looking for something portable, there’s a Yamaha keyboard that fits the bill, ensuring you don’t have to compromise on quality for the sake of convenience or budget.

    Also, affordability doesn’t mean you have to give up on features that make playing enjoyable. Some Yamaha models come with weighted keys for a realistic piano feel, stands, and headphones for a complete setup right innovative. This makes them an excellent choice for initial-time players looking for a straightforward, cost-effective way to start their musical curiousity to.

    Yamaha YPT270 61-Key Portable Keyboard

    Starting with the keyboard, we believe it’s significant for beginners to find an option that’s easy to use yet capable of growing with them as they improve. That’s where our choice comes into play. It’s designed to be both portable and packed with features that encourage learning and enjoyment from day one. Whether at home or on the road, this keyboard is a companion that fits into your life seamlessly.

    Its wide range of sounds and built-in lessons offer a fantastic foundation for anyone new to music. Plus, it can connect to a variety of music apps, making practice fun and interactive. For those excited to explore more, the option to explore sounds and compositions opens up a world of creativity.

    At last, for us, affordability without compromising on quality is key. We make definitely you get a reliable instrument that won’t very expensive. This balance makes our selection an excellent starting point for musical journeys.

    Yamaha EZ300 61-Key Portable Keyboard

    For those stepping into the world of music, our keyboard offers over 600 sounds. This feature enriches the learning experience, providing variety and depth suitable for any beginner. With these many voices, students can explore different genres and styles, making practice sessions more engaging and fun.

    We also include a feature that makes learning and playing along to your favorite songs easy and enjoyable. This addition helps to build a practical understanding of music, improving both timing and rhythm. For more details on our range, you can check out our broad selection, which is designed to suit the needs of every entry-level player.

    Effortlessly portable, it’s a suitable option for those who are always on the move. If you’re heading to a lesson or performing for friends, this keyboard’s compact design ensures you can bring your music wherever you go. Our commitment to bridging the gap between hardware and software further enhances this portability, allowing for seamless transitions between practice environments.

    Top-Rated Yamaha Keyboards for Learning Piano

    Top-Rated Yamaha Keyboards for Learning Piano

    We understand that starting your musical curiousity to can feel overwhelming, especially regarding choosing the right instrument. That’s why we recommend starting with Yamaha keyboards, famous for their quality and beginner-friendly features. The Yamaha EZ-300, for instance, stands out as an excellent choice for new musicians. It offers over 600 voices, enabling learners to explore different sounds and genres effortlessly.

    For those looking for a keyboard that combines affordability with high quality, Yamaha offers several models tailored to initial-time players. Models like the Yamaha P-45 and the Yamaha PSR-E373 are perfect for beginners, providing features such as fully weighted keys and built-in lessons to make easier the learning process. These keyboards not only fit your budget but also grow with you as you progress in your musical curiousity to.

    Also, Yamaha’s range includes compact options for those with limited space and portable keyboards for musicians on the go. The addition of built-in lessons in models like the Yamaha EZ-300 further simplify the learning path for self-taught beginners, making it easier to practice and improve without the need for a physical instructor. With Yamaha, you’re not just buying an instrument; you’re investing in a complete learning experience that caters to your pace and style.

    Yamaha Piaggero NP-15

    We understand how challenging it can be for beginners to find the right keyboard. That’s why we often recommend a model that’s perfect for those just starting out on their musical curiousity to. It’s designed with simplicity in mind, ensuring a smooth learning curve for new players.

    Among its features are lightweight design and portability, making it easy to carry from place to place. If you’re practicing at home, taking it to lessons, or performing in front of a small crowd, this keyboard supports your musical aspirations wherever you go. Its range of built-in sounds allows for creative exploration, encouraging players to experiment with different styles and genres.

    For those interested in this beginner-friendly keyboard, you can find more details to help make an good choice. Its affordability and ease of use make it a top choice among newcomers, and we’re confident it will serve well in nurturing your musical talents.

    Yamaha PSR-SX600

    We believe the starter model offers a perfect mix of features and value for beginners. Its array of voices, from pianos to strings, allows learners to explore a variety of sounds. This makes practice sessions not just educational but fun, too.

    With a focus on simplicity, it comes equipped with intuitive controls that make it easy for initial-timers to navigate. The keyboard ensures that beginners won’t feel overwhelmed as they learn the basics of music production. For more information, you can check out detailed reviews here.

    Its affordability is perhaps one of its strongest points. By offering high-quality features at a reasonable price, we make definitely that starting your musical curiousity to doesn’t very expensive. This approach helps us make definitely that music education is accessible to everyone.

    Beginner-Friendly Yamaha Keyboard with Weighted Keys


    We understand how necessary it is for beginner pianists to find the right instrument. Starting on the curiousity to of learning piano can be daunting, but the right Yamaha keyboard can make all the difference. That’s why we recommend models with weighted keys for those who are starting out. Weighted keys offer a touch and feel similar to that of an acoustic piano, making the transition smoother for beginners.

    Among the vast range of options, Yamaha electric keyboards under $500 provide an excellent balance between cost and quality. Not only are these keyboards affordable for initial-time players, but they also come equipped with a variety of features designed to aid in learning. From built-in lessons to compact options that fit in small spaces, Yamaha has made definitely there’s a perfect match for every beginner’s needs.

    Also, we suggest looking for Yamaha keyboard bundles for beginners. These bundles often include a stand and headphones, which are necessary accessories for any budding pianist. This way, new musicians can start their musical curiousity to with everything they need, allowing for an easy, enjoyable learning experience. Yamaha’s dedication to creating beginner-friendly options ensures that there’s a suitable keyboard for every aspiring pianist, regardless of their space or budget limitations.

    Yamaha P-145

    We’ve taken a closer look at our options and found that for budding musicians wanting quality sound, one model stands out. This instrument combines ease of use with advanced features. It’s especially crafted to support learners in their musical curiousity to from the start.

    With upgraded specs, this model offers an enhanced experience. Learning becomes more enriching because of its authentic sound quality and responsive keys. It’s like having a concert piano at your fingertips, but designed for those just starting out.

    Also, for those on the move or with limited space, its compact size is a big plus. You can easily take it where your music takes you. For insights on beginner-friendly instruments, exploring keyboards and pianos will prove valuable. This model’s thoughtful design bridges the gap between starting learners and their aspirations to master the piano, making it an excellent choice for newcomers.

    Yamaha CP88

    We understand the importance of having a keyboard that not only serves the needs of beginners but also offers a level of quality that supports progression. For learners aiming for excellence in their musical curiousity to, our focus is on providing instruments that are effortless to play and rich in features. This ensures a seamless transition as skills evolve.

    Also, we prioritize ease of use alongside sophisticated functionality. Our selection includes keyboards that are intuitively designed, allowing users to explore and expand their musical vocabulary without getting bogged down by overly complex operations. For more details on such keyboards, consider exploring our options that cater to both the budding musician and the more seasoned player looking to improve their repertoire.

    Basically, our goal is to support the musical curiousity to from beginner to advanced levels, ensuring every step is met with the right tools for success. The versatility of our keyboards makes them a perfect fit for anyone looking to start on or continue their musical expedition.

    Yamaha Keyboard Bundles for Beginners with Stand and Headphones


    Starting on the curiousity to of music can be exciting. We understand how significant it is for beginners to have the right tools. That’s where affordable Yamaha keyboards come in. They are perfect for initial-time players. With features designed to make learning easy and fun, these keyboards are a great choice. They have built-in lessons that guide you through the basics of piano playing. This helps self-taught beginners to improve at their own pace.

    For those who are tight on space, compact Yamaha keyboard options are available. They fit well in small study areas, bedrooms, or living spaces, making practice convenient and accessible. Also, for new musicians looking for an all-in-one solution, our bundles come with stands and headphones. This setup encourages practice sessions without disruptions, fostering a better learning environment. You can check out some great options here. These bundles are an ideal start for anyone aspiring to play the piano, offering great value and the necessary tools to begin your musical curiousity to.

    When choosing your initial instrument, consider Yamaha electric keyboards for beginners under $500. These models provide a quality introduction to piano playing without a hefty price tag. Paired with entry-level Yamaha keyboards with learning functions, beginners have a strong platform for growth. The selection of sounds and rhythms available on these keyboards not only makes practicing enjoyable but also allows you to explore different music styles. This diversity keeps the learning process engaging and productive.

    Yamaha PSR-E373 Bundle

    Our choice for those starting their musical curiousity to often includes this key instrument. It packs an impressive number of features that are both engaging and useful for beginners. The selection of sounds and rhythms opens up a world of creative possibilities, making practice sessions both fun and educational.

    We understand the importance of quality and affordability. This package hits the mark by combining a rich set of functionalities with a price that doesn’t very expensive. It’s designed to grow with you as you progress in your musical curiousity to, offering more complex options and controls as you develop your skills.

    Also, the ease of use makes it a straightforward choice for those just finding their feet within the sphere of music. So, if you’re practicing at home or taking your initial steps in composing, this selection offers flexibility and opportunity for all. It stands out as a fitting start for budding musicians, providing a solid foundation upon which to build their talents.

    Yamaha P-515B Bundle

    For those stepping into the world of piano playing, finding the right instrument is necessary. Our choice leans towards a model that combines the needs of a beginner with the potential to satisfy even the most seasoned pianists. It’s known for its exceptional sound quality and realistic key action, which mimics the feel of an acoustic piano very closely.

    Explore our favorite picks, and you’ll find that this piano not only has a excellent sound engine but also offers a wide range of features. These include built-in lessons for beginners, making it easier to start your musical curiousity to. The instrument’s ability to grow with the player over the years is a significant advantage.

    The durability and the thoughtful design make definitely that it remains a reliable partner in music, whether for practice at home or performances. It strikes the perfect balance between a beginner’s needs and professional aspirations, making it a solid investment for anyone serious about learning the piano.

    Conclusion

    After exploring the best Yamaha keyboard models for beginner pianists, affordable options for initial-time players, and top-rated keyboards for learning piano, it’s clear that Yamaha offers a wide range of beginner-friendly keyboards with weighted keys. If you’re looking for a keyboard bundle with stand and headphones, an electric keyboard under $500, or an easy-to-use setup for new musicians, Yamaha has you covered. Plus, their entry-level keyboards with learning functions, compact options for small spaces, and keyboards with built-in lessons for self-taught beginners make Yamaha a top choice for those starting their musical curiousity to.

  • Ultimate Guide to Buying a Quality Used Piano Keyboard: Tips and Things to Watch Out For

    Ultimate Guide to Buying a Quality Used Piano Keyboard: Tips and Things to Watch Out For

    Buying a second-hand piano keyboard can be a great way to save some money. But it’s not as simple as just picking one that looks good. There are a few things you’ll need to keep in mind to ensure you’re getting a quality instrument.

    First off, you’ll want to consider the age and condition of the keyboard. Older models might have a charming vintage vibe, but they may also need more maintenance. And while a few scratches and dings won’t affect the sound, serious damage could be a sign of neglect.

    You’ll also need to think about the brand and model. Some brands are known for their durability and excellent sound, while others might not hold up as well over time. Researching and understanding the different options can help you make an informed decision.

    Factors to consider when buying a second-hand piano keyboard

    When it comes to buying a second-hand piano keyboard, age and condition often take the spotlight. It’s easy to understand why. An older model might charm buyers with its classic aesthetic, but these keyboards often need more care and maintenance. It’s essential to scrutinize the keyboard’s condition before finalizing the purchase. Detecting issues like persistent sticking keys or strangely tuned notes, which could be signs of underlying problems, is crucial.

    Knowledge of brands and models often parallels the importance of age and condition. Some brands hold their quality better over time, while others might deteriorate more rapidly. The different piano brands often come with their various attributes and characteristics which often mirror in their produced models. Hence, understanding the nature of the brand and its models can aid potential buyers greatly. Gleaning details from online reviews, piano forums, or even pulling tips from local music stores can be key steps in gaining a broad understanding of the piano market landscape.

    A table showcasing a general classification of piano keyboards by brand reputation might look something like this:

    Brand Reputation Brands
    High Steinway & Sons, Kawai
    Medium Yamaha, Casio
    Low Alesis, Behringer

    While knowing about brands and conditions is useful, buyers must consider another important factor: the skill level. The requirement in a piano keyboard for a rookie embarking on the journey of music is starkly different from a classical pianist with years of practice. Buyers should reflect on the user’s skill level when deciding.

    Browsing through second-hand goods is always an adventure; unexpected treasures and occasional pitfalls are in the equation. Therefore, inspecting the keyboard thoroughly and understanding the world of pianos is a must. As the journey unfurls, seasoned musicians and beginners alike might find themselves swaying to the rhythm of their perfect keyboard. Knowledge of brands, understanding of varying conditions, and due consideration of the user’s skill level are the solid notes to this melody.

    Evaluating the age and condition of the keyboard

    One critical factor when buying a second-hand piano keyboard is evaluating the instrument’s age and general condition. It’s worth mentioning again that the condition of a second-hand keyboard can dramatically impact its performance and longevity. So, let’s delve into this point further, shall we?

    Age isn’t just a number when it comes to piano keyboards. Much like a fine wine, some keyboards can improve with age, while others may deteriorate. It’s important to know the age of the keyboard as it can provide clues about potential wear and tear or underlying issues that aren’t immediately visible.

    Depending on how well it’s been maintained, an older keyboard might have a rich and warm sound that younger keyboards haven’t developed yet. On the flip side, a neglected older keyboard may carry unseen complications such as internal rusting or dust accumulation, which may affect its sound quality and require costly repairs.

    Another tip: Inspect the keyboard’s physical condition. Look out for noticeable defects such as cracks or chipped keys, as these can affect the keyboard operation and overall sound production. It’s also a good idea to play a few notes across the entire keyboard to ensure there are no sticking keys or strangely tuned notes.

    Being thorough during your evaluation would definitely pay off. A keyboard that has been well cared for, regardless of its age, is likely to provide a much better experience compared to a newer keyboard that’s been neglected.

    Remember, purchasing a second-hand keyboard is similar to buying a used car. It’s not just about finding a good deal. It’s about smart investing, understanding why age and condition matter, and ultimately finding the best fit for you.

    Next, the article explores the importance of professional assessment and advice when purchasing a second-hand keyboard. After all, there are nuances and technicalities a layperson might miss, so stay tuned.

    Understanding the importance of the brand and model

    When shopping for a second-hand piano keyboard, it’s essential to understand the role that the brand and model can play. Brand reputation plays a big part, as some keyboard manufacturers are known for their quality, longevity, and sound.

    Popular and well-established manufacturers usually ensure that their products are built to standard and made of quality materials. This tends to hold up over time, even for used models. For instance, brands like Yamaha, Roland, and Casio have solid reputations in the music industry for delivering high-caliber keyboards that produce excellent sounds.

    However, don’t let brand names overshadow the importance of inspecting each second-hand keyboard on its own merits. While a strong brand reputation can provide a sense of assurance, every used keyboard has its unique history of use and care.

    Moving onto model considerations, it’s just as important to research the piano keyboard’s model as it is to look into the brand. Various models within a brand can have drastically different features, sounds, and build quality. For instance, some models are better suited for beginners, while others are designed with professional use in mind.

    Moreover, the age of the model should be a key consideration. The older the model, the more likely it is to have worn components and outdated technology. Conversely, more recent models may feature upgraded technology and design.

    Here are some key points to reflect on when considering the brand and model of a used keyboard:

    • Brand reputation for quality and durability
    • Individual history of the keyboard despite the brand reputation
    • The specific model and its features
    • The year the model was released

    A second-hand piano keyboard can be an excellent investment with the proper research and considerations. Remember—it’s a combination of the keyboard’s brand, model, and individual condition that’ll likely dictate its performance and lifespan. Therefore, don’t shy away from asking relevant questions or seeking professional advice to ensure the right choice.

    Researching different options before making a decision

    Purchasing a second-hand piano keyboard isn’t a decision to rush. It’s critical to explore all possible options. Researching different brands, models, and prices will offer a wider perspective, making it easier to find what you’re looking for. Don’t limit yourself to one brand or model. Be open to different possibilities; you never know what gem you could uncover!

    Having a clear understanding of your needs and preferences will help refine the search. Are you a beginner looking for a basic keyboard? Or a seasoned musician in need of advanced features? Once you define your needs, narrow down your options. It’s essential to consider the age of the keyboard, as it directly impacts its condition and the technology used in its construction.

    Remember, buying from a trusted source is of utmost importance. Do not neglect this aspect during your research. Trusted sources may be a reputable music store, a professional musician selling their gear, or even a trusted online marketplace. Verify the seller’s reputation or credibility before making any commitments. A reliable source should provide enough information about the keyboard, support proof of ownership, and allow for inspection before purchase.

    Show interest in the keyboard’s history. Therefore, ask about how often it’s been used, whether it’s been professionally serviced, and if it’s ever been repaired. The more insight you can get, the safer your buying decision will be.

    To aid your research process, consider reaching out to keyboardist communities or forums online. There’s an enormous wealth of knowledge within these communities from people who’ve been in your shoes before. They can offer advice, share their experiences, answer your concerns. This can vastly expand your knowledge about the specifics of what to lookout for when purchasing a second-hand keyboard. But remember, while these insights can guide your decision, the final call is entirely up to you.

    Having explored the tips on research and considerations, let’s delve into what to expect when inspecting a second-hand keyboard.

    Conclusion

    So there you have it! Buying a second-hand piano keyboard isn’t as daunting as it might seem. It’s all about doing your homework, knowing what you want, and not being afraid to ask questions. Remember, it’s not just about the price tag; it’s about finding a keyboard that suits your needs and will stand the test of time. Trust your gut, rely on your research, and connect with fellow keyboard enthusiasts. With patience and persistence, you’ll find the perfect second-hand piano keyboard that hits all the right notes. Happy playing!

  • Top Picks: Best Piano Keyboards with Hammer-Action Keys Reviewed

    Top Picks: Best Piano Keyboards with Hammer-Action Keys Reviewed

    If you’re a music enthusiast seeking the perfect piano keyboard, you’ve likely heard about hammer action keys. They’re the secret to getting that authentic piano feel, mimicking the resistance and rebound of traditional piano keys. But with so many options out there, it’s hard to know where to start.

    That’s where this guide comes in. It’ll help you navigate the sea of hammer action keyboards, pointing out the top picks. Whether you’re a beginner or a seasoned pro, you’ll find the perfect fit for your needs and budget. So, sit back and let’s dive into the world of hammer action keyboards.

    What are hammer action keys?

    Push any key on a traditional, acoustic piano, and here’s what’ll happen: the key raises a hammer, which then strikes the string. The weight and response of this hammer action are what gives a piano its characteristic touch or feel. When talking about piano keyboards, hammer action keys attempt to replicate this mechanical process as closely as possible.

    Let’s look at the mechanics. In a hammer-action keyboard, each key is attached to a weight. When the key gets pressed down, it raises this weight (just like the hammer in an acoustic piano), and when released, the weight falls back into place. That gives the sensation of weight and momentum, nearly imitating the feel of playing a traditional piano.

    You’re probably wondering, “But why does this matter?”

    Well, if you’re a beginner, a keyboard with hammer action keys provides that authentic piano feel, which might make the transition to an acoustic piano smoother down the road. And if you’re an experienced player, there’s no dismissing the tactile satisfaction of weighted keys. It adds depth and nuance to your playing and allows for expressive performances.

    Note: Not all keyboards are created equal, and neither are all hammer action keys.

    Many manufacturers come up with their unique designs and technologies for hammer action keyboards. They will differ in terms of touch sensitivity, response, and even weight distribution across the keys (traditional pianos have heavier keys in the low end and lighter keys on the high end).

    So there’s a lot to consider when choosing a hammer action keyboard. Rest easy, we’ll delve deeper into these factors and guide you through the world of hammer action keyboards, steering you toward the best option for your musical needs.

    Benefits of hammer action keys

    For both novice and seasoned musicians, hammer action keys on a piano keyboard offer multiple benefits. Designed to mimic the mechanical operation of an acoustic piano, these keys provide an authentic piano experience that’s comfortable for beginners and familiar to experienced players.

    First off, this system provides important feedback to the player. When pressing a hammer action key, the resistance felt is very much like that of an acoustic piano. Players can sense when the note has been played. This tactile response can significantly improve finger strength and overall keyboard technique. This makes it perfect for musicians aiming to transition from electronic to traditional piano play.

    Secondly, due to the graded weight system implemented in hammer action keys, each key’s resistance varies from low to high notes. The keys highlighted in lower octaves are typically heavier and become gradually lighter as a player moves toward the higher octaves. This replicates the feel of an acoustic piano, providing an innate sense of organic playability that’s almost impossible to achieve with non-weighted keyboards.

    One key factor to remember here is not all hammer action keyboards are created equal. Manufacturers often have unique designs and technologies for their hammer action keys. It’s not a “one size fits all”. So, when it comes to choosing a hammer action keyboard, understanding personal preferences and the main objective plays a significant role.

    In the next section of this article, we’ll delve deeper into the key factors and parameters that one needs to consider when selecting the right hammer action keyboard. These factors may range from the keyboard’s overall construction and design to the specific characteristics of the hammer action mechanism itself.

    Factors to consider when choosing a piano keyboard with hammer action keys

    When venturing into the territory of hammer action keyboards, there are a few important factors to consider. They’ll not only determine the quality of the keyboard but also how well it matches your style of play and feel preference.

    Feel and Responsiveness:
    The general *feel* of the keyboard should be your foremost consideration. No doubt, it’s about how authentic the keyboard feels to a real acoustic piano. Superb hammer action keyboards mimic the mechanical operation accurately, providing a seamless transition between digital and acoustic experiences. There’s the tactile feedback to think about as this can greatly improve finger strength and keyboard technique.

    Graded Weight System:
    One notable property of high-quality hammer action keyboards is the *graded weighting system*. This incorporates a resistance that varies between low and high notes. This replicates the feel of an acoustic piano where lower notes require more force to play than the higher ones. Always test this factor out when making the selection.

    Manufacturer’s Design and Technology:
    Each keyboard manufacturer has their own unique designs and technologies. Brands differ and so do the qualities of their keys. Some favor a more synthetic, light feel while others go for heavier, more realistic keys that are also significantly louder.

    Additional Features and Needs:
    Apart from the primary consideration of the keys itself, look at the additional features the keyboard offers. Does it have a built-in speaker system, or MIDI capabilities to record your playing? Perks like these often separate the good keyboards from the best.

    Ultimately, it’s essential to sample a few different keyboards before making a decision. This way, you can see what feels and sounds best to you. As you do, keep the following factors in mind: feel and responsiveness, graded weight system, manufacturer’s design and technology, and finally, additional features. Remember, the best keyboard is one that feels right to you and suits your individual needs.

    Top picks for piano keyboards with hammer action keys

    When it comes to top picks for piano keyboards with hammer action keys, several stand out. These models are renowned not only for their exceptional feel and responsiveness but also for the realistic replication of an acoustic piano sensation.

    A top-notch choice is Yamaha’s P-115 model. It’s widely considered for its GHS (Graded Hammer Standard) keyboard, which is designed to enhance the natural playing experience. Yamaha has carefully calibrated each key, so the lower keys bear more weight just like an acoustic piano. Its ability to interact with iOS applications add to the engaging experience it offers.

    Next on the list is the Casio Privia PX-160 which is well-known for its remarkable Tri-Sensor Scaled Hammer Action II keyboard. This technology allows for an impressive level of detail when it comes to responsiveness and recreating the nuances of delicate piano playing. Further, it boasts its unique features like split and layer capability, plus it’s equipped with a host of high-quality tones.

    The Roland FP-30 claims a spot as one of the best piano keyboards with hammer action keys as well. Its innovative PHA-4 (Progressive Hammer Action) offers high resolution, expressiveness, and great playability. A step above, it makes use of Roland’s SuperNATURAL Piano sound engine providing a rich, authentic sound that flows naturally with your playing.

    Additionally, Korg’s B1SP is a worthy mention. Korg has implemented a Natural Weighted Hammer Action (NH) keyboard in this model, replicating the heavier touch in the low keys and lighter touch in the high keys. Additionally, the B1SP is equipped with built-in speakers and comes with a dedicated stand and pedal board.

    These top picks represent the best in class for hammer action keys, each offering unique features that set them apart. Whether it’s the feel, responsiveness, or the additional features, these keyboards are the epitome of what to expect when choosing a piano keyboard with hammer action keys.

    Conclusion

    So there you have it! The Yamaha P-115, Casio Privia PX-160, Roland FP-30, and Korg B1SP have proven to be top-notch when it comes to piano keyboards with hammer action keys. They’ve each got their own unique features that make them stand out in the crowd. But what they all have in common is their ability to mimic the feel and responsiveness of an acoustic piano. Whether you’re a seasoned pro or just starting out, there’s something in this lineup for everyone. These keyboards truly represent the cream of the crop for hammer action keys. So go ahead and make your pick. You won’t be disappointed!

  • Affordable Excellence: A Review of the Alesis Recital Pro and other Budget-Friendly Digital Piano Keyboards

    Affordable Excellence: A Review of the Alesis Recital Pro and other Budget-Friendly Digital Piano Keyboards

    If you’re on the hunt for a digital piano keyboard that doesn’t break the bank, you’ve come to the right place. We know that finding the perfect blend of affordability and quality can be a bit of a challenge. That’s why we’ve taken the time to review some of the best budget-friendly options out there.

    From beginners looking to dip their toes in the world of music, to seasoned players wanting a cost-effective backup, there’s something here for everyone. We’ve considered factors like sound quality, key action, and additional features to give you a comprehensive look at each keyboard.

    Yamaha P-45 Digital Piano Keyboard Review

    Diving right in, Yamaha’s P-45 is an exceptional option when it comes to affordability and quality. It’s a perfect balance that attracts both beginners and professionals seeking a budget-friendly backup.

    What sets the P-45 apart is its Graded Hammer Standard (GHS) weighted action. This feature mimics the touch of an acoustic piano. The lower keys feel heavier, and as one progresses upward, the keys become lighter, offering an authentic piano feel.

    Sound quality is crucial, and the P-45 doesn’t compromise. This keyboard packs an impressive Advanced Wave Memory (AWM) sound engine. This technology captures the sound of an acoustic piano, enabling realistic and immersive playing experiences.

    Delving into the keyboard’s range, it provides 88 keys – an essential element for those looking to play a broad spectrum of pieces. With a maximum of 64-note polyphony, players have ample range to navigate complex works without note drop-off.

    Let’s not forget the keyboard’s simplicity. The P-45 features an easy-to-use button for changing voice, song, and metronome settings. A minimalist approach, which certainly benefits beginners and those valuing straightforwardness in their musical equipment.

    Yet, even with all these features, the Yamaha P-45 maintains amazing portability. Perfect for shared apartments, college students, and gigging musicians. Weighing just under 25 lbs, it’s effortlessly transportable and doesn’t demand a large space.

    Feature Details
    Key Action Graded Hammer Standard (GHS) weighted action
    Sound Technology Advanced Wave Memory (AWM)
    Keys 88
    Polyphony 64-note
    Weight 25 lbs

    For those who want a versatile keyboard that delivers affordability, quality, and portability, they might find their match in the Yamaha P-45. He ticks all the boxes, proving that you don’t have to break the bank for quality music.

    Casio Privia PX-160 Digital Piano Keyboard Review

    In the quest for budget-friendly digital piano keyboards, Casio’s offerings are impossible to overlook. Among those, the Privia PX-160 stands out as a strong candidate. It’s loaded with features that cater to both newcomers and seasoned players giving it an edge in terms of versatility.

    One of the standout aspects of the PX-160 is the scaled hammer action keys. This Tri-Sensor Scaled Hammer Action II keyboard provides a level of touch response that’s incredibly close to that of a grand piano. The lower notes have a heavier feel, while the higher ones are lighter, mirroring the natural, physical characteristics of an acoustic piano.

    The PX-160 is no slouch on the sound front either. It’s equipped with AiR Sound Source, the latest sound production system from Casio. This generates a sound quality that’s rich, detailed and full-bodied. The two-track MIDI recorder is an additional feather in the cap, allowing one to record, tweak and perfect their performances.

    In terms of design, it’s sleek, compact and most importantly, portable. It does not require a dedicated space and is easy to carry around if the need arises.

    In terms of educational features, the PX-160 is equipped with Duet mode, making it a convenient choice for piano lessons. Here is an overview of the PX-160’s key features:

    • Tri-Sensor Scaled Hammer Action II keyboard
    • AiR Sound Source
    • Two-track MIDI recorder
    • Duet mode
    • Compact and portable

    So, when it comes to seeking a digital piano keyboard that delivers an authentic feel, excellent sound quality and excellent portability, the Casio Privia PX-160 is an option that’s worthy of serious consideration.

    Roland FP-30 Digital Piano Keyboard Review

    It’s time to take a step further and introduce another fabulous budget-friendly digital piano keyboard, the Roland FP-30. Noted for its remarkable design and advanced features, this keyboard sets a high standard for its price range.

    First off, the Roland FP-30 comes with 88 fully weighted keys. They’re crafted to mimic the feel of a high-quality acoustic piano. You’ll notice that these keys are sensitive to touch, providing various sound dynamics based on your playing intensity. It’s a fantastic feature for those seeking an immersive playing experience.

    When it comes to sound quality, the Roland FP-30 doesn’t disappoint. Behind its stellar performance is the renowned SuperNATURAL Piano Sound engine. It delivers rich, textured tones inspired by a grand acoustic piano. Whether you’re exploring jazzy tunes or deploying classical melodies, this is your reliable partner for an expressive performance.

    What about connectivity? The Roland FP-30 is well-equipped in that department. It features USB and Bluetooth connectivity, allowing you to link with mobile devices, computers, or music software. This feature supports music learning apps and expands your music library with an abundance of song choices for your practice.

    If education is a priority, the Roland FP-30 covers that ground. With its Twin Piano mode, it’s easy for two players to run the keyboard simultaneously. It works by splitting the keyboard into two identical halves, great for music lessons where the teacher and student play side by side.

    Let’s move on to design. The Roland FP-30 is compact and lightweight, fitting snugly into narrow spaces. If you’re the traveling musician, you’ll appreciate the portability of this digital piano keyboard. Plus, it doesn’t compromise on sturdiness, promising durability for the long haul.

    The Roland FP-30 is powerful, versatile, and mindful of your budget. It continues the lineup of high-quality yet accessible digital piano keyboards. Let’s look at other remarkable options out there.

    Alesis Recital Pro Digital Piano Keyboard Review

    Moving on to another great budget-friendly digital piano option, let’s highlight the Alesis Recital Pro. This keyboard is an excellent choice for both beginners and advanced pianists who need a versatile and reliable instrument without denting their wallets.

    The Alesis Recital Pro is known for its 88 fully weighted keys, providing a realistic piano feel. It’s also sensitive to touch for a wide variety of sound dynamics. An impressive feature of this keyboard is its adjustable touch response, allowing players to cater the sensitivity of the keys to their liking.

    One of the standout features of the Recital Pro is its rich and textured tones made possible by its powerful 20W built-in speakers. With 12 premium voices from acoustic piano to organ, the keyboard ensures top-notch sound quality for playing an assortment of musical pieces.

    The Alesis Recital Pro also boasts useful learning features such as “Lesson Mode” that divides the keyboard into two sections with identical pitch ranges – ideal for one-on-one teaching or self-learning. Moreover, its three-month Skoove Premium subscription offers interactive online piano lessons to enhance players’ skills.

    For connectivity, Alesis Recital Pro provides multiple options. It includes a USB-MIDI output for connecting to computers or mobile devices and also has 1/4″ headphone output that allows players to practice privately. For those who need to perform in front of an audience, this keyboard comes with a 1/4″ stereo output to connect to an amplifier.

    Despite its comprehensive features, the Alesis Recital Pro remains easy to use, thanks to its user-friendly controls and intuitive interface. While it may not be as lightweight as the Roland FP-30, it’s certainly sturdy and built to last, making it a sensible choice for the newbies and experienced players alike.

    Please note that the values and facts mentioned are as per the manufacturer’s specifications, and actual performance may vary based on individual use.

    Overall, the Alesis Recital Pro is quite impressive with its fully weighted keys, built-in speakers, and varied connectivity options. It’s not just easy on the pocket but also rich in features, making it a great value for money. It stands as a robust competitor to the Roland FP-30 in the realm of cost-effective digital pianos.

    Conclusion

    So there you have it. The Alesis Recital Pro stands out among budget-friendly digital pianos. Its full 88 keys, touch sensitivity, and adjustable touch response make it a dream for any pianist. Its powerful speakers deliver outstanding sound quality and its learning features make it a perfect choice for beginners. Plus, its connectivity options allow for a wide range of uses. It’s not just a piano, it’s a tool for musical exploration. And the best part? It’s sturdy, easy to use, and offers excellent value for money. If you’re on a budget but don’t want to compromise on quality, the Alesis Recital Pro might just be the keyboard you’re looking for. Happy playing!

  • Yamaha VS Casio Digital Pianos: A Detailed Comparison of Price, Durability & Sound Quality

    Yamaha VS Casio Digital Pianos: A Detailed Comparison of Price, Durability & Sound Quality

    When it comes to digital piano keyboards, two names often rise to the top: Yamaha and Casio. Both brands offer a wide range of options for musicians of all levels, from beginners to professionals. But how do they stack up against each other?

    Yamaha’s keyboards are known for their high quality and professional-grade features. They’re often seen in music studios and on concert stages around the world. On the other hand, Casio keyboards are praised for their affordability and user-friendly interfaces, making them a popular choice among beginners and hobbyists.

    In this article, we’ll dive deeper into the specifics of these two brands. We’ll compare their key features, sound quality, durability, and pricing to help you make an informed decision. Whether you’re a seasoned musician or just starting out, this comparison should shed some light on which keyboard is the right fit for you.

    Key features of Yamaha keyboards

    When it comes to digital piano keyboards, Yamaha holds a strong reputation for its impeccable key features. Each model offers a unique combination of specifications that cater to a range of pianists, from beginners to seasoned musicians.

    One of the standout features of Yamaha keyboards is the Graded Hammer Standard (GHS) keyboard. This technology mimics the feel of an acoustic piano where the keys in lower octaves provide a heavier touch, getting lighter as the keys go up in octave. It’s a crucial feature for those who want to build proper finger technique.

    Additionally, Yamaha’s AWM stereo sampling enhances the sound quality to a level that’s strikingly real. AWM (Advanced Wave Memory) is a sampling system which creates the realism of an acoustic instrument by using digital technology to record the instrument’s sound. This carries over the rich tones of an actual piano, adding immense value to the playing experience.

    An equally impressive aspect is Yamaha’s Smart Pianist App compatibility. It gives users an interactive platform to adjust settings, select instrument voices, and even transcribe music. Beginners find this particularly beneficial as it provides useful tools for learning.

    On top of these, Yamaha keyboards typically come with an extensive library of pre-loaded songs. The song bank, featuring a varied selection of classical favorites to popular hits, works as both an educational tool and a source of entertainment.

    Further proving its worth, it’s important to note that Yamaha keyboards often have durable builds and understated aesthetics. They’re manufactured with high-quality materials that ensure longevity and are designed with a professional look, appealing to many pianists.

    In terms of connectivity, most Yamaha models have USB and MIDI ports, allowing pianists to connect the keyboard to other devices for expanded functionality.

    All these notable features combine to make Yamaha keyboards a favourable choice for many. Yet, it’s essential to consider other factors like individual budget, required features, and personal preference when making the final decision.

    Key features of Casio keyboards

    Let’s talk about Casio. Known for their innovation, Casio keyboards offer a myriad of features that make them a competitive choice for a digital keyboard. They’ve created a name in the industry for their quality, variety of options, and easy accessibility to beginners and professionals alike.

    Primarily, Casio keyboards come with the Scaled Hammer Action II Keyboard system. It’s a sophisticated technology that doesn’t just mimic the feel of an acoustic piano. It goes a step further in replicating the granular details. The moment you strike the key, you’d feel a heavy touch on the lower notes that gradually becomes lighter as you move up.

    Sound technology is a strength Casio doesn’t shy away from flexing. The brand’s proprietary AiX sound Source technology provides clear, rich tones that resonate for a remarkable music experience. You’d find that it enhances the audio output to a quality that parallels a grand piano, captivating the hearts of the listeners.

    Furthermore, Casio offers its Chordana Play app compatibility. It’s a supportive tool for beginners and music enthusiasts. The app allows you to change settings easily, access tutorial lessons, and play along with MIDI files as per your learning pace.

    Casio also equips their keyboards with a wide selection of built-in songs and rhythms. From the classics to the latest chart-toppers, there is an abundance of choices for training and entertainment. Plus, Casio keyboards boast of durable builds that can withstand the test of time.

    Suffice to say, Casio keyboards pack a punch with their feature sets. However, each person’s preferences vary. It’d be wise to compare these features with what Yamaha has to offer before jumping into a conclusion.

    Bear in mind, both Yamaha and Casio offer excellent keyboards intending to suit the needs of their users. As much as the choice relies on the product’s features, it also comes down heavily on the user’s preferences, budget, and required features.

    Sound quality comparison

    Comparing Yamaha and Casio keyboards in terms of sound quality also reveals noteworthy differences. While both models strive to offer the most realistic sound possible, the technologies they employ to deliver this vary.

    In the Yamaha keyboards, sound quality is significantly enhanced via the company’s very own AWM stereo sampling technology. This technology works by capturing high-quality recordings of acoustic pianos, which are then used to generate the sound in Yamaha’s digital keyboards. No matter if someone’s playing a soft soothing melody, a serene nocturne or a vivacious sonata, these keyboards produce grand acoustic variations that cater to every musical taste and style.

    On the flip side, Casio keyboards rely on their AiX Sound Source technology to deliver sounds that are clear, rich, and filled with harmonic overtones. With this technology, Casio has excelled in providing grand piano tones that are expressive, powerful and resonate beautifully across all frequencies. Whether one is practicing scales or performing at their first concert, playing a Casio keyboard creates a sonic experience that can rouse any audience.

    The differences don’t just end here. Yamaha keyboards generally have a warmer, more vibrant sound profile. This tends to produce a full-bodied tone that is comfortable for most pianists. Conversely, Casio keyboards tend to produce a brighter tone which can be quite attractive to performers who lean towards precision and clarity.

    However, it’s important to note that the sound quality of both these keyboards can be greatly affected by external factors such as existing room acoustics or the type of external speaker system used.

    With the clear distinctions between the two keyboard giants when it comes to sound quality, one would think making a choice between the two would be simple. However, that’s not necessarily the case as the sound preference can be highly subjective based on the user’s piano playing style, ear for music, and personal auditory preference. The best way to decide is simply to play and listen to both keyboards and see which one resonates most.

    Durability comparison

    Shifting focus onto the durability aspect, both Yamaha and Casio don’t skimp when it comes to the quality of their pianos. However, minor differences divide these two giants. Diving deeper into this comparison allows us to shed some light on these subtle nuances.

    When talking about Yamaha, durability is part and parcel of their offerings. They’ve built a reputation for their keyboards’ longevity, much like their motorbikes. Grown from the same ethos, Yamaha puts an uncompromised focus on quality at every stage of construction. Take their PSR series, for example, that’s been around for 3 decades and shows no sign of faltering. This steadfast dependability across their range is a testament to Yamaha’s commitment to durability.

    Now let’s focus on Casio keyboards. Despite Yamaha’s robustness, Casio musical instruments don’t lag behind. Casio’s specs sheet implies a strong focus on resilience. Their Privia PX series, illustrated by the model Casio PX-770, is strikingly solid and designed to last. Its matte keys provide resistance to wear and tear, aiding the keyboard’s overall lifespan in the long run.

    Additional aspects like the soldering of electronic components, quality of elemental materials, and tight control on manufacturing processes play a significant role in determining the keyboards’ durability too. Yamaha and Casio prioritize these factors, ensuring their customers receive a product that lasts.

    Despite subtle differences, users globally have found their digital pianos from both these brands going strong even after several years of consistent use. It’s clear that Yamaha and Casio both manufacture keyboards that are built to last.

    Remember, though, that the exact lifespan of a digital piano can hinge significantly on how it’s used and maintained. Regular cleaning, proper storage, and usage within the manufacturers’ guidelines certainly help prolong the keyboard’s lifespan. Comparing Yamaha and Casio’s durability brings us to the realization that both brands offer robust musical instruments. They each have their own unique strengths and choosing between them really boils down to personal play style and brand preference.

    Pricing comparison

    While sound quality and durability are vital factors when choosing a digital piano, it’s essential not to overlook the price point. Everyone’s on a budget, whether it’s tight or generous. That’s where the brands Yamaha and Casio reveal another contrast.

    Yamaha keyboards typically come with a higher price tag compared to their Casio counterparts. The higher cost isn’t just for prestige – it’s reflective of the quality of materials used, the engineering prowess, and the longstanding reputation that Yamaha has built over the years.

    On the other hand, Casio’s digital piano keyboards are often more budget-friendly. Their appeal lies in providing a good balance of quality and affordability. These keyboards are priced lower but still offer an impressive array of features. So, for beginners or those on a tighter budget, Casio can be an attractive choice.

    There’s no doubt that both Yamaha and Casio produce a wide array of keyboards catering to all sorts of budgets. To give an apt idea about the price range, let’s consider some popular models from both brands.

    Brand Model Price Range
    Yamaha P-45 $450-$500
    Yamaha YDP-144 $1000-$1200
    Casio CTK-3500 $100-$150
    Casio PX-770 $600-$700

    As we can see, the prices vary quite a bit, even within each brand. These figures give a general sense of where each brand falls in terms of price.

    In the journey of choosing between Yamaha and Casio, one needs to evaluate carefully. It’s not just about whether you can stretch your budget to get a Yamaha piano or save some bucks with a Casio. What matters more is if the features and qualities fit your specific needs and preferences. Because the true value of a musical instrument is not in its price tag, but in the happiness and satisfaction it brings to its user.

    Conclusion

    When it comes to picking the perfect keyboard, it’s not a one-size-fits-all situation. Yamaha and Casio both have their strengths. Yamaha’s keyboards might be a bit pricier but they’re known for their superior sound quality and durability. On the other hand, Casio’s keyboards are the go-to for those on a budget, offering a balance of quality and affordability. It all boils down to what fits your personal play style, brand preference, and budget. So whether you’re leaning towards the rich tones of a Yamaha or the cost-effective reliability of a Casio, you’re sure to find a keyboard that hits all the right notes.