Blog

  • Master Treble Clef Notes Easily: Fun Exercises & Apps

    Master Treble Clef Notes Easily: Fun Exercises & Apps

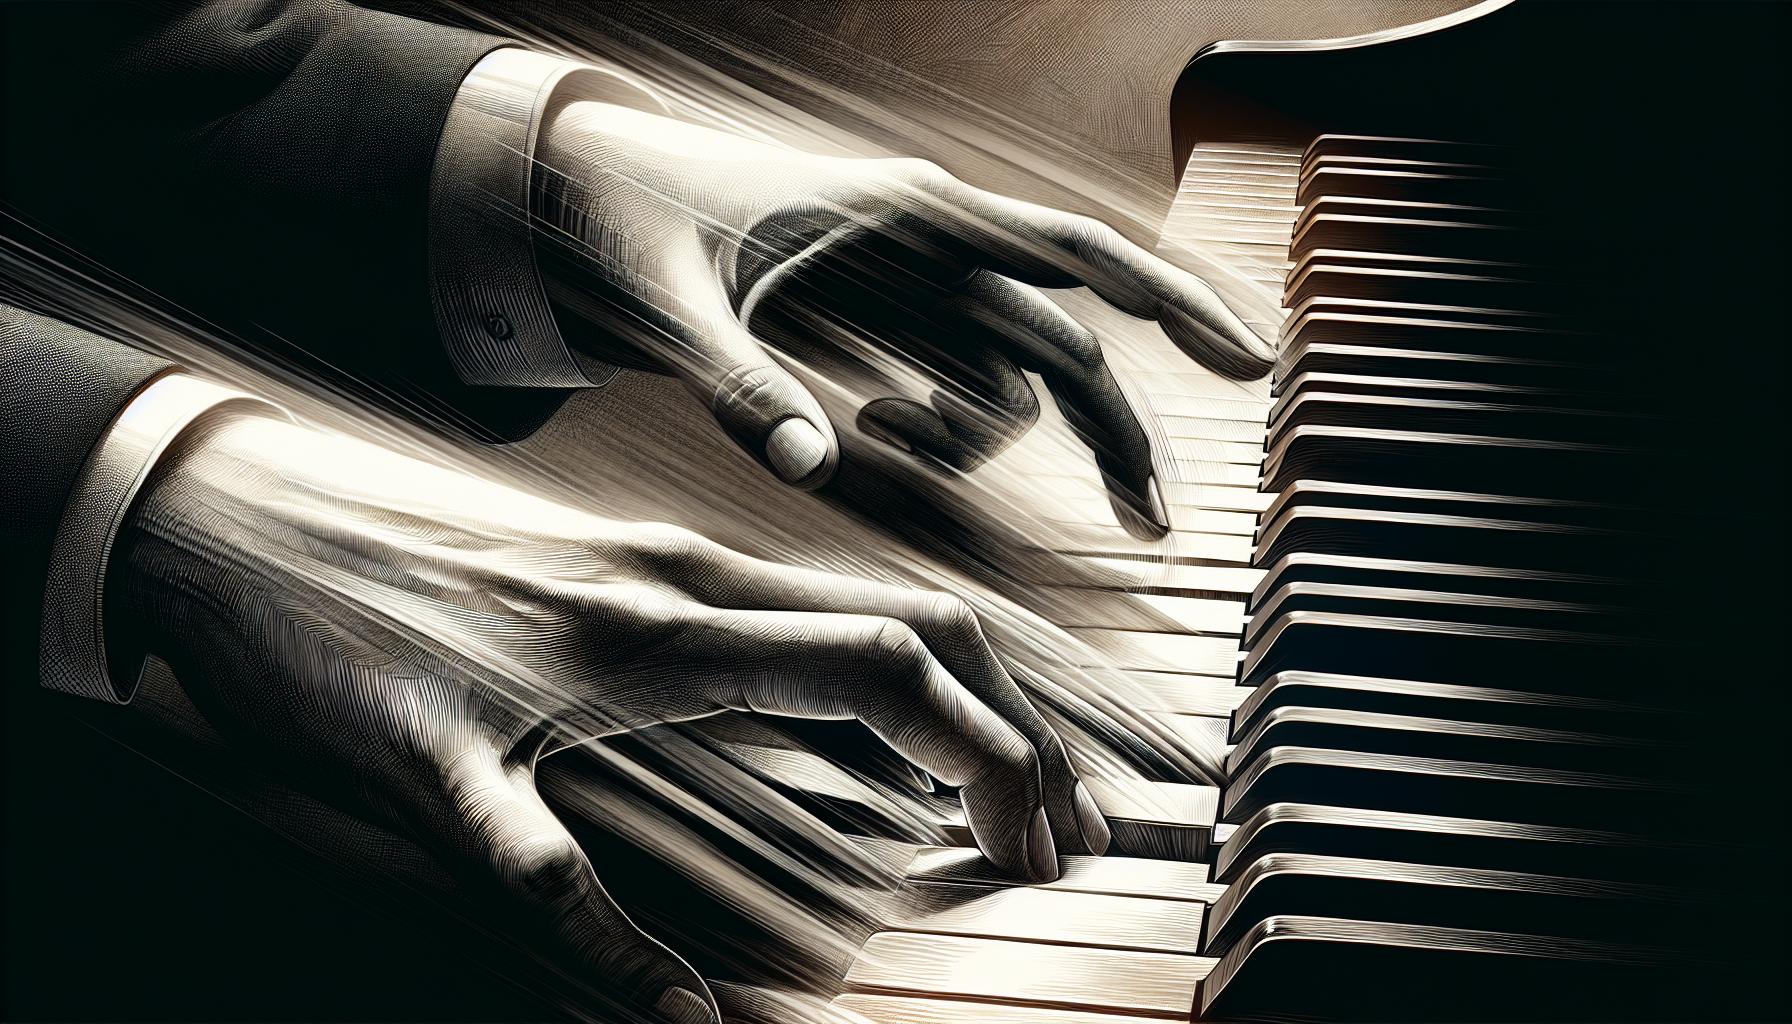
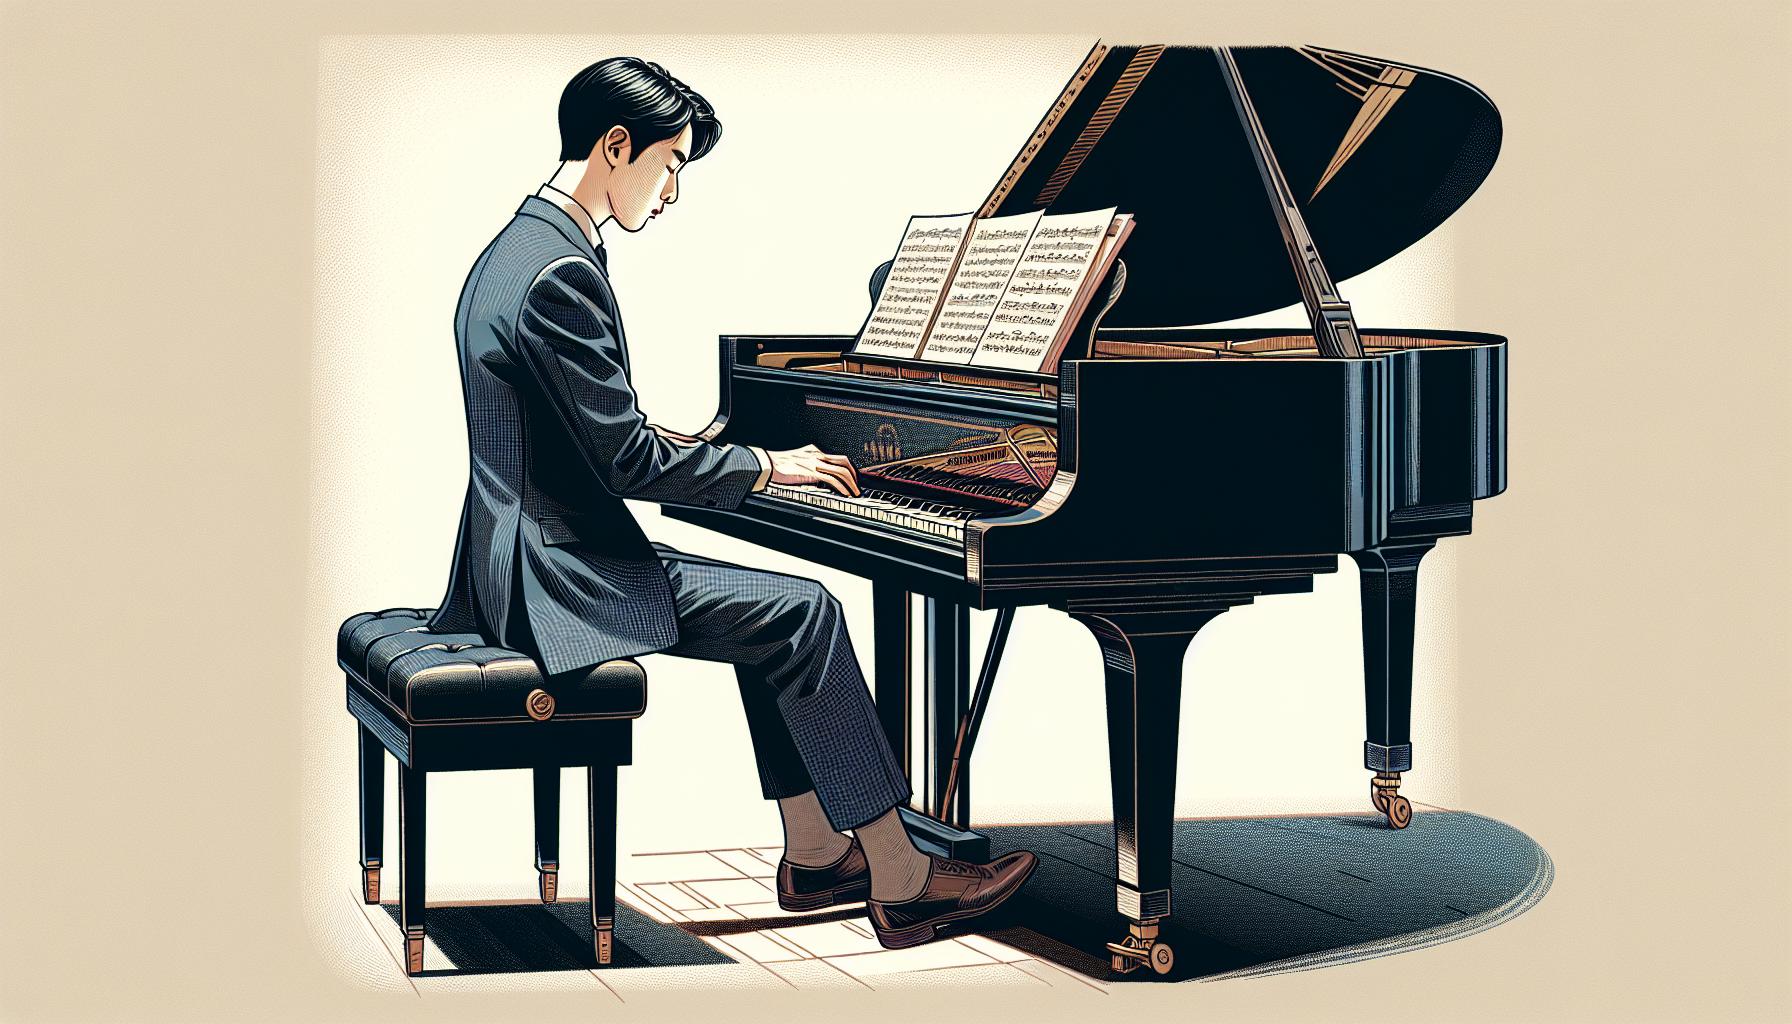
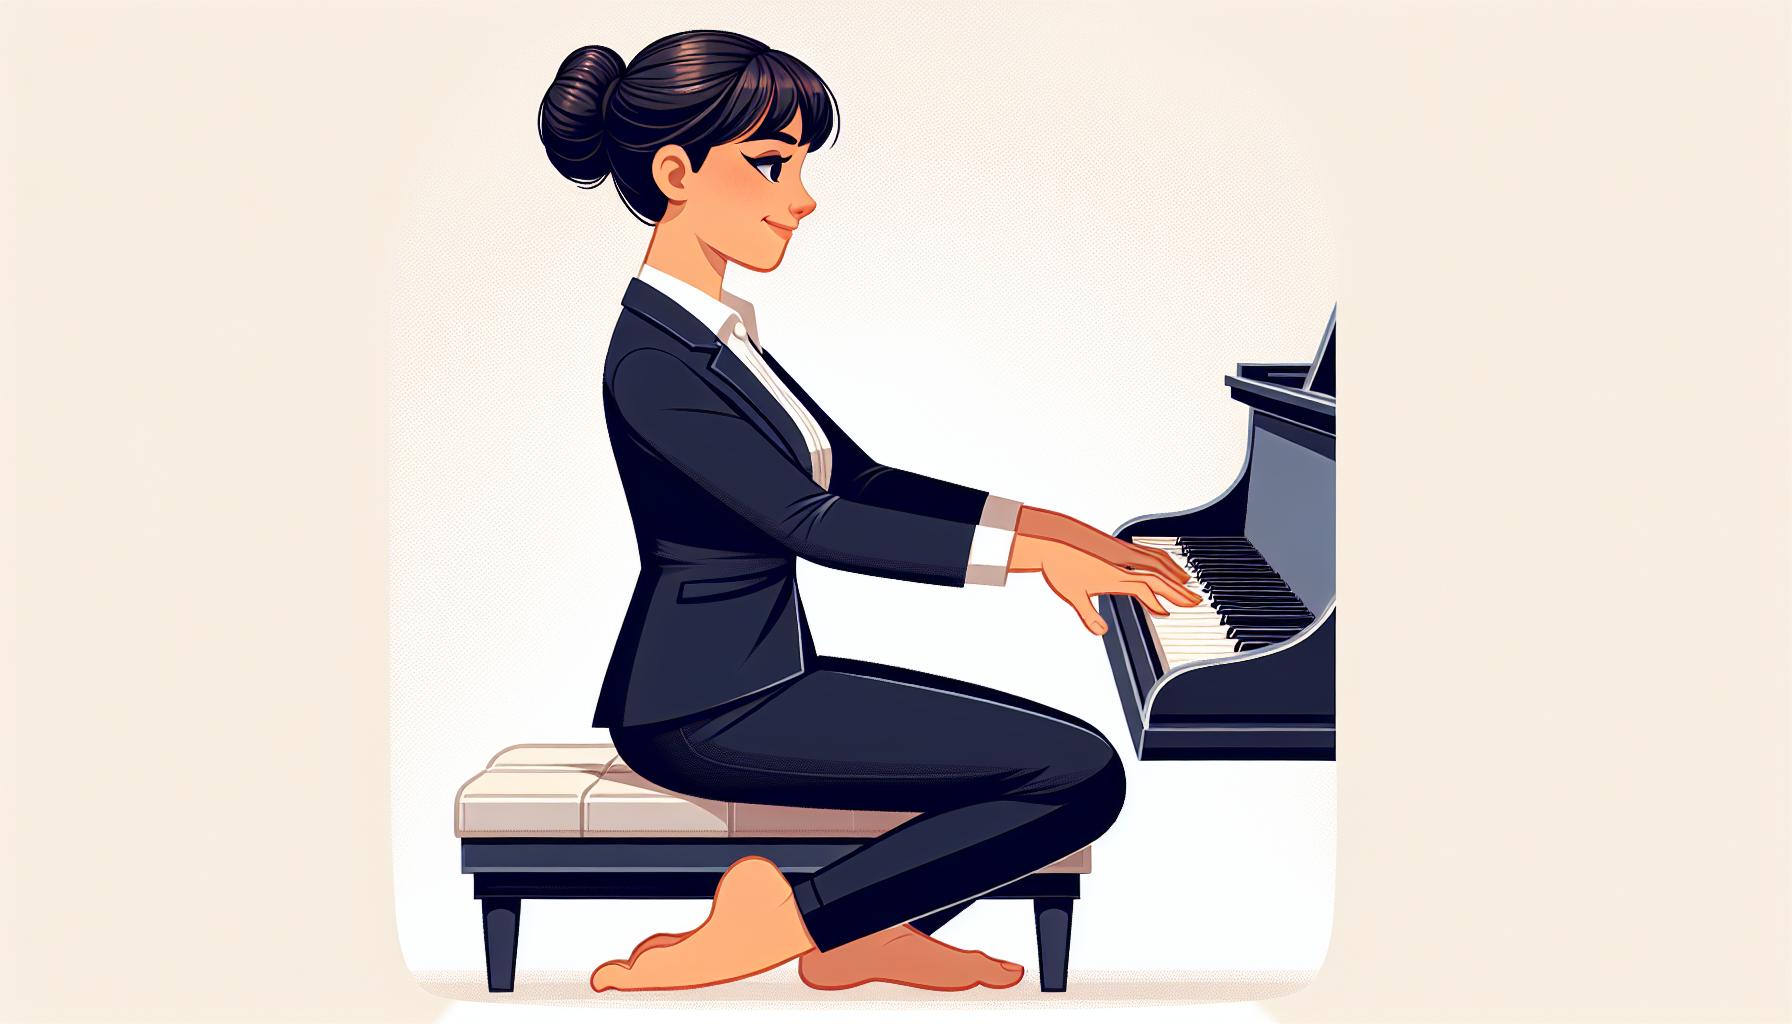
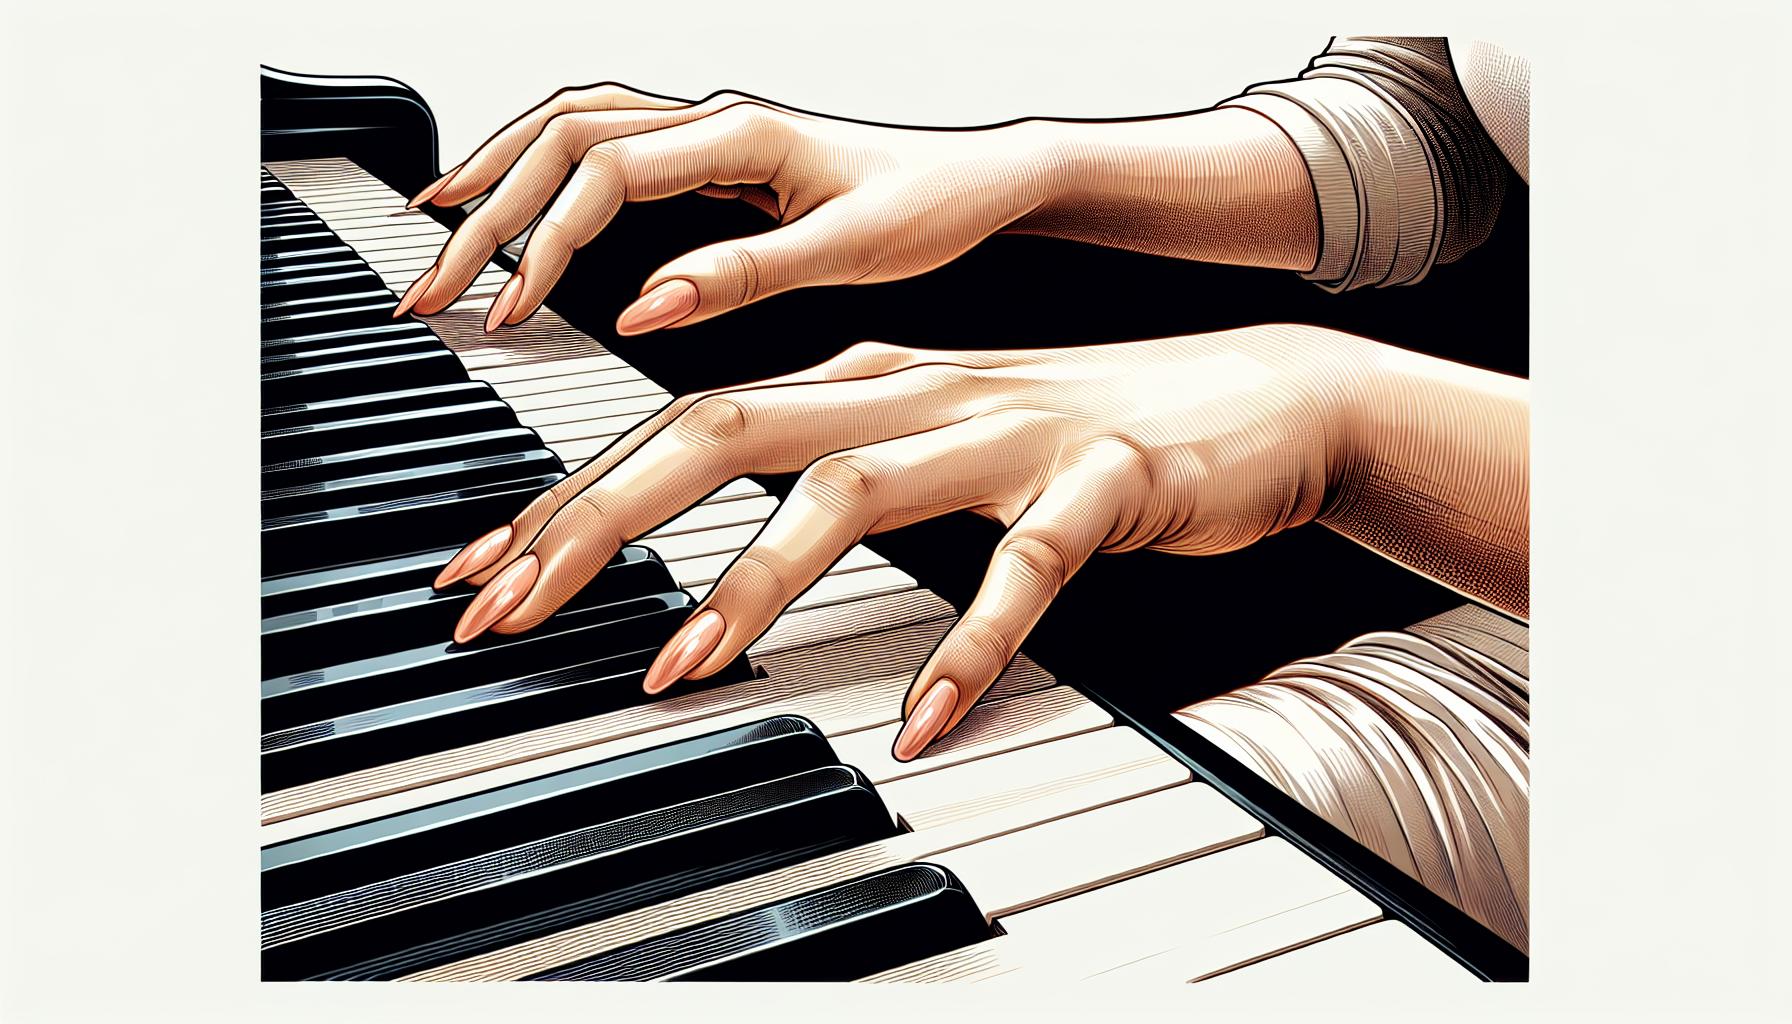
    Learning to read music can feel like cracking a secret code. For many budding musicians, the treble clef notes are where the adventure begins. But don’t worry, there’s no need to feel overwhelmed. With a few simple tricks up your sleeve, you’ll be reading those notes as effortlessly as you read your favorite book.

    Remembering the treble clef notes is all about finding fun and easy ways to anchor the information in your mind. Whether it’s catchy phrases, visual aids, or clever mnemonics, there’s a method that’ll work for you. Let’s dive into some of the most effective strategies to turn those daunting dots and lines into clear, musical messages.

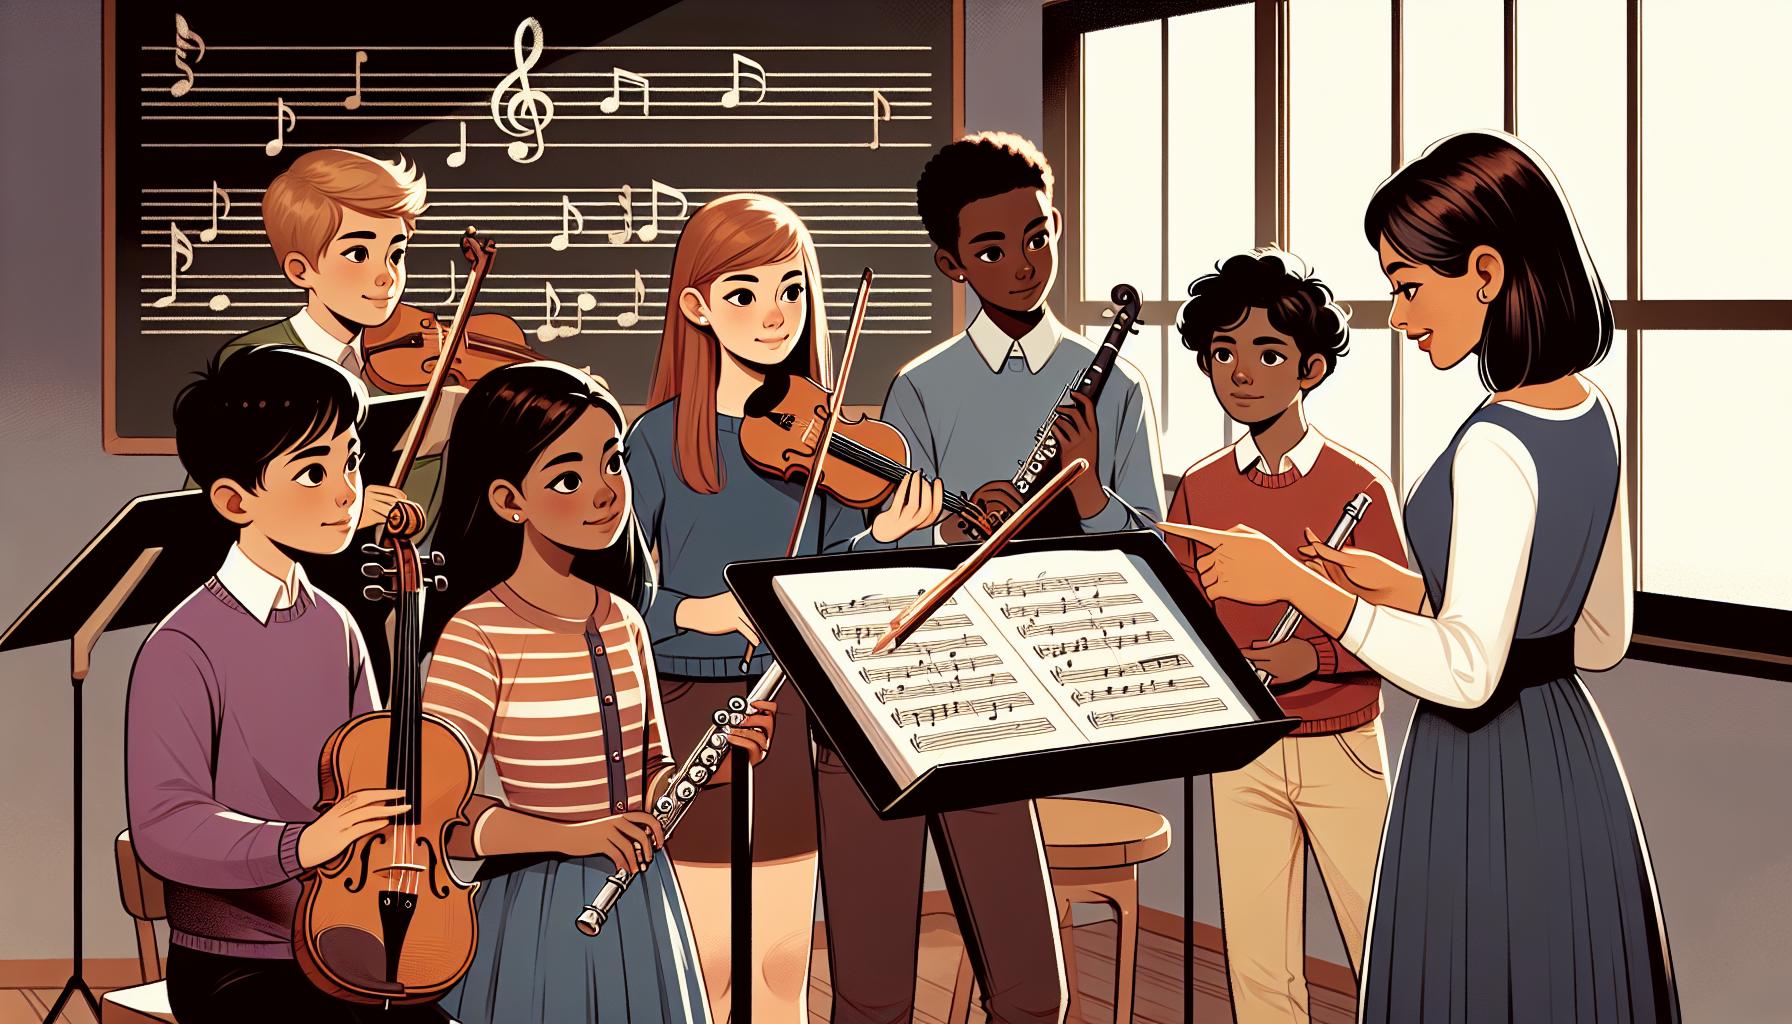
    Understanding the Treble Clef

    The treble clef, also known as the G clef, plays a pivotal role in music notation as it sets the reference point for the notes on the staff. Recognizing its significance is the first step toward mastering the art of reading music. The treble clef symbol curves around the G line on the staff, indicating that this line represents the note G.

    This notation system might seem daunting at first, but with a bit of practice, anyone can master it. The notes on the lines and spaces each carry specific pitches, and these are what musicians learn to recognize quickly to interpret music accurately.

    Breaking Down the Treble Clef Notes

    The notes on the lines from bottom to top are E, G, B, D, and F. A popular mnemonic to remember this order is “Every Good Boy Does Fine.” For the spaces, the notes spell out the word FACE, starting from the bottom. This simple yet effective method makes remembering the position of notes easier and reading music more accessible.

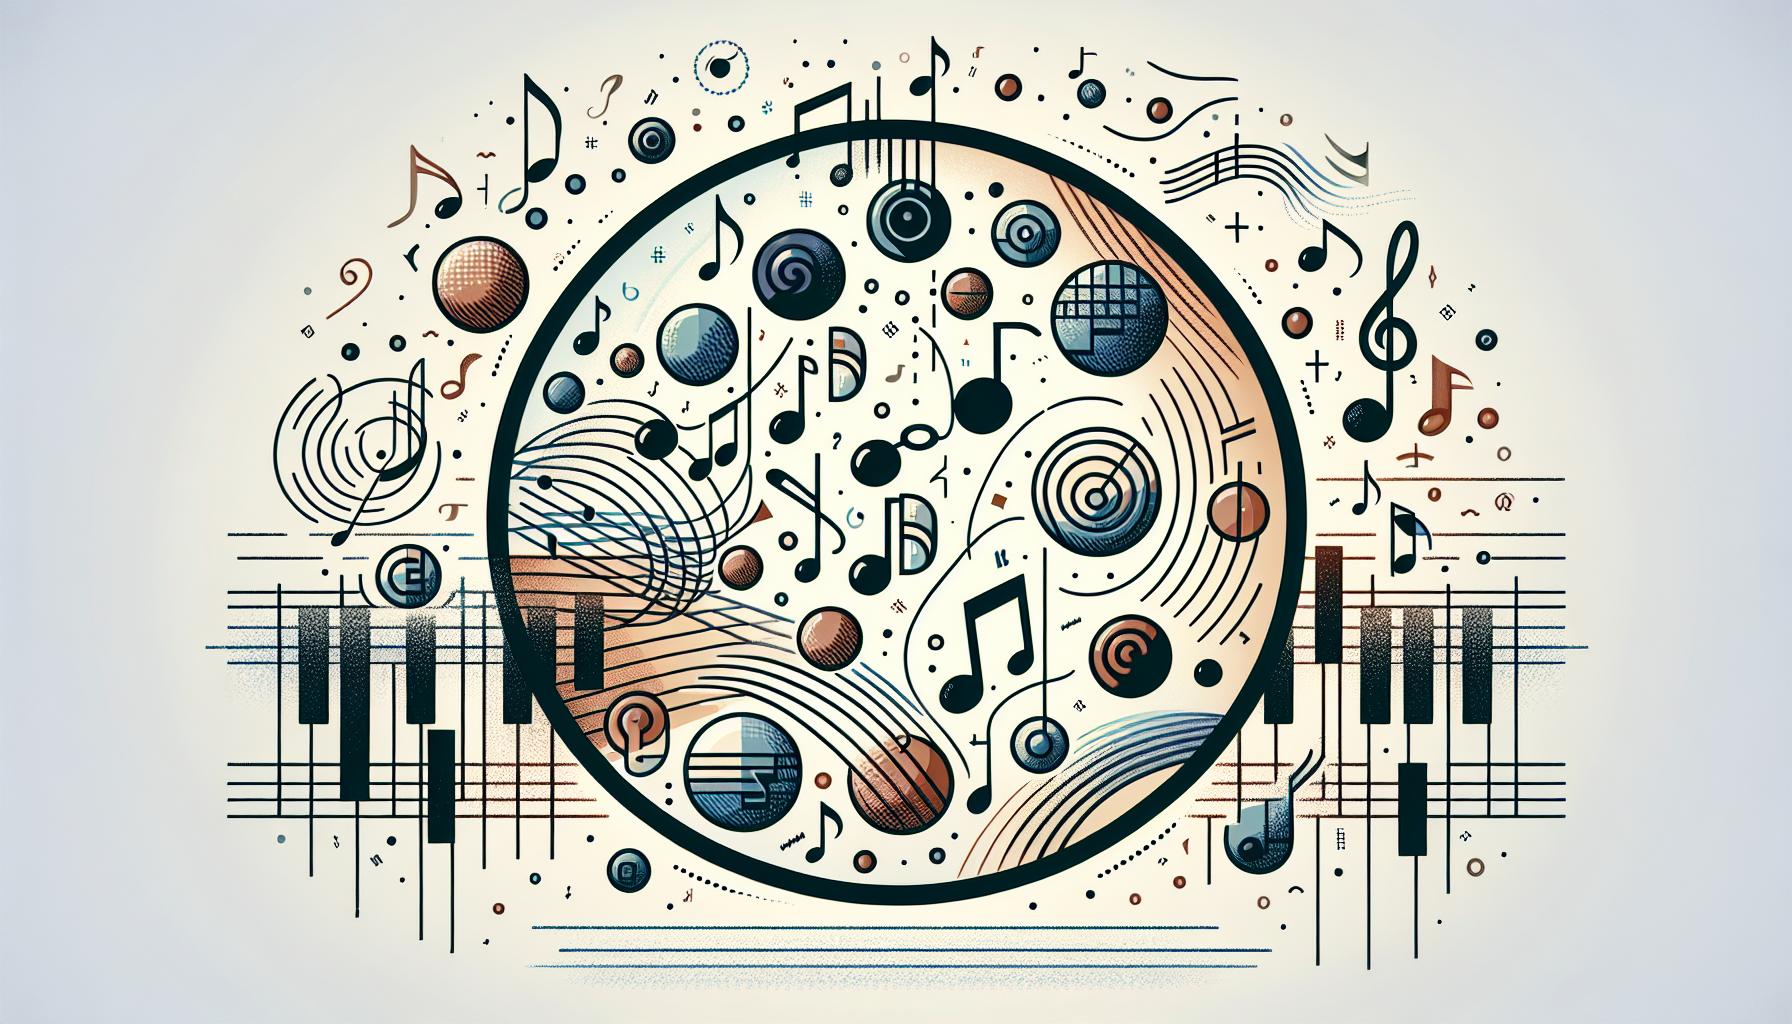
    Visual Aids and Mnemonics

    Visual aids, like diagrams and charts, can significantly enhance understanding and memorization of the treble clef notes. They offer a visual representation of where each note sits on the staff, making it easier to grasp the spatial relationships between notes. Furthermore, creating personal mnemonics or phrases can add an element of fun to the learning process, ensuring that the information sticks.

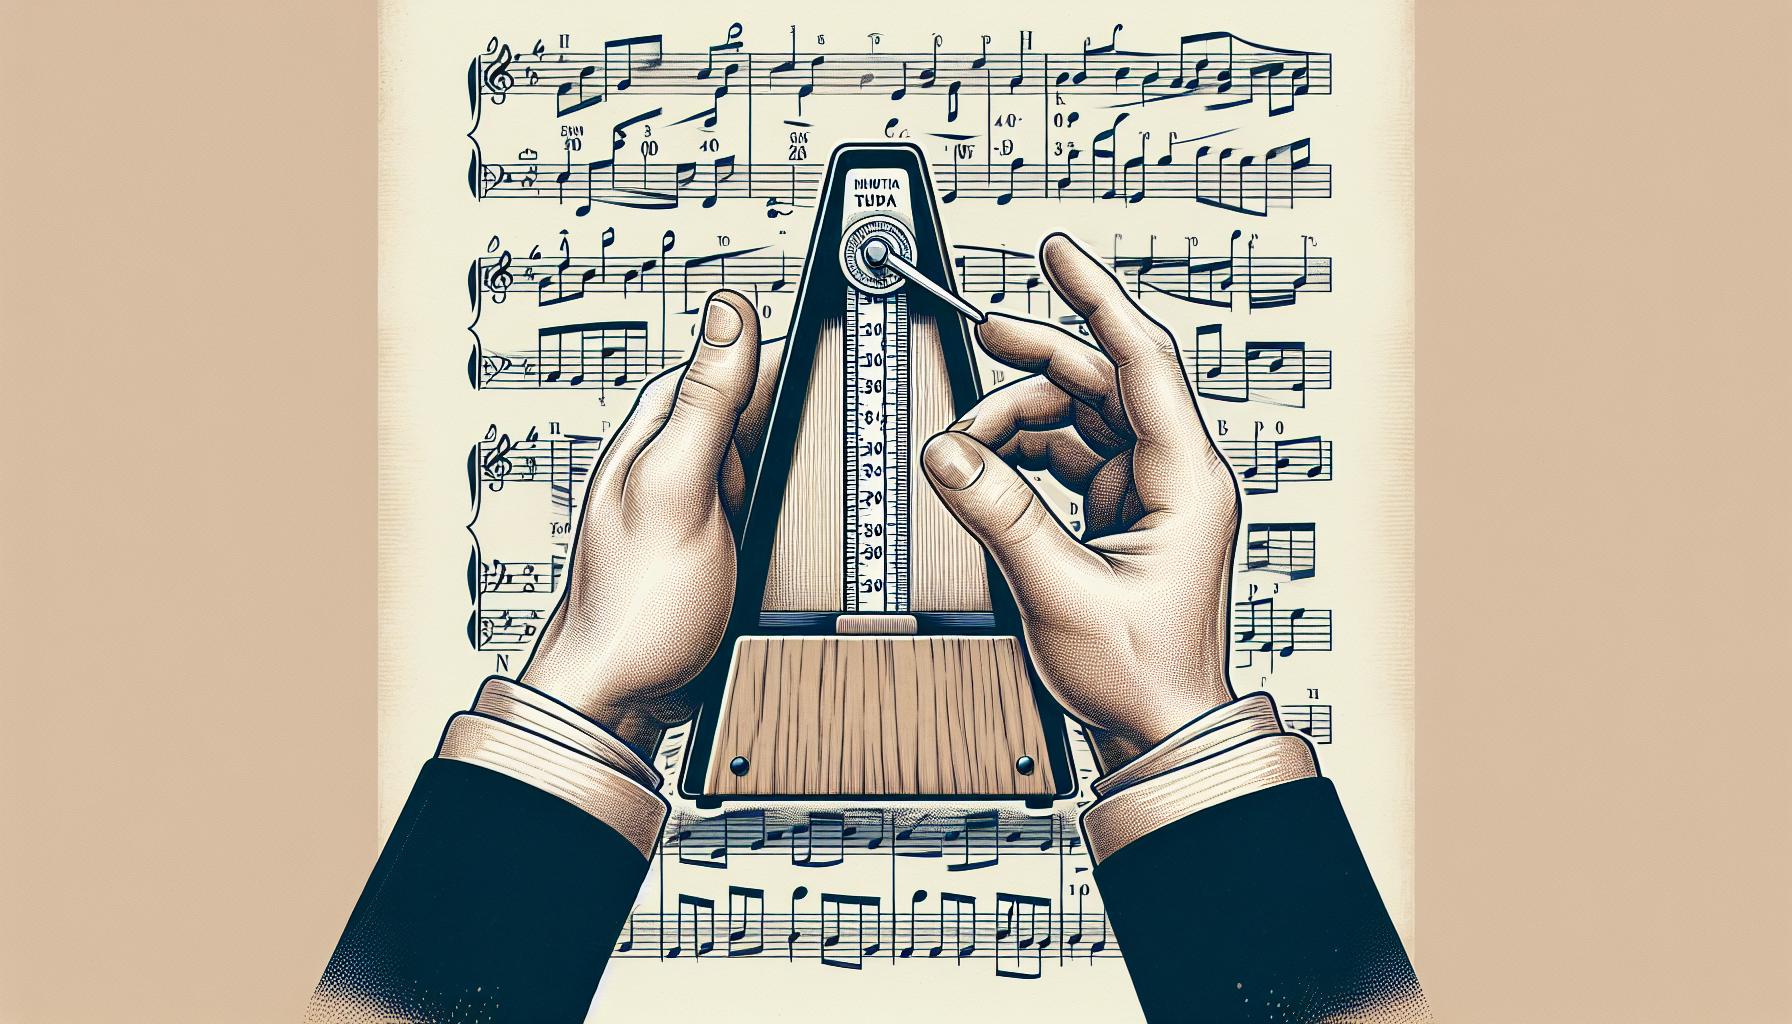
    The Role of Practice

    Like any skill, practice plays a vital role in learning to read the treble clef notes efficiently. Initially, it’s helpful to take time to study the staff and the placement of each note, using the mnemonics and visual aids as guides. Gradually, identifying the notes will become second nature, enhancing the ability to read music fluently.

    Incorporating flashcards, music apps, or even simple quizzes can transform practice sessions into engaging and interactive learning experiences. They not only reinforce memory but also add variety to avoid monotony.

    Applying Knowledge Through Music

    Once the basic understanding of the treble clef notes is established, applying this knowledge through actual music can be highly rewarding. Starting with simple melodies that use a limited range of notes can help solidify this new skill. As confidence grows, gradually expanding into more complex pieces will further develop music reading capabilities.

    Importance of Learning Treble Clef Notes

    The treble clef serves as a critical element in the world of music, marking the very beginning of one’s musical journey. When someone learns to interpret the symbols swirling on the lines and spaces of the treble clef, they unlock a universal language shared by musicians worldwide. This knowledge not only opens doors to various genres of music but also enables individuals to communicate their musical ideas effectively.

    At its core, mastering the treble clef notes nurtures a solid understanding of music theory. Knowing the precise location of each note is crucial for reading and writing music accurately. This foundational knowledge allows musicians to progress from simple melodies to intricate compositions with confidence. The ability to swiftly recognize notes on the treble clef enhances sight-reading skills, making it easier for musicians to explore new pieces independently.

    Beyond the technical necessity, there’s a beautiful reason to immerse oneself in the study of treble clef notes; it fosters a deeper connection with the music. Musicians often express that their appreciation for music flourishes as they delve more into its structure and notation. Learning the treble clef is not just about memorizing where the notes lie; it’s about understanding the harmony and rhythm that come to life when those notes are played in sequence.

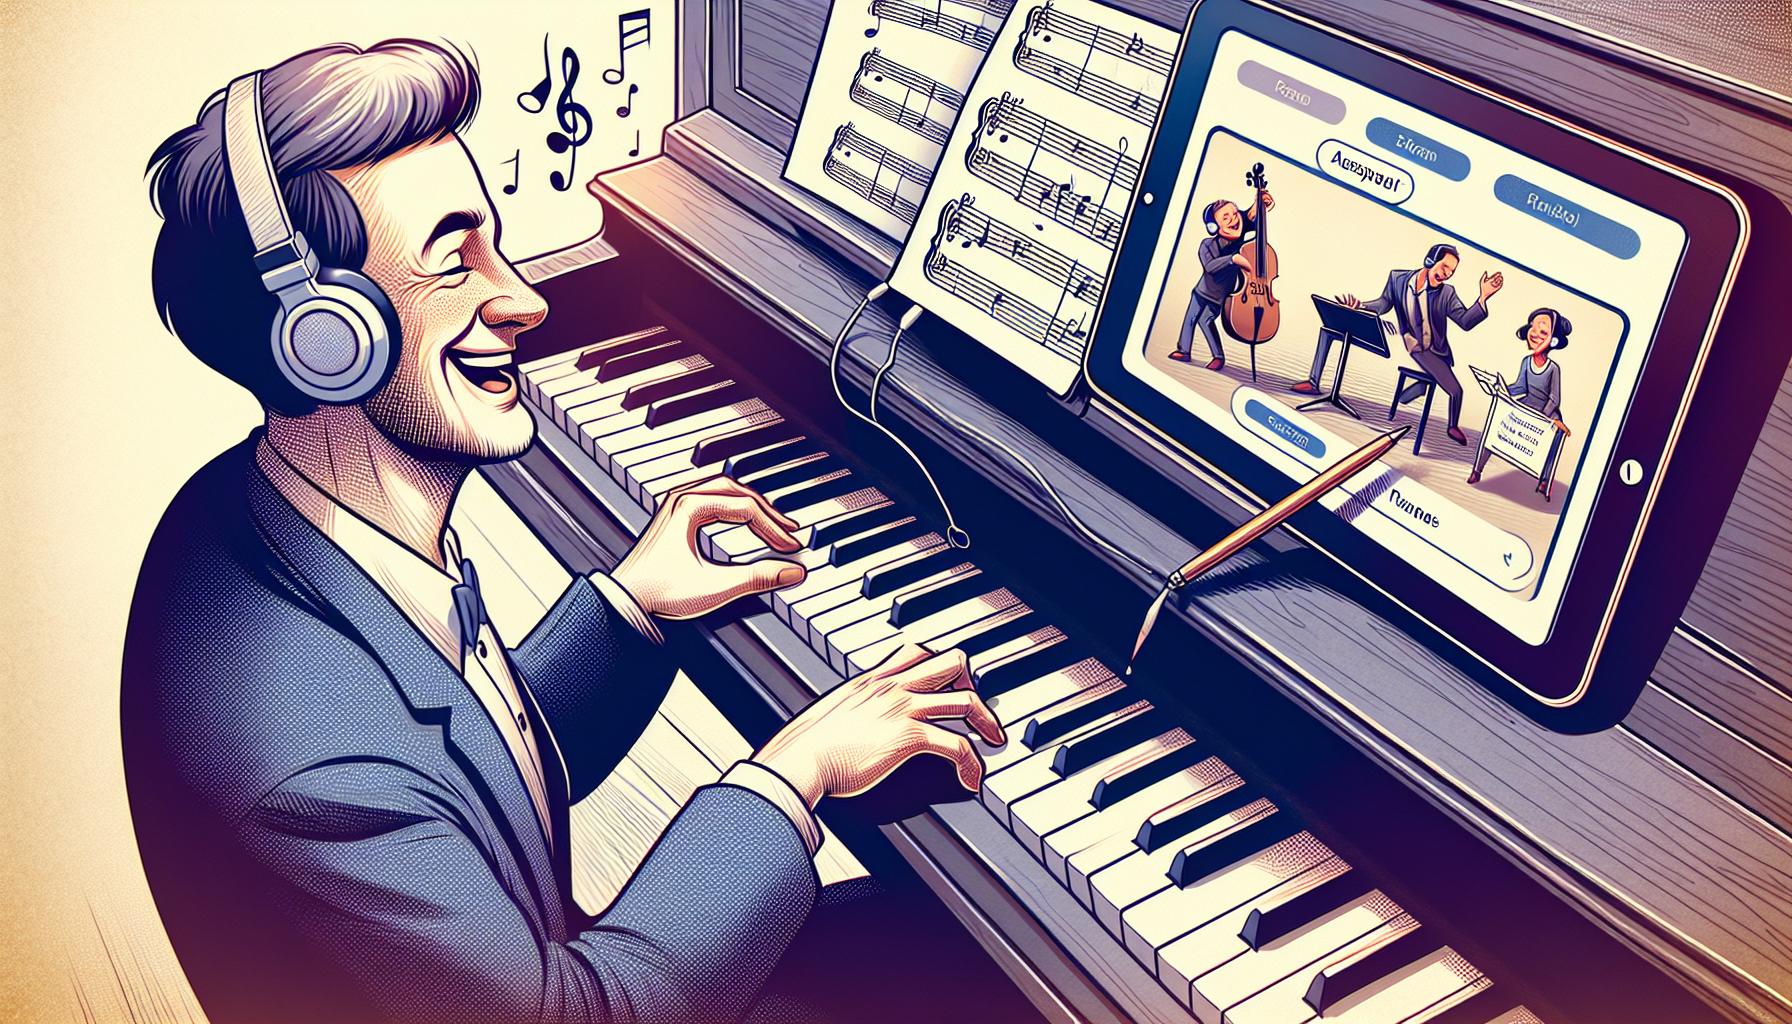
    Interactive tools play a pivotal role in this learning process. Incorporating flashcards, mobile apps, and online games into practice sessions can make the experience more engaging and enjoyable. These resources cater to different learning styles, ensuring that everyone can find a method that resonates with them.

    Musicians who invest time in mastering the treble clef often find that they’re not just learning to read notes—they’re learning to speak the language of music fluently. This opens up a world of possibilities, from composing original pieces to interpreting the works of famous composers with nuance and depth.

    Common Mnemonics for Remembering Treble Clef Notes

    Memorizing the notes on the treble clef can seem daunting at first. However, educators and musicians have long used mnemonic devices to simplify this task. A mnemonic is a tool that helps us remember information easier, often by associating that information with a memorable phrase or pattern. When it comes to music, mnemonics can turn the challenge of remembering notes into an engaging and effective learning activity.

    One of the most popular mnemonics for the lines of the treble clef spells out EGBDF. Music students often learn the phrase, “Every Good Boy Does Fine,” to remember the order of these notes from bottom to top. For the spaces, which spell out FACE, no phrase is necessary; it’s already a word! This simple wordplay makes it easier for learners to recall which notes fall where on the staff.

    Beyond these basics, creative educators sometimes develop unique phrases to align with their students’ interests or humor. For example:

    • “Every Great Band Draws Fans” could resonate more with those interested in contemporary music.
    • “Elephants Go Bouncing Down Freeways” might appeal to younger students with vivid imaginations.

    These mnemonic devices not only aid in memorization but also add a bit of fun to the learning process. It’s important, however, to remember that while mnemonics are incredibly helpful, practice is key to solidifying this knowledge. Incorporating games, flashcards, and writing exercises that use these mnemonics can further enhance a student’s ability to quickly and accurately identify treble clef notes.

    In addition to traditional mnemonics, technology offers new ways to learn. Mobile apps and online tools often integrate mnemonic-based games to teach musical notes. These platforms can provide immediate feedback and adapt to a user’s learning pace, making music education both accessible and personalized.

    By combining mnemonics with regular practice and modern learning tools, students can overcome initial hurdles in reading music. This approach not only simplifies the process of learning treble clef notes but also nurtures a lasting appreciation for music theory and literacy.

    Using Visual Aids to Memorize Treble Clef Notes

    Incorporating visual aids into the learning process can significantly boost a student’s ability to memorize treble clef notes. From flashcards to colorful charts, these tools use the power of imagery to imprint musical symbols in the mind. Many educators find that when students physically see the notes in relation to the treble clef, their understanding of music notation strengthens.

    Flashcards are a tried-and-true method, valuable for their portability and ease of use. They can feature the note on the staff on one side and the note name on the other, encouraging self-testing and repetition. Innovative teachers might also include mnemonic devices on the flashcards, combining visual learning with verbal memory aids.

    Another effective visual tool is the use of color-coded charts or diagrams. Assigning a distinct color to each note or line can help students visually differentiate between them. For example, coloring all “E” notes in red and “G” notes in blue helps students quickly recognize the note’s position on the staff. This method becomes especially helpful when learning sheet music, as the colors can serve as instant reminders of each note’s identity.

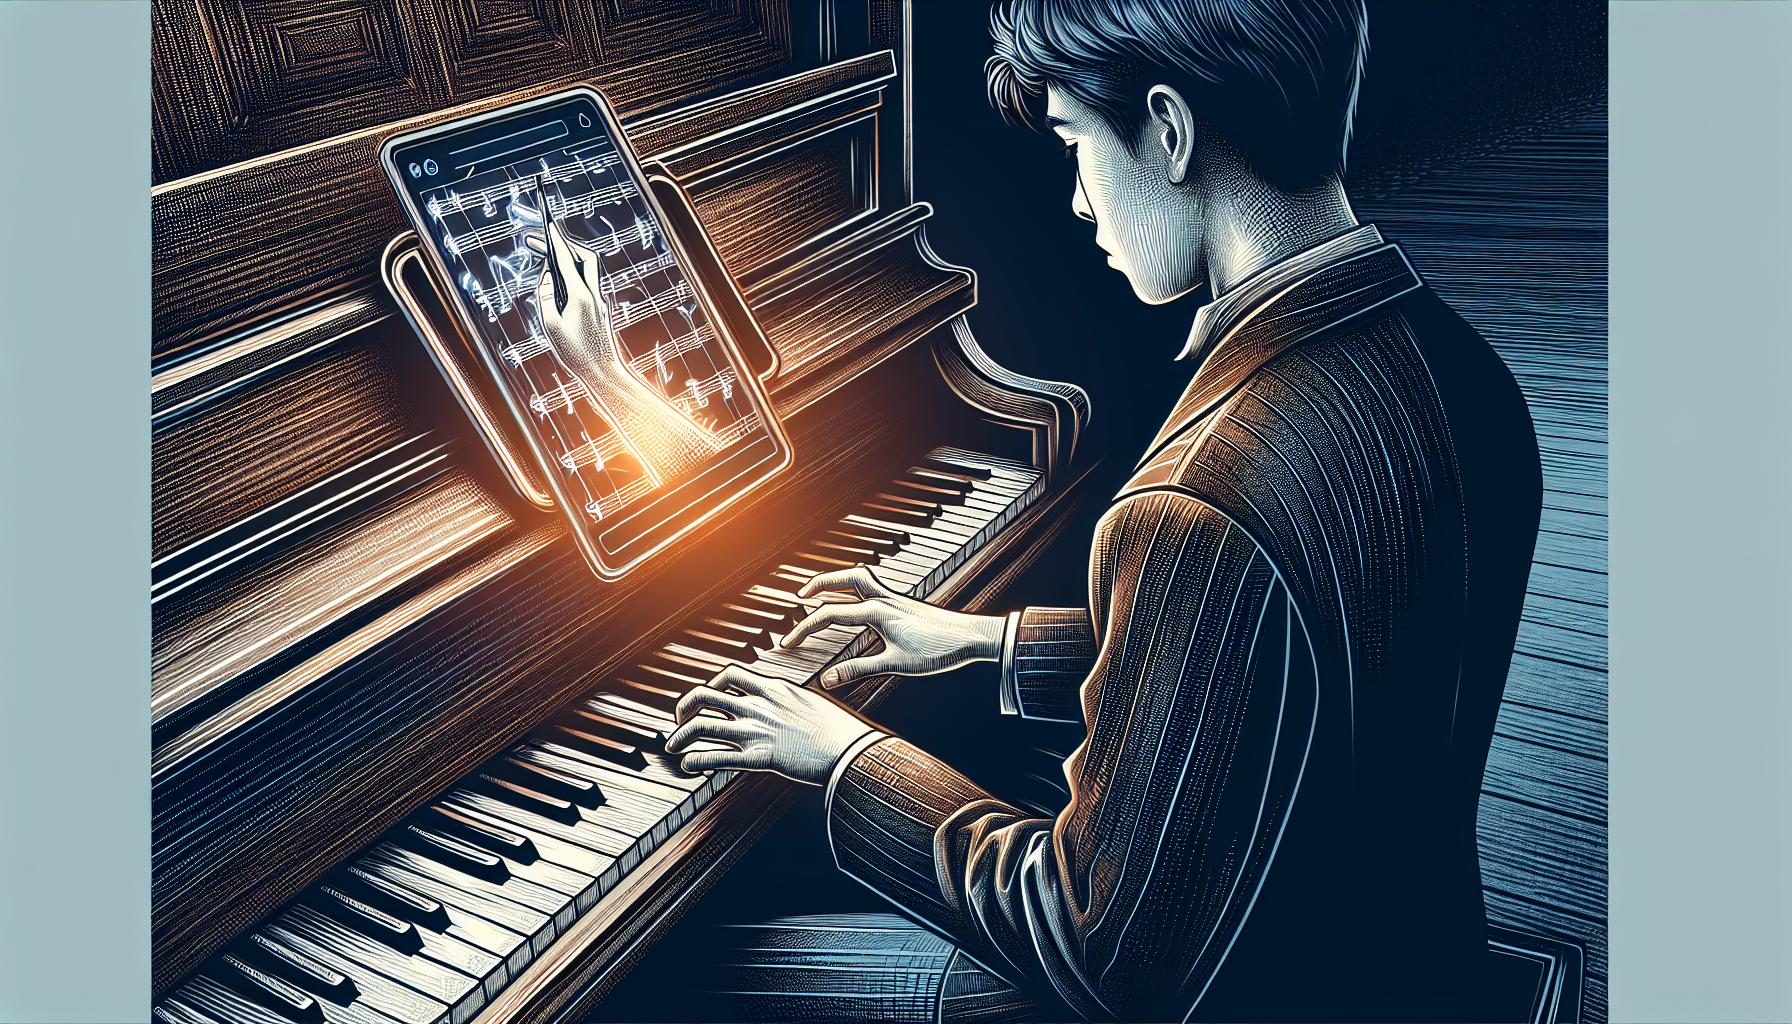
    Interactive software and apps take visual learning a step further by integrating engaging activities and games that adapt to a student’s learning pace. These programs often feature a virtual treble clef staff where notes move across the screen, and the student identifies them in real-time. Such technology not only reinforces note recognition but also keeps the learning process engaging and fun.

    Moreover, educators sometimes employ creative projects like crafting a model of the treble clef with notes positioned accurately. Students can use everyday items or craft materials to create these models, further reinforcing their understanding of note placement in a hands-on manner.

    Visual aids are not just supplementary tools; they are fundamental in making the study of music theory more accessible and enjoyable. By transforming abstract notes into tangible, colorful, and interactive experiences, students find themselves more engaged and motivated. The beauty of these visual tools lies in their versatility — they can be tailored to fit any learning style, ensuring that every student has the opportunity to excel in music theory.

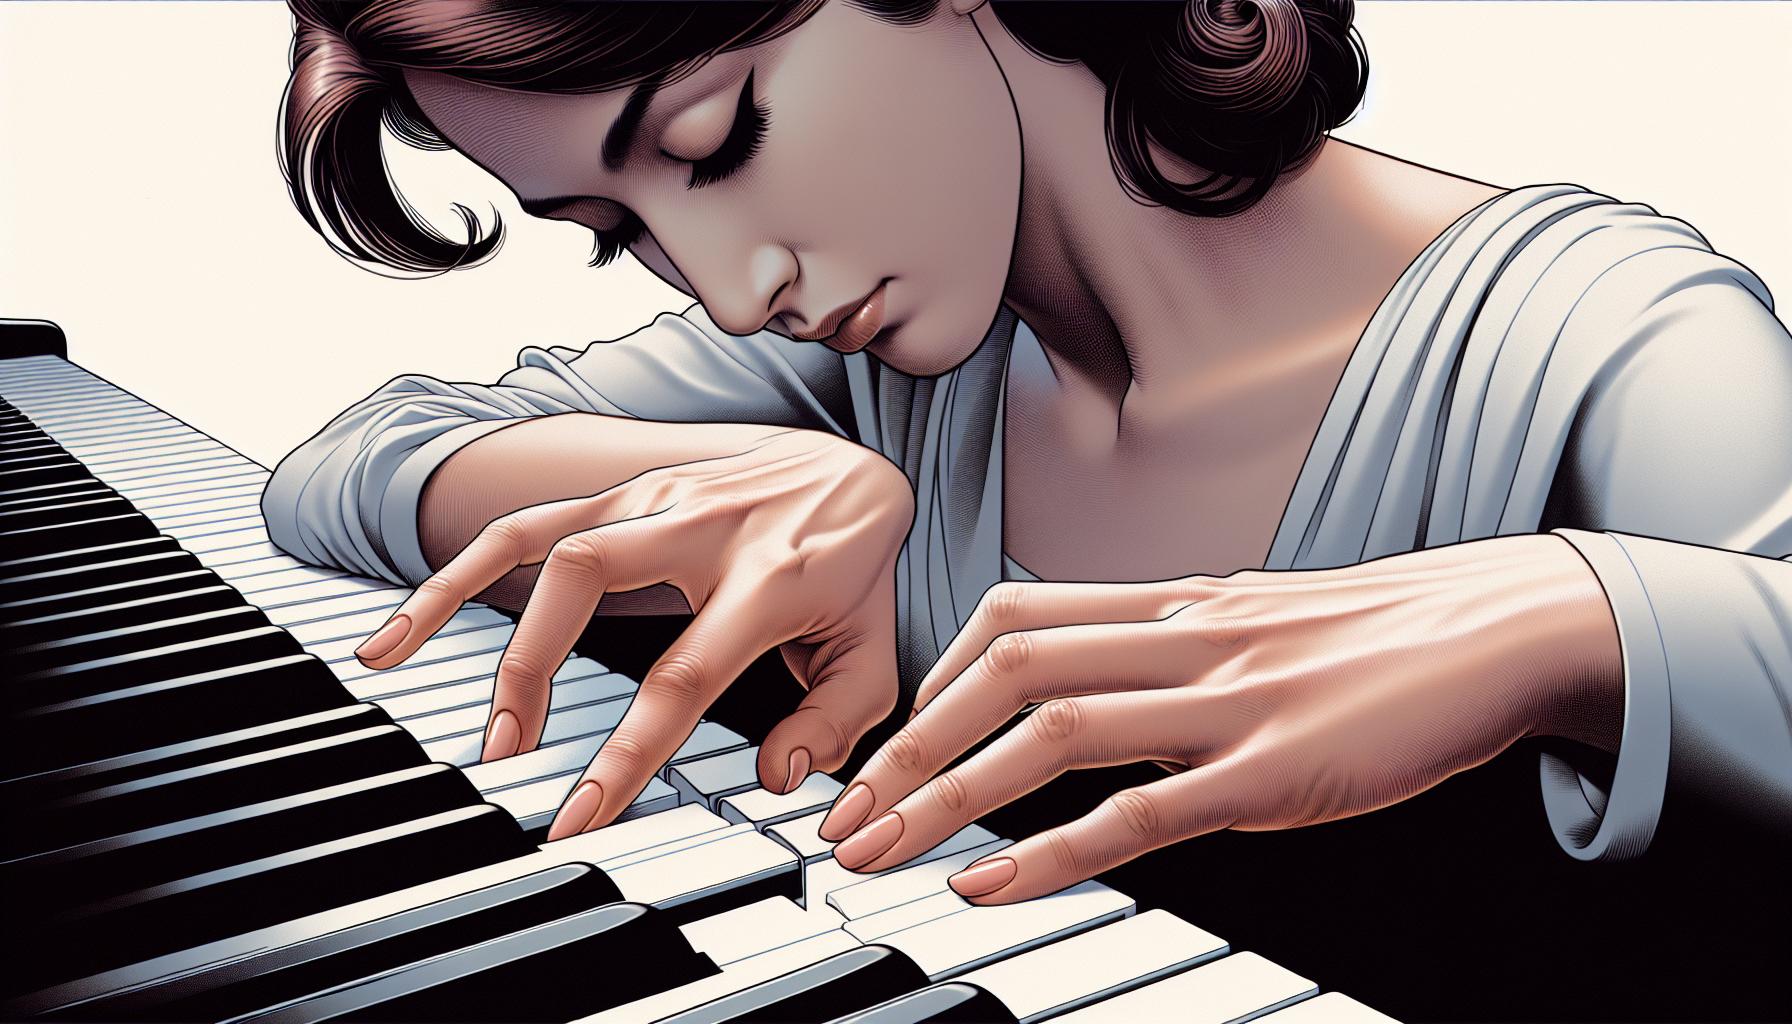
    Practice Exercises to Solidify Treble Clef Note Recognition

    Incorporating practice exercises into a student’s study routine is crucial for reinforcing treble clef note recognition. These activities not only consolidate what’s been learned visually but also add a fun and interactive dimension to the learning process.

    One highly effective exercise involves the use of note naming worksheets. Students are presented with sheets filled with various notes on the treble clef staff, and their task is to write the corresponding letter names beneath each note. Initially, students might find this challenging, but with consistent practice, they’ll quickly improve. Teachers can gradually increase the difficulty by adding ledger lines above and below the staff.

    Another exciting exercise is “Name That Tune.” Here, educators play simple melodies or note sequences on an instrument and ask students to identify and name the notes played. This auditory exercise enhances students’ ability to connect what they see on the page with the sounds they hear, solidifying their understanding of music notation.

    For a more interactive approach, incorporating music theory games and apps can be remarkably effective. Many of these digital tools are designed to make learning engaging, with progress trackers, levels, and challenges that motivate students to improve. Some popular apps include Staff Wars, Note Rush, and Music Theory Pro.

    Group activities also offer valuable practice opportunities. Teachers can organize students into small groups, where they’re given a set of notes to arrange into a melodious sequence or even compose a simple piece together. This not only enhances their understanding of treble clef notes but also fosters teamwork and creativity.

    To ensure steady progress, here’s a suggested practice routine:

    • Daily: Note naming worksheets for 10-15 minutes.
    • Twice a Week: “Name That Tune” or similar auditory recognition activities.
    • Weekly: Dedicate one session to interactive software or app-based learning.
    • Monthly: Engage in a group activity to create a melody or piece of music.
    Activity Type Frequency Duration
    Note Naming Worksheets Daily 10-15 minutes
    Auditory Recognition Twice a Week Varies
    App-Based Learning Weekly Session-based
    Group Activities Monthly Varies

    Conclusion

    Mastering the treble clef notes doesn’t have to be a solo journey filled with monotonous drills. By weaving together interactive exercises, innovative apps, and the power of group dynamics, students can transform their learning experience into an enjoyable adventure. It’s all about finding the right mix of technology, teamwork, and consistent practice. With the strategies outlined, learners are well-equipped to navigate the musical staves with confidence and creativity. Let’s make music theory a vibrant part of every musician’s journey.

  • Why Do My Piano Pieces Sound Uneven? Tips for Dynamic Mastery

    Why Do My Piano Pieces Sound Uneven? Tips for Dynamic Mastery

    Ever found yourself puzzled over why your piano pieces don’t quite sound the way they’re supposed to? You’re not alone. Many pianists, from beginners to the more experienced, often encounter the frustrating issue of unevenness in their playing. It’s like hitting a sour note in an otherwise beautiful melody.

    This unevenness can stem from a variety of factors, each affecting the fluidity and harmony of your performance. Whether it’s a matter of technique, rhythm, or emotional expression, pinpointing the exact cause can be a bit of a detective game. But don’t worry, understanding these challenges is the first step towards overcoming them.

    Incorrect Hand Positioning

    One of the key factors leading to unevenness in piano playing is Incorrect Hand Positioning. Many pianists, whether they’re just starting out or have years of experience under their belts, may inadvertently adopt hand positions that are not conducive to fluid and even playing. This misstep can significantly influence the quality of sound and the ease with which pianists navigate the keys.

    Improper hand positioning often stems from a lack of formal training or misinterpretation of piano playing techniques. It’s crucial for players to understand that their hands should be relaxed yet firm, allowing their fingers to glide over the keys with precision and control. When hands are positioned too stiffly or too loosely, it leads to uneven pressure on the keys, which in turn, results in a performance that lacks consistency and smoothness.

    To correct this issue, pianists should focus on several key aspects:

    • Finger Strength and Independence: Building up finger strength through exercises and scales can improve overall control.
    • Wrist Flexibility: A flexible wrist aids in smoother transitions and more nuanced playing.
    • Proper Arch: Maintaining a natural arch in the hand helps in exerting even pressure across all fingers.

    Practicing with these points in mind ensures that each note is played with the right amount of force, thereby reducing unevenness. Additionally, it’s beneficial to regularly consult with a piano teacher or an experienced player who can provide personalized advice and adjustments to hand positioning.

    Beyond the physiologic aspects, emotional expression plays a significant role in how pianists position their hands. Players often adjust their hand positioning unconsciously in an effort to convey certain emotions through their music. While this is an important aspect of musical expression, it’s essential to strike a balance. Excessive force or tension can hinder performance rather than enhance it.

    Recording oneself while playing and analyzing the footage is a practical way to observe hand movements and identify any inconsistencies or incorrect positioning. This self-assessment, coupled with constructive feedback from mentors, can lead to substantial improvements.

    Addressing incorrect hand positioning is a multi-faceted process involving physical adjustments, emotional awareness, and continued learning. By dedicating time to refining hand positioning, pianists can significantly improve the evenness of their performances, leading to more harmonious and expressive renditions of piano pieces.

    Uneven Key Pressures

    When pianists notice their pieces sounding uneven, one major culprit often flies under the radar: Uneven Key Pressures. This issue isn’t just about hitting the wrong notes; it’s about how the same notes can sound drastically different due to the variance in the force used to press them. This complexity adds an unwanted layer of inconsistency to performances that can frustrate even the most diligent players.

    So, why does this happen? First off, each finger possesses its own natural strength and dexterity. The thumb and middle finger are typically stronger, sometimes leading to them dominating the lighter, more nuanced touches required from the weaker fingers. Consequently, when transitioning between fingers, the sound can leap from soft to loud unexpectedly.

    Moreover, uneven key pressures can also stem from a lack of coordination and muscle memory. Playing the piano isn’t just about hitting the right notes; it’s about doing so with the right amount of force and at the right time. Developing this nuanced control takes practice, and even experienced pianists can find themselves slipping if they’re not careful.

    Solutions for Improving Key Pressure Evenness

    Thankfully, there are strategies to overcome this challenge:

    • Practice with Dynamics: Regularly switch between playing softly (piano) and loudly (forte) to gain better control over your finger pressure. Begin with simple scales before moving on to more complex pieces.
    • Finger Exercises: Strengthening weaker fingers can equalize the pressure they apply. Light exercises, not just on the piano but also using tools like grip strengtheners, can be very beneficial.
    • Slow Practice: Playing slowly allows for more deliberate movements and a higher awareness of how much pressure is being applied with each finger.
    • Digital Tools: Some digital pianos and software can provide visual feedback on key pressure, offering insights into how evenly you’re playing.

    Improving key pressure evenness also requires mental focus. Being consistently aware of how each finger is moving not only fosters stronger neural connections for better muscle memory but also enhances the musicality of performances by ensuring that each note sounds as it should.

    Musicians should also engage in regular recording sessions of their practice and performances. Listening to playbacks can reveal nuances in key pressure that might not be noticeable in the moment but are glaring upon review.

    Lack of Proper Finger Independence

    One of the core issues causing piano pieces to sound uneven lies in the Lack of Proper Finger Independence. When pianists struggle to control each finger independently, it results in certain notes overpowering others or being played with inconsistent timing. This not only affects the fluidity of play but also the overall harmony of the piece.

    Finger independence is crucial for pianists because it allows them to express the music exactly as intended, with each note receiving its due attention and pressure. Without this ability, melodies can become muddled and the contrasts between different sections of a piece can blur.

    How to Improve Finger Independence

    Improving finger independence is a gradual process that involves several strategies:

    • Daily finger exercises: Simple exercises, focused on moving each finger individually while keeping the rest stationary, can significantly enhance control and dexterity.
    • Slow practice: Playing pieces slowly allows pianists to focus on the movement and role of each finger, fostering better independence.
    • Scales and arpeggios: Regularly practicing scales and arpeggios is not only beneficial for finger strength but also for independence. It forces the fingers to work individually within a structured musical context.
    • Practice with different dynamics: Attempting to play the same piece or exercise with varying dynamics (loud, soft, crescendo, decrescendo) trains the fingers to apply different levels of pressure independently of each other.

    The Role of Mental Focus in Developing Finger Independence

    Mental focus plays a pivotal role in developing finger independence. Pianists must be acutely aware of each finger’s movement, ensuring that no finger is moving unintentionally or remaining too rigid. Visualizing the role of each finger before playing can also help in executing pieces more fluidly.

    In addition to physical exercises, pianists should engage in mental practices. Imagining playing a piece and focusing on the movement of each finger can create a mental map, facilitating greater control when actually playing the instrument.

    Utilizing Technology for Feedback

    Advancements in digital tools offer pianists novel ways to assess and improve their finger independence. Apps that track key pressure and timing can provide valuable feedback, allowing pianists to pinpoint where their finger control is lacking. These tools can complement traditional practice methods, offering a more comprehensive approach to overcoming uneven playing caused by insufficient finger independence.

    Inconsistent Tempo Control

    When practicing piano, it’s not uncommon to encounter issues with maintaining a steady tempo across different pieces, or even within a single piece. This challenge, known as inconsistent tempo control, can significantly affect the overall sound and coherence of the music. But why does this happen, and how can it be addressed?

    One of the core reasons for inconsistent tempo control is a lack of metronomic practice. Many pianists, especially beginners, might not realize the importance of integrating a metronome into their practice routine. Playing with a metronome not only helps in keeping a consistent pace but also improves rhythmic accuracy and timing.

    Another factor contributing to uneven tempo is the player’s emotional state. It’s not unusual for pianists to speed up through passages that excite them or slow down in more reflective sections without even realizing it. While expression is a key aspect of musical performance, allowing emotions to dictate tempo can lead to a lack of uniformity in the piece overall.

    Practicing with a metronome addresses these issues by providing an external, consistent beat to follow. However, using a metronome effectively requires more than simply setting it and starting to play. Pianists should:

    • Start at a slower tempo than the piece’s intended speed. This allows for a focus on precision and evenness in timing before building up to performance tempo.
    • Break the piece into sections. Working on small parts at a time makes it easier to identify and correct tempo inconsistencies.
    • Gradually increase the metronome speed as accuracy and confidence improve. This approach helps in developing muscle memory for the correct tempo.

    But metronomic practice isn’t the only strategy for overcoming tempo inconsistencies. Developing a strong sense of internal timing is equally important. This can be achieved through:

    • Rhythmic solfège exercises: Singing rhythms using solfège (do, re, mi, etc.) improves internal timekeeping and rhythmic precision.
    • Clapping and tapping rhythms: Before playing a piece on the piano, clapping or tapping out its rhythm can help internalize the tempo and flow.
    • Recording practice sessions: Listening back to one’s own performances can highlight tempo fluctuations that might not be obvious in the moment.

    Insufficient Dynamic Variations

    When playing the piano, the expression of music involves much more than just hitting the right notes at the correct timing. Dynamic variations, which refer to changes in volume and intensity, play a crucial role in bringing a piece to life. Without these variations, piano pieces often sound flat, monotonous, and, simply put, uneven. It’s the difference between reading a story in a monotone voice and telling it with passion and inflection.

    Many pianists overlook the importance of dynamics either because they’re mainly focused on getting the notes and rhythms correct or because they haven’t yet learned to control the pressure on the keys to produce a wide range of volumes. Dynamics aren’t just instructions to play loudly or softly; they’re an integral part of the musical language that conveys emotions and shapes the piece’s narrative.

    Common Causes of Insufficient Dynamic Control

    • Lack of Awareness: Sometimes, pianists are not fully aware of the dynamic markings in the sheet music, especially when concentrating hard on finger positioning and note accuracy.
    • Technical Limitations: Beginners or those who have not developed finger strength and independence may find it challenging to play with varied dynamics, leading to a more uniform and less expressive performance.
    • Inadequate Instrument Maintenance: The condition of the piano can also affect dynamic range. An out-of-tune piano or one with mechanical issues might not respond well to attempts at dynamic variation.
    • Emotional Connection: The emotional connection to the piece plays a significant role. If a pianist is not emotionally engaged with the music, it can lead to a less dynamic and more mechanical performance.

    Strategies to Improve Dynamic Variation

    To create a more expressive performance, pianists need to focus on improving their dynamic range. Here are some effective strategies:

    • Study the Score: Before starting to play, carefully study the score to understand the composer’s dynamic markings. This preparation helps in internalizing the intended dynamic changes.
    • Focus on Finger Strength: Engaging in exercises designed to improve finger strength and independence can greatly enhance a pianist’s ability to control dynamics.
    • Listen and Emulate: Listening to recordings of professional pianists and trying to emulate their dynamic range can provide valuable insights into how dynamics can shape a piece.
    • Record and Analyze: Recording practice sessions and listening back to them can help pianists become more aware of their dynamic range and identify areas for improvement.

    Conclusion

    Mastering dynamic variation is the key to transforming uneven piano pieces into expressive performances. By paying closer attention to the music’s emotional depth and technical demands, pianists can breathe new life into their playing. It’s not just about hitting the right notes; it’s about conveying the story behind them. With dedication to practice, a keen ear for detail, and a deeper connection to the music, anyone can elevate their piano skills. Remember, the journey to dynamic mastery is a rewarding one, filled with discoveries and improvements at every turn. Keep exploring, listening, and experimenting, and watch as your performances grow richer and more compelling.

  • 5 Tech Tips to Make Piano Practice Fun & Efficient

    5 Tech Tips to Make Piano Practice Fun & Efficient

    For many, the thought of sitting down for piano practice conjures up images of tedious repetition and the monotonous ticking of a metronome. But what if we told you it doesn’t have to be this way? That’s right, piano practice can actually be a blast!

    By infusing creativity, games, and a dash of modern technology, students can transform their practice sessions from mundane to marvelous. Let’s dive into some innovative strategies that make learning scales and mastering compositions something to look forward to, not dread.

    Set Clear Goals

    Establishing clear, achievable goals is a fundamental step toward making piano practice more enjoyable. Instead of approaching practice sessions with a vague sense of what they want to accomplish, students should outline specific objectives for each session. This method transforms a potentially overwhelming task into a series of manageable, rewarding steps.

    First, it’s important for learners to differentiate between short-term and long-term goals. Short-term goals might include mastering a specific scale or section of a piece, while long-term goals could involve perfecting an entire song or preparing for a recital. By setting both types of goals, students can enjoy the satisfaction of achieving immediate milestones while also working towards more substantial accomplishments.

    Utilizing SMART Goals

    To ensure goals are effective, they should follow the SMART criteria: Specific, Measurable, Achievable, Relevant, and Time-bound. Here’s how it applies to piano practice:

    • Specific: Goals should be as concise as possible. For example, “Learn the C Major scale hands together at 60 bpm” is more specific than “Get better at scales.”
    • Measurable: Progress needs to be quantifiable. Achieving a certain tempo or mastering a set number of measures are examples of measurable objectives.
    • Achievable: Goals must be realistic. Taking on too much too quickly can lead to frustration.
    • Relevant: Objectives should be directly related to the student’s overall musical aspirations.
    • Time-bound: Setting deadlines encourages consistent practice and keeps motivation high.

    Incorporating SMART goals into practice sessions encourages students to stay focused and track their progress. Celebrating each achievement, no matter how small, boosts confidence and reinforces the notion that practicing piano isn’t just about the end result—it’s about the steps along the journey.

    Regular Review and Adjustment

    Goals are not set in stone; they’re meant to evolve as students grow and their abilities improve. Regularly reviewing goals allows students to adjust their plan based on their current progress and changing interests. This flexibility keeps practice sessions fresh and aligned with the learner’s evolving skill level and musical tastes.

    Learners might find it helpful to keep a practice journal where they can jot down their goals, achievements, and reflections. Not only does this provide a sense of accomplishment over time, but it also offers valuable insights into what works best for them. They’ll discover patterns in their learning style, helping them tailor future goals to be even more effective.

    Gamify Your Practice

    Turning piano practice into a game is an innovative way to add excitement and fun to the learning process. This approach, known as gamification, leverages the elements of game playing to motivate students to stay engaged and accomplish their musical goals.

    One effective method is to incorporate music apps and online platforms designed to teach piano in a game-like setting. These tools often feature interactive lessons, immediate feedback, and rewards systems such as points or badges for mastering certain skills or pieces. By blending the structure of traditional learning with the appealing aspects of video games, students are likely to spend more time at the piano simply because they’re having fun.

    Setting up challenges and competitions with oneself or others is another way to gamify piano practice. This could involve setting a timer and seeing how many scales can be played correctly in a given period or trying to beat a personal record in sight-reading. For those with friends or family members who play, organizing small contests or performances can spur motivation and encourage practice.

    Creating a practice reward system can also transform the pianist’s journey. For every goal met or level achieved, students might earn a reward. These rewards can be music-related, such as new sheet music or accessories, or something unrelated but motivating, like a trip to their favorite ice cream shop. What’s important is that the reward is meaningful and directly tied to the accomplishment of a piano practice goal.

    Below are some popular music apps that have been known to add an element of fun to piano learning:

    • Simply Piano
    • Yousician
    • Flowkey
    • Piano Maestro

    Each app has its unique features, but all share the common goal of making piano practice more enjoyable and effective through gamification.

    While these strategies can make practice sessions more engaging, it’s crucial for students to balance gamified learning with traditional practice. The combination ensures that while they’re having fun, they’re also developing the discipline and technique needed to progress.

    Explore Different Genres

    One way to inject excitement into piano practice is by exploring a variety of musical genres. Delving into different styles can open up a whole new world of piano playing, making each session something to look forward to. Whether it’s jazz, classical, pop, or even electronic music, each genre offers unique challenges and rewards that keep practice sessions fresh and engaging.

    Incorporating different genres into practice routines allows learners to discover what truly resonates with them. For some, the structured beauty of classical music might be the most fulfilling, while others might find the freedom and improvisation in jazz more thrilling. Pop music, on the other hand, can be a great way to stay connected with current trends, making practice sessions not only educational but also culturally relevant.

    Popular Music Apps and Their Genres

    To facilitate this exploration, many music apps and online platforms offer lessons across various genres. Below is a quick overview of some popular apps and the genres they support:

    App Name Genres Supported
    Simply Piano Classical, Pop, Jazz, and more
    Yousician Rock, Classical, Pop, and Blues
    Flowkey Classical, Pop, Film Music, and more
    Piano Maestro Classical, Pop, Traditional, among others

    These platforms make it easy to switch between genres, providing a vast library of songs and compositions. They often feature interactive lessons that cater to different skill levels, allowing users to progress at their own pace.

    Setting Genre-Specific Goals

    To make the most out of exploring different genres, it’s beneficial to set specific goals. For instance, learners might aim to master a jazz piece that incorporates complex rhythms or a classical composition that challenges their technical skills. By setting such goals, learners can track their progress across different musical styles, finding joy in the diversity of their achievements.

    • Enhances Musical Understanding: Learning different genres broadens one’s musical vocabulary, providing a deeper understanding of music theory and composition.
    • Improves Adaptability: Transitioning between genres enhances adaptability, helping learners become more versatile pianists.
    • Keeps Practice Exciting: Exploring new genres keeps the curiosity alive, ensuring that practice sessions are never dull or monotonous.

    Collaborate with Others

    One of the most enriching ways to breathe new life into piano practice is through collaboration. Playing with others, be it in a duo, band, or even an orchestra, introduces a dynamic interaction that solo practice lacks. It’s not just about playing notes together; it’s about sharing a musical journey.

    Discover the Joy of Duets

    Duets offer a fantastic entry point for pianists looking to collaborate. They can start with a friend or a fellow student, working on pieces specifically composed for two. This partnership brings an added layer of accountability and motivation, as both players rely on each other to create a cohesive performance. Duets help build essential skills like listening, timing, and rhythm, which are crucial for ensemble playing.

    Join a Band or Musical Ensemble

    For those seeking a broader experience, joining a band or musical ensemble opens up a world of genres and styles beyond the traditional classical repertoire. Playing in a band allows pianists to experiment with jazz, pop, rock, and even electronic music, translating their skills into new, exciting contexts. This variety not only keeps practice sessions fun but also expands a musician’s versatility and understanding of different musical frameworks.

    Benefit Description
    Enhanced Musicality Collaborating exposes musicians to different playing styles, enhancing their own musicality.
    Social Connections Music becomes a medium for forming new friendships and deepening existing ones.
    Increased Motivation The commitment to a group keeps individuals engaged and less likely to skip practice sessions.
    Exposure to New Ideas Every musician brings their unique interpretations, providing a rich learning environment.

    Playing with others requires a level of openness and adaptability. Musicians need to be willing to adjust their playing to blend seamlessly with their partners, whether that means changing dynamics, tempo, or even the style of play. The communication that happens, both verbal and non-verbal, during these sessions is pivotal. It’s about creating a dialogue through music, where each note and rhythm contributes to a larger musical conversation.

    Utilize Technology

    In today’s digital age, technology offers an array of resources to make piano practice more engaging and effective. Many pianists, both beginners, and experts, are discovering that incorporating technology into their routine can transform the learning experience from mundane to exciting.

    Music Learning Apps have revolutionized the way musicians learn and practice. Apps like Simply Piano, Flowkey, and Yousician guide users through lessons that adjust to their playing level, providing immediate feedback on timing, accuracy, and rhythm. These apps often have a vast library of songs ranging from classical to contemporary hits, ensuring that learners are constantly challenged and never bored.

    Digital Scores and Sheet Music are also invaluable tools. Gone are the days of flipping through bulky music books. Now, platforms like MuseScore and Sheet Music Direct offer access to thousands of digital scores on tablets and smartphones. This not only saves space but also allows for interactive features such as automatic page turning and adjustable tempo. For those struggling with a particular piece, being able to slow down the tempo without altering the pitch can be a game-changer.

    Recording and Playback Software offers another layer of feedback for self-guided improvement. Tools like GarageBand and Audacity allow musicians to record their practice sessions and listen back to them. This practice can reveal nuances and mistakes that might not be apparent in the moment, providing critical insights for improvement. Moreover, it allows for experimentation with mixing, helping pianists understand how their playing fits within the larger context of a composition or band.

    Online Forums and Video Lessons foster a sense of community and provide a wealth of knowledge. Websites like Piano World Forum and platforms like YouTube have endless threads and tutorials on everything from technique and theory to gear reviews and practice tips. Watching professionals play and explain concepts can be incredibly motivating, and the ability to ask questions and share progress with a global community of fellow pianists offers support that can make the journey less isolated.

    Integrating technology into piano practice isn’t just about making it fun; it’s about enhancing learning through interactivity, feedback, and access to a global community. As musicians explore these tools, they often find that their practice becomes more focused, efficient, and, most importantly, enjoyable.

    Conclusion

    Making piano practice fun isn’t just about what you play but how you play it. By embracing the technology at our fingertips, we open up a world of possibilities that can transform the traditional piano practice into an exciting and rewarding journey. Whether it’s through interactive apps, digital scores, or connecting with a global community, the key is to find what excites you and incorporate that into your routine. Remember, the goal is to enjoy the process as much as the progress. So go ahead, experiment with these tools, and watch your piano practice come to life in ways you never imagined.

  • Master Correct Posture for Long Piano Sessions: Tips & Exercises

    Master Correct Posture for Long Piano Sessions: Tips & Exercises

    Mastering the piano isn’t just about hitting the right notes; it’s also about how you sit and hold yourself at the keyboard. Many pianists, from beginners to seasoned professionals, often overlook the importance of correct posture. Yet, maintaining the right posture is crucial, especially when playing for long hours. It not only prevents strain and injury but also enhances performance and stamina.

    Imagine sitting at the piano, feeling comfortable, and playing your favorite pieces with ease. That’s the power of correct posture. It’s the foundation that supports every chord and melody, ensuring that playing for extended periods doesn’t take a toll on your body. Whether you’re practicing for an upcoming performance or simply playing for the love of music, adopting the right posture can make all the difference.

    Importance of Correct Posture for Piano Players

    Piano playing is an art that demands not just emotional expression and technical skill but also physical endurance. A key component of being able to play for long hours without fatigue is maintaining correct posture. Many pianists, both novice and advanced, often overlook this aspect, not realizing its impact on their playing stamina and overall health.

    Correct posture for piano players involves more than just sitting up straight. It encompasses the positioning of the back, shoulders, arms, and even how the feet rest on the floor. Good posture ensures that the body’s weight is evenly distributed, minimizing unnecessary tension in any one area. This balance is crucial for preventing injury especially when one engages in long practice sessions.

    Moreover, adopting a proper posture enhances musical performance. When a pianist is seated correctly, their arms have the freedom to move more fluidly, allowing for a broader dynamic range and more expressive playing. The correct alignment of the body with the piano also ensures that the force exerted on the keys comes from the proper use of muscles, leading to more precise and consistent playing.

    • Prevents Injury: By reducing strain on the back, shoulders, and wrists, good posture reduces the risk of common pianist injuries, such as tendonitis and carpal tunnel syndrome.
    • Increases Endurance: Proper alignment and weight distribution allow for more efficient use of muscles, thus reducing fatigue and enabling longer practice sessions.
    • Improves Technique: A proper seating position allows for optimal hand position and finger movement, which is essential for playing complex passages and improving overall technique.
    • Enhances Expression: With the body comfortably aligned, pianists can focus more on the emotional aspect of their performance, offering a more engaging and expressive rendition of their pieces.

    Practical steps to achieve correct posture include adjusting the piano bench to ensure that the forearms are parallel to the floor, keeping the back straight but relaxed, and positioning the feet flat on the floor or on a footrest if they don’t reach the ground. It’s also important for pianists to be mindful of their posture throughout their practice and make adjustments as necessary.

    Incorporating breaks into practice sessions can help maintain good posture. During long hours at the piano, it’s easy for the body to gradually shift into less optimal positions. Short breaks allow pianists to stretch and realign their bodies before resuming practice.

    Ergonomic Setup of Piano and Bench

    The journey toward maintaining correct posture for long piano playing hours begins with the ergonomic setup of the piano and bench. This setup is foundational, as it influences how a musician interacts with the instrument, affecting both performance and physical health over time.

    First, let’s talk about the piano bench. It’s not just a seat; it’s an integral part of a pianist’s posture. The height of the bench should allow the feet to rest flat on the floor, with knees forming about a 90-degree angle. This position ensures balance and stability, allowing for effective pedal use. A bench that’s too high or too low can strain muscles over time, leading to discomfort and potentially impacting performance.

    Adjustability is crucial here. Many benches offer height adjustment options, which can cater to the unique physical requirements of each player. Investing in an adjustable bench is a wise choice for those who spend long hours at the piano.

    Turning attention to the piano’s height, this is generally standardized, especially with grand and most upright pianos. However, digital pianos and keyboards offer more flexibility in this area. If the keyboard is too high, it can lead to elevated shoulder tension. If it’s too low, it can cause the wrists to bend unnaturally. Ideally, the keyboard should be positioned so that the forearms are parallel to the floor when the hands are on the keys, promoting neutral wrist alignment.

    Distance from the piano also plays a vital role in maintaining an ergonomic setup. Sitting too close can cramp one’s style – quite literally – by restricting arm movement and causing the player to hunch over. Conversely, sitting too far can force the reach of keys, straining the back, shoulders, and arms. A good rule of thumb is to sit close enough that the elbows are just slightly in front of the body when the fingers are on the keys, ensuring a comfortable reach for both the keys and the pedals.

    To promote an ergonomic setup, consider the following adjustments:

    • Bench Height: Adjust until the forearms are parallel to the floor.
    • Distance From Piano: Ensure elbows are slightly in front of the body when playing.
    • Foot Positioning: Feet should rest flat on the floor with knees at a 90-degree angle.

    Proper Seating Position at the Keyboard

    Achieving the correct seating position at the piano is pivotal for anyone aiming to play for extended periods without experiencing discomfort. This involves more than just sitting down; it requires careful consideration of one’s posture, the bench’s placement, and the distance to the keyboard.

    Firstly, the bench should be positioned so that the pianist can easily reach all keys of the piano with their arms comfortably extended. This does not mean being so close that one’s elbows are tightly by their side, nor so far that they have to stretch to reach the keys. A good rule of thumb is to allow the elbows to slightly protrude in front of the body, ensuring the shoulders remain relaxed.

    Moreover, the height of the bench is crucial. Ideally, it should be adjusted so that the forearms are parallel to the floor when the hands are on the keyboard. This position prevents undue strain on the wrists and aids in maintaining a relaxed shoulder posture. Unfortunately, not all benches are adjustable. In such cases, using cushions or adjustable piano stools can provide an adequate solution.

    The necessity of a correct seating position cannot be overstressed when it involves playing for long durations. Here are some specifics:

    • Distance from Keyboard: The pianist should be close enough to the piano that their fingertips comfortably reach the keys while their arms maintain a gentle curve.
    • Bench Height: The height should allow the pianist’s forearms to align parallel to the ground, facilitating a natural, strain-free position.

    Let’s not forget the importance of keeping the feet flat on the ground. This aids in providing stability and balance, which are indispensable for controlling pedal work and supporting the overall posture. For younger players or individuals with shorter stature, a footrest might be necessary to achieve this.

    Ergonomics play a significant role in preventing fatigue and discomfort. Thus, adjusting the bench and seating position isn’t just about comfort—it’s about promoting a healthier playing technique. Regular breaks are also recommended to stretch and alleviate any tension that builds up during long practice sessions.

    Understanding and implementing the principles of proper seating can have a transformative effect on a pianist’s practice and performance. It not only helps in avoiding potential physical ailments but also enhances the ability to play more expressively. By maintaining an ergonomic setup, pianists can enjoy the beauty of music-making, free from the constraints of discomfort and strain.

    Hand and Arm Positioning Techniques

    When it comes to mastering the piano, the positioning of one’s hands and arms plays a pivotal role in both performance and endurance. Proper alignment not only enhances musical expressiveness but also safeguards against strain and injury. Therefore, understanding and implementing correct hand and arm techniques is essential for those who spend long hours at the piano.

    To begin, the wrists should maintain a natural, relaxed curve, avoiding any excessive bending upward or downward. This posture allows for greater agility and precision, enabling pianists to gracefully navigate complex pieces. Moreover, keeping the wrists flexible facilitates dynamic control and aids in the smooth execution of passages.

    The fingers should be curved slightly, touching the keys with the tips. This position, often described as holding an imaginary ball, provides a solid foundation for pressing the keys with sufficient force while maintaining sensitivity and articulation. Each finger, from the thumb to the little finger, needs to be engaged effectively to produce a clear, even tone across the keyboard.

    Another key aspect of proper technique involves the alignment of the arms. They should be positioned so that the elbows are slightly away from the body, allowing the hands to be centered over the keyboard. This alignment ensures that the force exerted when playing comes from the arms and shoulders, not just the fingers. It’s crucial for distributing the workload across the larger muscle groups, thereby reducing fatigue and the risk of repetitive strain injuries.

    For those who play for extended durations, maintaining these hand and arm positions can be challenging. Here are a few strategies to help sustain good posture:

    • Frequent Breaks: Take short breaks every 20 to 30 minutes to stretch and relax the hands and arms. This regular interval helps prevent cramping and fatigue.
    • Exercises: Incorporate specific hand and arm exercises into your practice routine to strengthen muscles and improve flexibility. Exercises focusing on wrist rotation, finger stretching, and forearm strengthening can be particularly beneficial.
    • Mindfulness: Stay conscious of your hand and arm positioning while playing. It’s easy to revert to bad habits under stress or during difficult passages. Regularly checking and correcting your posture can help embed proper techniques.

    Practicing Good Posture for Long Hours

    Practicing good posture is crucial for pianists who spend long hours at the keyboard. It’s not just about avoiding discomfort; it’s also about enhancing musical performance. When seated correctly, pianists have better access to the full range of the keyboard, allowing for more expressive playing.

    Finding the Right Seat Height

    The first step in maintaining good posture is finding the right seat height. The ideal position allows the forearm and hand to be in line with the keyboard, preventing undue strain on the arm and wrist. A simple guideline is to ensure the elbows are slightly higher than the keys, promoting a natural curve of the fingers.

    Positioning the Feet

    Another often-overlooked aspect of posture is foot positioning. Feet should be flat on the floor or on a footrest, with the knees at about a 90-degree angle. This position supports the back and allows for proper balance and weight distribution, which is vital for dynamic playing and pedaling.

    Maintaining a Neutral Spine

    Central to good posture is maintaining a neutral spine. Slouching or leaning too far forward can lead to back pain and reduce lung capacity, affecting breathing and, subsequently, phrasing and expressiveness in playing. Pianists should sit back in their seat, allowing the back to maintain its natural curve without rigidity.

    Adjusting Keyboard Distance

    The distance between the pianist and the keyboard also plays a critical role in maintaining good posture. Being too close or too far can cause one to overreach or compress their arms, leading to tension. The ideal distance allows the arms to be comfortably extended when playing the keys in the middle octave range.

    Breaks and Exercises

    Incorporating regular breaks and exercises into practice sessions is essential for sustaining good posture over long hours of play. Short breaks every hour prevent stiffness and fatigue, while simple stretching and strengthening exercises can improve posture and flexibility. Here are a few recommended exercises:

    • Shoulder rolls and stretches to relieve upper body tension
    • Wrist flexor and extensor stretches
    • Finger stretches to maintain flexibility and prevent cramping
    Exercise Benefit
    Shoulder rolls Relieves upper body tension
    Wrist stretches Increases flexibility and reduces the risk of strain
    Finger stretches Maintains finger flexibility and prevents cramping

    Conclusion

    Adopting the right posture isn’t just about playing comfortably for hours; it’s about ensuring longevity in a pianist’s career. By setting up the perfect seat height, positioning feet properly, and keeping that spine neutral, pianists can significantly reduce the risk of discomfort and injury. Remember, the keyboard’s distance matters just as much as the breaks and stretches in between sessions. These exercises aren’t merely suggestions but essential tools to maintain flexibility and fend off strain. So, let’s make these practices a staple in every pianist’s routine to not only enhance performance but to cherish the joy of playing for years to come.

  • Mastering Dynamics: How to Soften Loud Notes on Piano with Pedals

    Mastering Dynamics: How to Soften Loud Notes on Piano with Pedals

    Playing the piano beautifully isn’t just about hitting the right notes; it’s also about mastering the art of dynamics. One common challenge pianists face is softening loud notes to create a more expressive and nuanced performance. Whether you’re tackling a delicate piece or aiming to add depth to your playing, controlling volume is key.

    Fortunately, there are tried-and-true techniques that can help. From adjusting finger pressure to experimenting with pedal use, pianists have several tools at their disposal. Let’s dive into how you can soften those loud notes and bring a touch of finesse to your piano playing.

    Understanding Dynamics in Piano Playing

    Mastering dynamics in piano playing is not just about hitting the keys with different amounts of pressure. It involves a deeper understanding of the emotional expression of music. Dynamics can transform a simple piece into a powerful narrative that captivates the listener’s heart. They must consider dynamics as an integral part of their musical expression, akin to adding colors to a painting. Specifically, softening loud notes offers a unique challenge that requires both technical skill and emotional sensitivity.

    When it comes to dynamics, pianists often struggle with controlling the volume of their play, especially in transitioning from loud passages to softer ones. It’s not merely a matter of playing notes at a lower volume but entails a delicate process of expressing the same intensity and emotion at a softer dynamic level. This skill distinguishes outstanding pianists from the average, marking their performances with a signature touch of expressiveness and depth.

    Several techniques play a crucial role in achieving this finesse:

    • Adjusting Finger Pressure: Lightening the touch on the keys can reduce the volume without losing the note’s clarity. It’s about finding the right balance, where the sound is gentle yet still fully formed.
    • Efficient Use of the Pedals: The sustain pedal, when used judiciously, can help maintain a note’s presence without the need to strike the key hard. This technique is particularly useful for creating a smoother transition between dynamic levels.
    • Arm Weight and Movement: Controlling the arm’s weight allows for a more nuanced dynamic range. A relaxed arm can produce a soft sound, whereas a more forceful movement generates volume. Learning to modulate this aspect can vastly expand one’s expressive capabilities on the piano.

    Incorporating these techniques into one’s playing is not an overnight process. It requires mindful practice and a keen ear for detail. Listening critically to one’s playing and adjusting accordingly can lead to significant improvements. Moreover, recording sessions and seeking feedback from teachers or peers can provide invaluable insights into how effectively one is expressing dynamics.

    A common mistake is to focus solely on the technical aspects, forgetting the emotional intent behind the music. Pianists should always aim to convey the composer’s emotional narrative through their dynamics. For instance, a piece may call for a sudden softening of volume to evoke a sense of intimacy or reflection. Achieving this effect genuinely requires not only technical control but also an emotional connection to the piece.

    Importance of Controlling Volume

    In the world of piano playing, the ability to control volume isn’t just a technical skill—it’s an art form. Controlling volume is essential for conveying the emotional depth and subtlety that pieces of music demand. It’s the difference between a performance that is merely played and one that breathes life into the composer’s notes, creating a compelling narrative for the audience.

    Pianists who master volume control can navigate through the nuances of a piece, like whispering through the quiet moments and soaring in the crescendos. This dynamic range is what makes a performance memorable. It’s about Communicating Feelings, where the intensity of a passage can elicit joy, sorrow, tension, or relief in the listener.

    Achieving this requires meticulous attention to detail. Pianists must develop a keen sense of touch, able to adjust the force applied to the keys with precision. This is not about playing softly across the board but knowing when to apply gentle pressure to specific keys to soften loud notes without losing their intensity. The use of the pedals, especially the Soft Pedal and Sostenuto Pedal, plays a crucial role in this. The former changes the timbre and volume of the notes played, while the latter sustains selected notes at a softer volume.

    Additionally, controlling volume is not solely for the sake of dynamics. It’s also about Balance and Harmony within a piece. When playing pieces with complex textures or layers, pianists must ensure that the melody stands out over the harmony without overpowering it. This balance allows every note and chord to find its rightful place in the overall sound.

    For pianists, the journey to mastering volume control is ongoing. It involves:

    • Practicing Specific Techniques: Such as adjusting finger pressure, effective use of pedals, and managing arm weight.
    • Active Listening: Pianists should constantly evaluate their playing, listening to recordings of their performances to identify areas for improvement.
    • Feedback from Teachers and Peers: Objective feedback can provide invaluable insights into how well a pianist controls volume.
    Reason Description
    Emotional Depth Volume control allows for the expression of a wide range of emotions in music.
    Performance Nuance Mastery over loud and soft notes adds a layer of sophistication to a performance.

    Techniques to Soften Loud Notes

    To achieve a more nuanced performance on the piano, softening loud notes is crucial. This delicate balancing act requires not only physical control but also an emotional connection to the music. Here are some effective techniques pianists can use to master the gentle touch necessary for softening notes without sacrificing clarity or expression.

    Finger Control: At the heart of softening loud notes is the pianist’s ability to adjust finger pressure. Lighter touch on the keys results in a softer sound. However, this doesn’t mean a loss of control. Skilled pianists maintain precision in their movements, ensuring each note is hit accurately but with less force.

    • Practice with Varied Dynamics: Regular practice sessions should include playing pieces with varying dynamics. Start by playing a piece loudly and then gradually decrease the volume, focusing on maintaining the same level of expressiveness and clarity. This helps in developing a sensitive touch.

    Use of the Una Corda Pedal: The una corda pedal, found on the left side of the piano, is a valuable tool for softening notes. When pressed, it shifts the piano’s action so the hammers strike fewer strings, resulting in a softer, more muted sound. Pianists should experiment with this pedal to understand its effect on the music and learn when its use is most appropriate.

    • Adjust Arm Weight: Managing arm weight is another technique to soften loud notes. By reducing the weight transferred from the arms to the fingers when playing, pianists can achieve a lighter sound. It’s about finding the balance between enough weight for control and too much weight that results in overly loud notes.

    Strategic Use of the Sustain Pedal: While the sustain pedal is typically used to prolong the sound of the notes, it can also assist in softening them if used judiciously. By carefully timing the release of the pedal, pianists can create a softer tail-off of sound, adding to the overall gentleness of the piece.

    Listening and Adjustment: Finally, one of the most crucial techniques is the ability to listen critically to one’s playing and adjust accordingly. Playing softly requires constant adjustment and fine-tuning based on what the pianist hears. This might mean changing finger pressure, adjusting arm weight, or even modifying the use of pedals midway through a piece.

    Adjusting Finger Pressure

    One of the most direct methods to soften loud notes on the piano involves adjusting finger pressure. It’s a technique that seems simple on the surface but requires a nuanced understanding of touch and how it translates into sound. By varying the amount of pressure applied to the keys, pianists can directly impact the volume and tone of the notes they produce. This control is fundamental for achieving a dynamic and emotive performance.

    To begin mastering this technique, pianists should start by experimenting with the extremes of soft and loud playing. This practice helps them become acutely aware of the range of pressure their fingers can exert. It’s not just about pressing the keys more gently; it’s about understanding how slight variations in pressure can produce profoundly different sounds.

    • Start Slowly: Begin practicing at a slow tempo to give yourself time to feel the pressure of each finger on the keys.
    • Mindful Practice: Pay close attention to how different degrees of pressure affect the sound. It’s about developing a sensory connection between your fingers and the piano.
    • Consistent Pressure: Ensure even pressure across all fingers for balanced dynamics. Uneven pressure can lead to a disjointed and erratic performance.

    Practicing with scales and simple pieces allows for a focused approach to adjusting finger pressure. Attention should be paid not just to the downward motion but also to the release of the keys. A smooth, controlled release contributes significantly to the overall softness of the sound. Incorporating exercises that emphasize this aspect can lead to more refined control over dynamics.

    Another crucial aspect of adjusting finger pressure is the recognition that different pianos respond uniquely to touch. A technique that works on one instrument may produce a different effect on another. Therefore, pianists must learn to adapt their touch based on the specific characteristics of the piano they are playing. This adaptability is a hallmark of a versatile and sensitive musician.

    Adjusting finger pressure isn’t just about playing softly; it’s about creating a palette of sound that can express a wide range of emotions. The ability to do so with intention and precision can truly elevate a pianist’s performance. It transforms the piano from a mere instrument into a voice that speaks with infinite shades of nuance and color.

    Experimenting with Pedal Use

    When pianists venture into the nuanced realm of dynamics, the pedals beneath their feet become invaluable tools, not just footrests. The sustain pedal, or damper pedal, is particularly instrumental when it comes to softening loud notes. By skillfully deploying it, pianists can add a layer of subtlety to their sound that goes beyond mere finger pressure adjustments.

    The magic of the sustain pedal lies in its ability to blur the lines between notes, creating a cohesive, softer sound. However, timing is everything. Pressing the pedal too early or too late can result in a muddled or harsh sound, respectively. The key is to press the pedal right after the notes are played, allowing them to ring out and blend smoothly with subsequent sounds. This technique, known as “pedal overlapping” or “legato pedaling,” ensures a continuous, fluid sound without any unintended harshness.

    Yet, the sustain pedal is not a one-size-fits-all solution. Pianists must engage in mindful experimentation, adjusting their pedaling techniques to suit the piece they’re playing, the acoustic environment, and the specific piano. For instance, a lightly damped pedal might be perfect for a soft, intimate piece in a small room but entirely inappropriate for a powerful, resonant performance in a large hall.

    Moreover, the use of the soft pedal, or una corda pedal, provides another avenue for exploration. When pressed, the soft pedal shifts the piano’s action slightly, causing the hammers to strike fewer strings. This not only reduces the volume but also alters the timbre of the notes, giving them a softer, more delicate quality. It’s a subtle effect, one that requires finesse and a keen ear to employ effectively.

    Incorporating pedal use into the quest to soften loud notes opens up a world of creative possibilities. By experimenting with different pedaling techniques, including how long to hold the pedal and how fully to depress it, pianists can discover the perfect balance for each piece. It’s an ongoing process, one that demands patience, practice, and a willingness to listen intently to the nuances of the sound.

    Conclusion

    Mastering the art of softening loud notes on the piano can elevate a musician’s performance from good to mesmerizing. By understanding and applying the nuanced techniques of pedal use, pianists can achieve a level of expressiveness that truly resonates with their audience. It’s all about the delicate balance of timing, touch, and experimentation. As they continue to explore and refine these skills, they’ll find their own unique sound, making each piece not just played, but profoundly felt. Remember, the journey to dynamic mastery is ongoing, but with patience and practice, it’s within reach.

  • Master Relaxed Wrists in Piano Playing: Tips & Techniques

    Master Relaxed Wrists in Piano Playing: Tips & Techniques

    Playing the piano beautifully isn’t just about hitting the right notes; it’s also about how you hit them. One key element that often goes overlooked is the importance of having relaxed wrists. It’s a simple concept that can make a world of difference in your playing, transforming stiff, robotic movements into smooth, expressive passages.

    Many pianists, from beginners to the more experienced, find themselves struggling with tension in their wrists, which can lead to discomfort and even injury over time. But don’t worry, mastering the art of playing with relaxed wrists is within reach. With a few adjustments and mindful practice, anyone can learn to play more fluidly and comfortably.

    The Importance of Relaxed Wrists in Piano Playing

    When it comes to the delicate art of piano playing, the wrists play a pivotal role that’s often understated. They’re not just a bridge connecting the fingers to the rest of the arm; they are instrumental in creating the flowing, effortless sound that defines expert playing. Maintaining relaxed wrists is not merely a suggestion but a crucial element in achieving both the technical and expressive qualities that music demands.

    One of the main reasons relaxed wrists are so important is their impact on dynamics and expression. Firm, rigid wrists limit the range of motion, making it difficult to execute soft, flowing passages or powerful, emphatic chords with the same ease. In contrast, relaxed wrists can move freely, allowing for nuanced control over the volume and quality of each note.

    Furthermore, the health and longevity of a pianist’s career can heavily depend on their ability to play without tension. Chronic tension can lead to discomfort and, more severely, repetitive strain injuries such as tendinitis or carpal tunnel syndrome. These conditions not only cause pain but can also necessitate breaks from playing or, in extreme cases, lead to the end of a pianist’s playing days. By fostering relaxation in the wrists, players can significantly reduce their risk of these injuries, ensuring they can continue to enjoy playing for years to come.

    Risk Factor Without Relaxed Wrists With Relaxed Wrists
    Dynamics and Expression Limited Enhanced
    Risk of Injury High Reduced

    To cultivate relaxed wrists, it’s essential to begin with proper posture and hand positioning at the piano. The forearms should be roughly parallel to the floor, with the wrists neither drooping down nor arched too high. This neutral position promotes natural, fluid movements and reduces tension. Additionally, incorporating specific exercises and stretches into one’s practice routine can further develop wrist flexibility and strength, making it easier to maintain relaxation even during challenging pieces.

    Mindful practice is another key component. Players should regularly check in with their bodies, ensuring they’re not holding unnecessary tension in the wrists or elsewhere. Sometimes, tension can creep in without notice, especially when focusing intently on learning a new piece or perfecting a difficult passage. By staying aware and making adjustments as needed, pianists can gradually train themselves to play more relaxedly.

    Common Issues with Tension in Wrists

    Playing the piano requires not just intellectual acumen but also physical harmony, particularly in one’s wrists. However, many pianists, from beginners to seasoned professionals, encounter issues related to wrist tension. Understanding these problems is the first step toward achieving the goal of playing with relaxed wrists.

    Impact on Musicality

    Firstly, wrist tension significantly hampers musical expression. A relaxed wrist allows for better control over dynamics, enabling pianists to produce a wide range of volumes and tones. In contrast, a tense wrist results in a played note or chord sounding flat or forced, stripping the music of its intended emotional impact.

    Risk of Injury

    Secondly, the risk of injury escalates with continuous wrist tension. Tendinitis and carpal tunnel syndrome are common conditions among pianists who don’t adopt relaxed wrist techniques. These injuries not only cause pain and discomfort but can also lead to prolonged periods away from the piano, hindering progress and growth as a musician.

    Condition Description Prevalence Among Pianists
    Tendinitis Inflammation of the tendon due to overuse or strain. High
    Carpal Tunnel Syndrome Compression of the nerve within the carpal tunnel, leading to numbness and tingling in the hand. Moderately High

    Hindrance to Technical Development

    Moreover, tension in the wrists acts as a roadblock to technical advancement. Techniques such as scales, arpeggios, and octave jumps require fluidity and flexibility which can’t be achieved if the wrists are stiff. This limitation not only affects a pianist’s ability to execute complex pieces but also slows down the learning process overall.

    Psychological Effects

    The psychological aspect of playing with wrist tension cannot be overlooked. Frustration and a lack of confidence often accompany the inability to play as expressively or accurately as desired. Over time, this can lead to a diminishing passion for playing, as every practice session or performance becomes a reminder of the physical limitations being faced.

    • Mindful Practice: Incorporating mindfulness into practice sessions helps in recognizing when and where tension occurs.
    • Proper Posture and Hand Positioning: Ensuring the correct posture and hand positioning lays the foundation for relaxed wrists.
    • Stretching and Strengthening Exercises: Regular exercises designed

    Techniques for Playing Piano with Relaxed Wrists

    Relaxed wrists are integral for pianists, not just for improving the quality of their music but also for preventing injuries that can sideline their passion. Achieving and maintaining this relaxed state, however, requires a conscious effort and a set of techniques that should become second nature over time.

    One fundamental approach is to Always Start with Proper Posture. The height of the piano bench and the distance from the keyboard are crucial. They should sit in such a way that their forearms are parallel to the floor when playing. This position promotes wrist relaxation and allows for better control and flexibility.

    Mindful Practice Sessions play a critical role in developing relaxed wrists. Pianists should start their sessions with the intention of keeping their wrists loose. This involves being acutely aware of their body’s tension and consciously relaxing their wrists as they play. Incorporating slow practice pieces specifically focusing on wrist movement can significantly improve flexibility and relaxation.

    Hand Positioning and Movements are also key. Fingers should curve naturally, allowing the hand to form a rounded shape over the keys. This encourages the wrist to stay flexible. Pianists should avoid flat-fingered playing, which often leads to tension. Instead, they should aim for a fluid motion from their fingers through their wrists, as if lightly bouncing off the keys with each note.

    Exercises aimed at Strengthening and Stretching the wrists can’t be overlooked. Interval training, where intense periods of playing are followed by rest and stretching exercises, helps in muscle recovery and flexibility. Simple stretches, like gently bending the wrist forwards and backwards or rotating them in circles, can be immensely beneficial if done consistently before and after practice sessions.

    Incorporating Dynamic Playing into Practice routines is another essential technique. Dynamic playing involves varying the volume and intensity of the music, which in turn, requires a pianist to adjust their touch and wrist tension. By practicing pieces with varying dynamics, pianists can learn how to fluidly adjust their wrist tension, thus enhancing their ability to maintain relaxed wrists across all playing styles.

    Lastly, Breaks are Essential. No matter how immersed one gets in the music, taking regular breaks to rest and reset the wrists is crucial. Short breaks during practice sessions give the muscles time to relax and reduce built-up tension. This not only helps in maintaining relaxed wrists but also in preventing fatigue and injuries.

    Exercises to Help Relax and Strengthen Wrist Muscles

    Playing the piano with relaxed wrists isn’t just about avoiding stiffness during performances; it’s also about strengthening the muscles around the wrists to support fluid, graceful movements. Incorporating specific exercises into daily practice can significantly enhance both the flexibility and strength of a pianist’s wrists, making playing more enjoyable and reducing the risk of injury.

    Stretching Exercises

    Stretching is essential for maintaining wrist flexibility. These simple exercises can be done before and after practice sessions:

    • Wrist Rotations: Extend the arms in front with palms down. Gently rotate the wrists clockwise, then counterclockwise, 10 times in each direction. This exercise promotes joint mobility.
    • Palm Pushes: With palms facing each other in front of the chest, gently push the palms together while keeping the elbows out to the sides. Hold for 5-10 seconds, then release. This stretch works on the muscles and tendons that run across the back of the hand and forearm.
    • Finger Stretches: Extend one arm out with the palm facing up and gently pull back on the fingers with the opposite hand, stretching the underside of the forearm. Hold for 15 seconds, then switch hands.

    Strengthening Exercises

    To complement flexibility, developing strength in the wrists and forearms is crucial. Here are exercises geared toward building that necessary muscle:

    • Wrist Curls: Using a light weight (a small dumbbell or a can of food), sit with the forearm on the thigh, palm facing up. Curl the weight towards the body, then lower it back down. Aim for 2 sets of 12-15 reps on each side.
    • Reverse Wrist Curls: Similar to wrist curls, but with the palm facing down. This exercise targets the extensor muscles on the back of the forearm. Again, aim for 2 sets of 12-15 reps on each side.
    • Grip Strengthening: Squeeze a stress ball or a grip strengthener for 5-10 seconds, then release. Repeat 10 times. This simple exercise improves grip strength and endurance, essential for pianists.

    Tips for Maintaining Relaxed Wrists While Playing

    Maintaining relaxed wrists is crucial for pianists who wish to play gracefully and avoid injury. Several strategies can help achieve this, ensuring long-term comfort and performance quality.

    Proper Posture and Bench Positioning play pivotal roles in facilitating wrist relaxation. Sitting at the correct height so that the forearms are parallel to the floor allows the wrists to remain loose and fluid. Adjusting the bench so that it’s neither too close nor too far from the keyboard is equally important. This optimal positioning supports the natural curvature of the hands and prevents excessive strain.

    Incorporating Mindful Practice Sessions into one’s routine is another effective strategy. Being conscious of the tension in the wrists while playing can help identify bad habits that may lead to stress and strain. Musicians should take frequent breaks during practice to stretch and relax the wrists. These pauses not only reduce the likelihood of injury but also enhance focus and performance.

    Technique refinement is essential for maintaining relaxed wrists. Developing a touch that’s light and responsive, rather than heavy and forceful, can significantly reduce tension. Techniques such as the drop-roll method, where the pianist allows the weight of the arm to fall onto the keys and rolls the wrist gently with each note, encourage fluidity and ease of movement.

    Warm-ups and Cool-downs should never be neglected. Just as athletes stretch before and after their activities to prevent injuries, pianists should too. Starting each practice session with gentle wrist stretches and concluding with relaxing exercises ensures the muscles are well-prepared for the demands of playing and have time to recover afterward.

    Incorporating Relaxation Techniques Beyond the Keyboard

    Relaxation does not solely arise from physical actions; mental state plays a considerable role. Practicing breathing exercises or engaging in short meditative sessions before playing can significantly lower tension levels throughout the body, including the wrists. Visualization techniques, where one imagines playing with effortless grace and fluidity, can also prep the mind and body for a relaxed playing session.

    Understanding the importance of hydration and nutrition is often overlooked in discussions about playing techniques. Yet, staying hydrated and maintaining a diet rich in magnesium, which supports muscle relaxation, can profoundly affect overall muscle health and indirectly contribute to more relaxed wrists.

    Conclusion

    Mastering the art of playing piano with relaxed wrists is a journey that requires patience, dedication, and consistent practice of the techniques discussed. By focusing on proper posture, bench positioning, and integrating the drop-roll method into practice sessions, pianists can significantly reduce tension. Remember, incorporating warm-ups, cool-downs, and relaxation exercises, along with paying attention to hydration and nutrition, plays a crucial role in maintaining healthy wrists. With time and mindful practice, achieving fluidity and ease in piano playing becomes not just a possibility but a reality. Keep these tips in mind, and enjoy the harmonious blend of relaxation and music.

  • Mastering Piano: How to Count Rhythms & Elevate Your Play

    Mastering Piano: How to Count Rhythms & Elevate Your Play

    Mastering the art of counting rhythms in piano music can transform a good pianist into a great one. It’s the backbone of music, giving it structure and emotion. Yet, for many, cracking the code of rhythmic patterns feels like deciphering an ancient language. Fear not, because it’s much simpler than it seems at first glance.

    Imagine being able to glide through complex pieces, your fingers dancing across the keys in perfect harmony with the beat. That’s the power of understanding rhythm. It’s not just about hitting the notes but feeling the pulse of the music. This guide is your first step towards achieving rhythmic mastery, making music that doesn’t just sound good but feels right.

    Understanding Basic Time Signatures

    Delving into the world of rhythms in piano music, one cannot overlook the significance of time signatures. They are the roadmap that guides musicians through the timing of each piece, determining the pace and flow of the notes. Understanding time signatures is crucial for any pianist aspiring to master the art of rhythm.

    Time signatures are found at the beginning of a piece of music, right after the clef and key signature. They consist of two numbers, one stacked above the other. The top number indicates how many beats are in each measure, while the bottom number reveals what note value is given one beat. The most common time signatures are 4/4, 3/4, and 2/4, though there are many others, each imparting a unique feel to the music.

    4/4 Time Signature, often referred to as common time, is the most frequently encountered. In this time signature, there are four beats in each measure, and the quarter note gets one beat. This means that any combination of notes adding up to four quarter notes fits into each measure.

    3/4 Time Signature is another widely used time signature, known for its waltz-like rhythm. Each measure has three beats, with the quarter note again being the beat note. This gives the music a distinctive “one-two-three, one-two-three” feel, ideal for dances and ballads.

    2/4 Time Signature is simpler, with only two beats per measure. It’s often found in march music and is best understood by counting “one-two, one-two.” Despite its simplicity, it requires the pianist to maintain a steady tempo to convey the piece’s intended energy.

    To effectively count rhythms in piano music, pianists should start by tapping the beat with their foot or metronome. For beginners, saying the beats out loud as they play can also be a helpful exercise. It’s essential to practice with a variety of time signatures to become comfortable with the feel and pacing of each.

    Let’s take a look at how different time signatures might appear in music:

    Time Signature Beats per Measure Note Given One Beat
    4/4 4 Quarter Note
    3/4 3 Quarter Note
    2/4 2 Quarter Note

    Identifying Note Values

    Once pianists have a grasp on time signatures, the next crucial step is to understand and master the different note values. In the realm of piano music, each note holds a distinct duration of sound, contributing to the overall rhythm of the piece. Recognizing these different note values is key to effectively counting rhythms.

    Note values range from whole notes, which sustain for four beats, to sixteenth notes, which last for a mere quarter of a beat. Each type of note has a specific symbol that musicians can quickly learn to identify. This visual recognition, combined with an understanding of time signatures, enables pianists to decipher how long each note should be held in the context of the music.

    • Whole Notes: Sustain for four beats
    • Half Notes: Hold for two beats
    • Quarter Notes: Last for one beat
    • Eighth Notes: Extend for half a beat
    • Sixteenth Notes: Maintain for a quarter of a beat

    To enhance rhythm counting skills, it’s beneficial for pianists to practice identifying these note values in various pieces of music. By looking at a piece of sheet music and pointing out different note values, they can build a mental map of how the rhythm unfolds.

    In addition to standard notes, other symbols like dots and ties affect the duration of a note. A dot placed after a note extends its duration by half of its original value, adding another layer of rhythm complexity. For example, a dotted half note would be held for three beats, adding one more beat to the original two beats of a half note. Ties, on the other hand, connect two notes of the same pitch, effectively lengthening the note’s duration by combining the values of the tied notes.

    Note Type Symbol Duration in Beats
    Whole Note O 4
    Half Note o- 2
    Quarter Note 1
    Eighth Note 0.5
    Sixteenth Note 0.25
    Dotted Half Note o-. 3 (2+1)

    Learning to Count Beats

    Learning to count beats in piano music is a foundational skill that all pianists must master. This ability allows players to interpret the rhythm of a piece accurately, thereby ensuring that their performance is both musical and expressive. The process starts with understanding the time signature of a piece, which dictates how many beats are in each measure and what note value constitutes one beat.

    Time Signatures: The Basics

    Time signatures are notated at the beginning of a piece and consist of two numbers. The top number indicates the number of beats in each measure, while the bottom number reveals the note value that represents one beat. Common time signatures include 4/4, 3/4, and 6/8, each creating unique rhythmic patterns.

    • 4/4 Time (Common Time): This time signature means there are four quarter notes per measure.
    • 3/4 Time (Waltz Time): Here, each measure contains three quarter notes.
    • 6/8 Time: Six eighth notes fill each measure, often creating a lilting rhythm.

    The Metronome: A Pianist’s Guide

    A metronome is an invaluable tool for pianists learning to count beats. By setting a metronome to a specific tempo, players can practice maintaining a steady beat, which is crucial for rhythmic accuracy. Starting slow and gradually increasing the tempo can help pianists build both confidence and skill in counting beats.

    Practicing With Clapping and Counting

    Before even sitting down at the piano, musicians can benefit from clapping and counting out rhythms. By clapping the rhythm and speaking the beat aloud, pianists internalize the rhythmic pattern, making it easier to execute when playing. This method also aids in highlighting any syncopation or off-beat rhythms that may be present in the music.

    Note Value Counting Technique
    Whole Note Count 1-2-3-4
    Half Note Count 1-2, 3-4
    Quarter Note Count 1, 2, 3, 4
    Eighth Note Count 1 & 2 & 3 & 4 &

    Practicing Syncopation

    Syncopation in piano music can initially seem like a daunting hurdle for learners. When the expected rhythm is disrupted, and emphasis is placed on normally weak beats, the usual flow of the music shifts. But mastering syncopation is not just a challenge; it’s an opportunity to bring excitement and variety to piano performances. To tackle this, several strategies can prove immensely helpful.

    First and foremost, understanding the concept of syncopation is key. It’s when the accent or stress moves from the strong beats to the weaker beats or offbeats. This shift can transform a straightforward rhythm into something more complex and intriguing. To internalize this concept, pianists should start by listening. Finding pieces rich in syncopation and simply listening to them attentively can provide a sense of how syncopation feels and sounds. Jazz and ragtime are genres particularly known for their extensive use of syncopation, offering a wide array of listening options.

    Secondly, slow practice is invaluable. When encountering syncopated rhythms, slowing down the tempo allows the pianist to process and understand the placement of each note. They should focus on counting out loud, emphasizing the syncopated beats to ensure accuracy. A metronome is an indispensable tool in this phase, as it provides a steady beat against which the pianist can align the syncopated rhythms.

    Here’s a useful tip: Clapping out syncopated rhythms before playing them on the piano can bridge the gap between understanding a rhythm intellectually and physically executing it. This method helps in internalizing the rhythm, making it easier for the pianist to replicate it on the instrument.

    Incorporating hand independence exercises is also critical when practicing syncopation. Oftentimes, one hand will be playing a steady rhythm while the other hand plays a syncopated pattern. To cultivate this skill, pianists can practice the hands separately at first, gradually bringing them together as they become more confident in their ability to maintain the syncopation.

    Finally, repetition plays a fundamental role in mastering syncopation. Through repetitive practice, the initially perplexing rhythms become familiar, eventually feeling as natural as any other rhythm.

    • Clap and count out loud syncopated rhythms from sheet music before playing.
    • Use a metronome to practice syncopated rhythms at slow speeds, gradually increasing the tempo as confidence grows.
    • Listen to recordings of pieces

    Applying Rhythmic Techniques to Piano Pieces

    Once pianists grasp the basics of rhythm and syncopation, applying these techniques to actual piano pieces becomes the next step. Integrating rhythm into piano music elevates the piece, infusing it with emotion and dynamic movement. It’s all about taking the theory and converting it into practice, which requires patience, focus, and a strategic approach.

    The first crucial step is to select pieces that incorporate various rhythmic patterns. This diversity allows pianists to experience firsthand the myriad of ways rhythm can shape music. Choosing pieces with varying levels of difficulty will also help them gradually build their rhythmic abilities. Here’s a suggested approach:

    • Start with simple pieces that have a clear and straightforward rhythm.
    • Gradually move on to more complex pieces that include syncopation and irregular time signatures.
    • Focus on pieces by composers known for their rhythmic complexity, such as Scott Joplin or George Gershwin.

    Practicing with a metronome is indispensable. It helps maintain a steady tempo, which is vital when mastering rhythms. Initially, it might feel restrictive, but over time, it teaches the pianist to internalize the tempo, making rhythm more natural and intuitive. The metronome should become a pianist’s steady companion, especially when working through tricky rhythmic passages.

    Another effective method is to break down the piece into manageable sections. Tackling a whole piece can feel overwhelming due to its rhythmic complexity. By focusing on small sections, pianists can give each part the attention it needs, mastering it before moving on to the next. This segmented approach ensures a more thorough understanding and execution of the rhythm.

    Incorporating rhythm-based exercises into daily practice can also fortify a pianist’s rhythmic skills. These exercises might include:

    • Clapping out rhythms before playing them on the piano.
    • Playing rhythmically challenging sections with each hand separately before combining them.
    • Using rhythm software or apps designed to improve rhythmic accuracy and understanding.

    Finally, listening and analyzing plays a critical role. Listening to recordings of the pieces being learned, with a particular focus on the rhythm, can provide valuable insights. Pianists should pay attention to how professional musicians navigate rhythmic challenges and try to emulate these techniques. Analyzing the piece’s rhythm away from the piano can also offer a new perspective, helping to internalize the rhythm and understand its role within the piece.

    Conclusion

    Mastering rhythm in piano music is a journey that requires patience, practice, and a keen ear. By adopting the strategies outlined, pianists can elevate their performances, infusing them with the emotion and movement that only rhythm can provide. It’s about more than just hitting the right notes; it’s about breathing life into them. So grab those pieces with challenging rhythms, set your metronome, and dive into the world of syncopation and irregular time signatures. Remember, every professional was once a beginner, and with each rhythmic challenge overcome, you’re one step closer to mastering the art of piano music. Happy playing!

  • Why Do My Shoulders Hurt When Playing Piano? Stretching & Posture Tips

    Why Do My Shoulders Hurt When Playing Piano? Stretching & Posture Tips

    Playing the piano should be a symphony of comfort and melody, yet for some, it’s accompanied by an unwelcome guest: shoulder pain. It’s a common complaint that can turn a beautiful hobby into a source of discomfort, leaving many to wonder why their passion for playing leads to pain.

    The reasons behind shoulder pain while tickling the ivories are as varied as the music produced. From poor posture to inadequate breaks, the factors contributing to this discomfort can often go unnoticed. But understanding these causes is the first step toward making beautiful music pain-free.

    Incorrect Posture While Playing

    Playing the piano should be an activity that brings joy and relaxation, but when shoulder pain creeps in, it’s often a sign that something is not right. Many pianists, both beginners and experienced, may find themselves battling discomfort. One of the primary culprits behind this issue is incorrect posture. Understanding and correcting one’s posture can be a game-changer in enjoying pain-free piano sessions.

    When sitting at the piano, the way a person holds their body plays a significant role in their overall well-being. Often, pianists might slouch, lean too far forward, or place their shoulders in an unnatural position, leading to strain. Such habits, over time, place unnecessary stress on the shoulder muscles and joints. The correct posture involves sitting upright, with feet flat on the ground, and shoulders relaxed but not drooping. The arms should be at a natural angle, allowing the hands to float over the keys without tension.

    Another aspect often overlooked is the height of the bench and its distance from the piano. If the bench is too low, too high, or too far from the instrument, it forces the pianist to overreach or adjust their body awkwardly to access the keys. This misalignment can quickly lead to shoulder pain. The ideal setup should enable the pianist to sit comfortably with their forearms parallel to the floor when their fingers are on the keys.

    Several strategies can be employed to correct bad posture habits:

    • Take Frequent Breaks: Incorporating short breaks during practice sessions helps to reset the body’s posture, reducing the risk of developing pain.
    • Exercise and Stretch: Regular shoulder and back exercises strengthen the muscles, making it easier to maintain good posture. Stretching before and after playing also helps in preventing stiffness and pain.
    • Adjust the Piano Setup: Ensuring the bench is at the correct height and distance from the piano is crucial. It may require some experimentation to find the perfect setup, but the effort is well worth it.
    • Seek Professional Guidance: A teacher or a physical therapist can provide personalized advice and exercises tailored to an individual’s specific needs.

    By tackling the issue of incorrect posture, pianists can significantly reduce the risk of experiencing shoulder pain. It’s not just about making adjustments but also about being mindful of one’s body while playing. Recognizing the signals of discomfort early and taking proactive steps to address them can help maintain the joy and comfort piano playing is supposed to bring.

    Overuse of Shoulder Muscles

    When piano players dive into long practice sessions or perform challenging pieces, they often focus so intently on perfecting their music that they may overlook the physical toll it takes on their bodies. Specifically, the shoulders bear a significant portion of this strain due to the overuse of muscles that occurs during repetitive movements. This overexertion can lead to shoulder pain, a common complaint among pianists.

    The mechanics of playing the piano require a complex interplay of muscles, not just in the fingers and arms but also in the shoulders. These muscles work together to control the arms’ movements, allowing for the precise keystrokes needed to produce music. However, when the shoulders are constantly raised or tensed – an easy habit to slip into when focusing on playing correctly – it puts undue stress on these muscles.

    • Soreness and pain in the shoulders during or after playing.
    • A feeling of fatigue in the shoulder muscles, even with little to no physical activity.
    • Reduced range of motion or stiffness in the shoulders.

    Addressing the issue of overuse begins with awareness. Pianists must become mindful of their posture and the way they engage their shoulder muscles while playing. Incorporating breaks into practice sessions allows the muscles to relax and recover. Stretching exercises, specifically designed for musicians, can also be beneficial in alleviating tension and promoting muscle health.

    Adding to the regimen, strengthening exercises targeting the shoulder muscles can help in building endurance. This doesn’t mean transforming practice sessions into workout routines; rather, it’s about incorporating small, effective exercises into daily life to support the physical demands of playing the piano.

    Here’s a quick overview of Useful Practices To Prevent Overuse:

    • Taking Regular Breaks: Short pauses during practice sessions to relax the shoulders.
    • Stretching: Engaging in daily stretching routines focused on the arms, shoulders, and back.
    • Strengthening Exercises: Simple exercises geared toward improving shoulder muscle endurance.

    Professional guidance from a physiotherapist familiar with musicians’ challenges can also provide tailored advice and exercises. They can offer insights into improving posture and developing a playing style that minimizes the risk of injury.

    Lack of Proper Stretching

    Playing the piano involves more than just the hands and fingers; it engages the entire body, especially the shoulders. Shoulder pain among pianists can often be traced back to a Lack of Proper Stretching before and after practice sessions. This oversight can lead to tension, soreness, and even injury over time.

    Stretching plays a critical role in preparing the muscles for the demands of playing the piano. It warms up the muscles, increases blood flow, and enhances flexibility, all of which are crucial for minimizing the risk of strain and injury. Without adequate stretching, pianists may find their shoulders becoming a site of chronic pain and discomfort.

    Essential Stretches for Pianists

    To combat shoulder pain, incorporating a series of stretches focusing on the shoulders, neck, and upper back is essential. These stretches should be gentle yet effective, aiming to loosen tight muscles and promote relaxation. Here are a few recommended stretches every pianist should consider:

    • Neck Side Stretch: Tilting the head to one side to stretch the neck and shoulder muscles, holding for 15-20 seconds on each side.
    • Shoulder Rolls: Rolling the shoulders forward and backward in a slow, circular motion to release tension.
    • Arm Cross Stretch: Stretching one arm across the body and using the other arm to apply gentle pressure, enhancing the stretch in the shoulder.
    • Upper Back Stretch: Interlacing the fingers and reaching forward, rounding the upper back to feel a stretch between the shoulder blades.

    Each of these stretches should be performed slowly and with care, paying close attention to any signs of discomfort. It’s also important for pianists to listen to their bodies and adjust the intensity of the stretches accordingly.

    Regular Stretching Schedule

    For maximum benefits, pianists should integrate stretching into their daily routine, dedicating time both before and after practicing. Starting with a 5-10 minute stretching session can significantly reduce the risk of shoulder pain and stiffness. Moreover, incorporating breaks during practice sessions to perform brief stretches can further prevent muscle overuse and fatigue.

    Regular stretching not only aids in preventing shoulder pain but also enhances overall playing technique. Improved flexibility and range of motion allow for more fluid and expressive playing, ultimately enriching the musical experience.

    Impact of Stress and Tension

    Playing the piano involves not just the hands and fingers but the entire body. When pianists sit down to practice, they’re not just engaging in a musical exercise; they’re undertaking a physical one as well. It’s essential to recognize how stress and tension, particularly in the shoulders, can significantly impact a pianist’s performance and overall well-being.

    Stress, whether it’s from the challenge of mastering a new piece or from external factors, often finds its way into the shoulders. Tension in this area during play not only affects technique but can also lead to discomfort and, over time, injury. When pianists are stressed, their bodies react by tightening up, which can decrease blood flow and reduce the efficiency of muscle use. This strain not only hampers the fluidity of movement but may also contribute to a cycle of pain and stress that’s hard to break.

    For many pianists, the realization that their posture contributes significantly to their shoulder pain comes as a revelation. Slouching or leaning too far forward can place undue stress on the shoulders, neck, and upper back. Maintaining a correct posture is paramount; it allows for better breathing, enhances concentration, and reduces unnecessary strain on the body. Here are a few signs that stress and tension might be affecting a pianist’s posture and play:

    • Hunching over the keys
    • Gripping the bench tightly
    • Raising shoulders while playing

    Incorporating mindfulness and awareness into practice sessions can help musicians recognize when tension starts to build. Taking regular breaks to stretch and relax the shoulders can prevent the buildup of stress, making it easier to maintain good posture and reduce the risk of pain.

    Understanding the body’s signals is key to managing stress and tension. When pianists feel their shoulders tightening or pain beginning to creep in, it’s a sign that they need to pause, reassess their posture, and perhaps do a few stretches. Ignoring these signals can lead to more severe issues down the line, such as chronic pain or even conditions like tendinitis or carpal tunnel syndrome.

    Conclusion

    Recognizing the role of proper stretching and posture can’t be overstated for pianists looking to avoid shoulder pain. It’s all about listening to what your body’s telling you and taking those necessary steps to ensure you’re playing in a way that’s healthy and sustainable. Remember, incorporating mindfulness and regular breaks into your practice isn’t just good for your shoulders—it’s good for your overall performance and well-being. By staying vigilant and proactive about tension and stress, you’ll not only keep those pesky shoulder pains at bay but also enhance your playing experience. So, let’s keep those stretches going and make every note pain-free.

  • Top Common Piano Fingering Mistakes Beginners Make

    Top Common Piano Fingering Mistakes Beginners Make

    Learning to play the piano is like embarking on a musical journey, filled with highs, lows, and everything in between. For beginners, it’s a world where melodies come to life under their fingertips. However, it’s not without its challenges. One of the most common hurdles they face is mastering the art of piano fingering. It’s the foundation upon which beautiful music is built, yet it’s often where many stumble.

    From using the wrong fingers for certain keys to inconsistent hand positioning, these mistakes can turn a harmonious experience into a frustrating one. They not only affect the quality of the music but can also lead to bad habits that are hard to break. Let’s dive into the world of piano fingering mistakes, shedding light on these common blunders so beginners can sidestep them and continue making beautiful music.

    Using Incorrect Fingers for Keys

    One of the most prevalent challenges that beginners face when learning to play the piano is using incorrect fingers for keys. This mistake often stems from a lack of understanding of proper fingering techniques which are crucial for efficient and fluid piano playing. Proper fingering allows for smoother transitions between notes, keeps the hand in a comfortable position, and ultimately contributes to a more pleasant musical sound.

    At the heart of this issue is the tendency for beginners to use whatever finger feels most convenient at the moment without considering the musical phrases that follow. For instance, they might use their thumb to play a key because it’s nearest, not realizing that it traps the hand in an awkward position for the next sequence of notes. This can lead to choppy and disjointed music rather than a smooth, flowing melody.

    To illustrate, here’s a common scenario:

    • A beginner attempts to play a scale or a simple melody.
    • They start with proper fingering but soon resort to using random fingers.
    • The music sounds uneven, and they struggle to transition smoothly between notes.

    Correct Fingering is Crucial

    Learning and adhering to correct fingering is not merely a suggestion; it’s a necessity for anyone wishing to play the piano well. Every piece of piano music has fingering suggestions that cater to the most natural hand movements and transitions. Ignoring these suggestions often results in inefficient hand positions and movements, leading to increased difficulty with speed and accuracy as the music becomes more complex.

    • Using the same finger for consecutive notes: This can severely limit the fluidity of the music.
    • Overusing the thumb or pinky: Relying too much on these fingers can lead to awkward transitions.
    • Not using the full hand: Failing to utilize all fingers leads to unnecessary hand movements.

    To combat these mistakes, teachers often emphasize the importance of slow, deliberate practice with a focus on proper fingering from the very beginning. It’s not uncommon for beginners to find this approach tedious, but the payoff is undeniable. As muscle memory develops, the correct finger placements start to feel more natural, and the quality of the music improves markedly.

    Additionally, various exercises, such as scales and arpeggios, are designed to reinforce correct fingering patterns. These exercises not only help in mastering the movements of the fingers across the keyboard but also in understanding the reasoning behind each fingering choice.

    Poor Hand Positioning

    One major obstacle that often impedes a beginner pianist’s progress is Poor Hand Positioning. Proper hand placement isn’t just about aesthetics; it’s a fundamental aspect that influences the ease with which one can reach the keys and transition smoothly between notes. Without correct positioning, players find themselves struggling with even the simplest of pieces, rendering their practice sessions less effective and far more frustrating than they need to be.

    For starters, the wrists should remain flexible yet stable, allowing the fingers to glide across the keyboard with minimal effort. A common mistake is either elevating the wrists too high or letting them drop too low, both of which can lead to unnecessary tension in the hands and forearms. This tension not only hampers movement but can also contribute to long-term discomfort or even injury. Additionally, fingers should curve slightly, as though cupping an invisible ball, to strike the keys with their pads rather than their tips or sides. This position optimizes control and touch sensitivity, enabling nuances in dynamics and articulation.

    Another aspect often overlooked is the angle of the arms. Ideally, they should form a roughly straight line from the elbow through the wrist to the hand, without any sharp bends. Such alignment ensures that the force applied when pressing the keys comes from the arms and the body, not just the fingers, preventing fatigue and promoting endurance.

    Beginners might also misjudge their distance from the keyboard, either crowding too close or stretching too far. A comfortable distance allows the arms to extend slightly forward, so the fingers can reach all the keys without strain. Adjusting the bench height and location can make a significant difference in achieving this optimal positioning.

    To correct these common mistakes, beginners are encouraged to:

    • Keep their wrists flexible and at a moderate height
    • Curve their fingers for better control
    • Maintain a straight arm line for efficient force use
    • Adjust their sitting distance for comfortable reach

    Incorporating these adjustments requires mindfulness and patience, as old habits can be hard to break. Regular monitoring and adjustments can help ensure that proper hand positioning becomes a natural part of a pianist’s technique. Visual aids, such as mirrors placed to the side of the keyboard, can offer immediate feedback on one’s posture and hand shape, serving as a useful tool during practice.

    Neglecting Finger Independence

    One often overlooked aspect of learning the piano is developing finger independence. Many beginners find themselves struggling with pieces that require simultaneous action from multiple fingers, each moving in its own rhythm and direction. Finger independence is crucial for executing complex melodies and harmonies that are the hallmark of proficient piano playing. Without it, players are likely to hit a plateau early on in their learning journey.

    The root of this problem lies in the natural tendency of fingers to move in sympathy with one another. It’s common for beginners to move fingers in a group or to rely heavily on their dominant fingers, neglecting the weaker ones. This leads to a lack of control and precision when playing. To combat this, it’s essential for pianists to engage in specific exercises that target the independence of each finger. These exercises, often simple and repetitive, can significantly improve dexterity and control over time.

    • Daily Exercises: Incorporating finger independence exercises into daily practice is vital. Scales, arpeggios, and Hanon exercises are particularly effective in isolating each finger’s movements.
    • Slow Practice: Playing slowly allows for the conscious correction of finger movements, ensuring that each finger acts independently of the others.
    • Varied Dynamics: Practicing the same piece or exercise with different dynamics (loud, soft, crescendo, decrescendo) for each finger further enhances control and independence.

    Here’s a brief overview of exercises to improve finger independence:

    Exercise Type Description Benefit
    Scales Playing scales slowly and precisely. Improves strength and agility.
    Arpeggios Breaking chords into single notes. Enhances reach and precision.
    Hanon Specific exercises for finger control. Builds endurance and dexterity.

    Encouraging beginners to focus on these aspects can lead to a significant improvement not just in their ability to play complex pieces but in their overall technique as well. It’s not just about playing notes accurately but playing them with the right expression, timing, and dynamics. Developing finger independence is a stepping stone towards achieving that musicality and technical skill.

    Overlooking Finger Strength and Agility

    For many beginners at the piano, there’s a tendency to focus solely on learning the notes and perfecting rhythm. While these are undoubtedly crucial aspects of playing the piano, novices often overlook the importance of finger strength and agility. This oversight can lead to a host of issues that might hinder their progress and limit their expressive capabilities on the instrument.

    Finger strength and agility are the bedrock of good piano technique. They enable pianists to execute complex passages, maintain evenness in scales and arpeggios, and produce a wide range of dynamics and articulations. Without robust finger development, players may find themselves struggling with inconsistency and unevenness in their playing.

    Common Missteps in Developing Finger Strength and Agility

    One frequent mistake is the over-reliance on certain fingers, especially the thumb and index finger, which are naturally stronger. This imbalance often leaves the weaker fingers lagging, leading to uneven scales and chords. Another oversight is not dedicating time to specific exercises aimed at building finger independence and control. Practices such as scales, arpeggios, and Hanon exercises are essential for cultivating the agility and strength required to tackle more challenging repertoire.

    In addition to neglecting specific technical exercises, beginners might not realize the role that slow practice plays in enhancing finger strength and agility. Playing slowly allows pianists to concentrate on the equal contribution of each finger, ensuring that none are overworked or ignored. This careful, deliberate approach to practice lays a solid foundation for more advanced skills.

    Furthermore, varying dynamics during practice is another aspect often overlooked by novices. They might not appreciate how playing passages at different volumes can significantly improve finger control and sensitivity. Soft playing, in particular, demands a high level of precision and strength, as it requires the pianist to depress the keys with enough force to sound a note while controlling the pressure to keep the volume low.

    • Scales and Arpeggios: Practice them slowly, focusing on evenness and control. Gradually increase the speed while maintaining precision.
    • Hanon and Czerny Exercises: These classical exercises are designed to improve finger strength and independence. They should be played with attention to detail, adhering to recommended fingerings.
    • **Stacc

    Failing to Practice Scales and Arpeggios

    One of the most common piano fingering mistakes for beginners is skipping over the practice of scales and arpeggios. It’s often seen as monotonous or less engaging compared to learning new songs. However, this overlooks their fundamental importance in developing not only finger agility and strength but also in understanding musical keys and improving sight-reading skills.

    Scales and arpeggios are the building blocks of music. They provide pianists with a framework to understand and play various pieces more effectively. When beginners ignore these exercises, they miss the chance to familiarize themselves with patterns that recur in compositions. This can lead to difficulties in playing more complex pieces that require a strong knowledge of scales and the ability to navigate the keyboard effortlessly.

    Moreover, practicing scales and arpeggios contributes significantly to finger independence. Each finger is trained to move with precision and strength, reducing the reliance on more dominant fingers, which is a common pitfall among beginners. The repetitive nature of these exercises also enhances muscle memory, making it easier for pianists to execute pieces without the need to constantly look at their hands.

    The Importance of Correct Fingering

    The right fingering technique is crucial when practicing scales and arpeggios. Incorrect fingering can lead to bad habits that are hard to unlearn and may hinder a pianist’s progress. Each scale and arpeggio has recommended fingering that aims to make the execution as smooth and efficient as possible. They’re designed to ensure that hand movements across the keyboard are fluid, minimizing awkward hand positions that can lead to strain or injury.

    Beginners might find it tempting to use fingering that feels more comfortable in the short term but doing so can limit their playing speed and expression in the long run. Adhering to the recommended fingering patterns encourages pianists to develop a versatile technique that’s applicable to a wide variety of musical contexts.

    Incorporating Scales and Arpeggios into Daily Practice

    Including scales and arpeggios in daily practice sessions is essential. It doesn’t have to be lengthy; even a few minutes dedicated to these exercises can make a noticeable difference. The key is consistency and attention to detail. Varying the dynamics and practicing at different speeds can keep the exercises engaging while challenging finger control and sensitivity.

    • Start slowly, focusing on evenness and accuracy.
    • Grad

    Conclusion

    Mastering the piano is a journey filled with learning and growth. For beginners, paying attention to the little details, like proper fingering techniques, can make a significant difference in their musical development. By dedicating a portion of their daily practice to scales and arpeggios, they’re not just improving their finger dexterity but also laying a solid foundation for more advanced pieces. Remember, every great pianist started with the basics, and with patience and consistent practice, those tricky passages will soon feel like second nature. Keep at it, and let each note guide you closer to your musical aspirations.

  • What is the best Yamaha Keyboard for Beginners?

    What is the best Yamaha Keyboard for Beginners?

    Best Yamaha Keyboard Models for Beginner Pianists


    Finding the right keyboard for a beginner can feel tricky, but it doesn’t have to be. We’ve checked out plenty of options and found that Yamaha offers some excellent choices. For those just starting their musical curiousity to, keyboards that are affordable, easy to use, and packed with learning functions are key. Yamaha gets this right, especially with models designed for initial-time players and even those with a bit more challenge for excited learners.

    Consider features like built-in lessons and weighted keys when you pick. These features help a lot as they mimic the feel of a real piano and guide through the learning process. Plus, Yamaha provides options that are budget-friendly without skimping on quality. For beginners under $500, you can find lighted keys and adapters that make starting easy and fun. And for those with small spaces, Yamaha’s compact keyboards are a perfect fit, ensuring that lack of room isn’t a barrier to learning piano.

    At last, Yamaha’s keyboard bundles for beginners, which include a stand and headphones, offer great value. They make definitely that you have everything needed to start playing right away. From electric keyboards that are easy on the wallet to entry-level models that come with learning functions, Yamaha has made definitely there’s something for every new musician. When you start on this musical adventure, having the right equipment makes all the difference. We believe Yamaha keyboards strike that perfect chord for beginners, setting them up for success from their very initial note.

    Yamaha EZ-300

    For those just starting their musical curiousity to, we understand the importance of choosing an instrument that’s not only complete but also encourages growth and creativity. Our model is packed with over 600 unique sounds, granting novices a broad sonic palette to explore and enjoy. This diversity not only makes practice sessions more engaging but also opens up a world of musical genres to play with. From classical piano to dynamic synths, learners have the freedom to find their sound preferences and develop a personal playing style.

    Plus, this keyboard is celebrated for its user-friendly features designed to assist beginners. Among these, the option to light up its keys stands out. This innovative feature guides learners through songs and exercises, making the learning curve smoother and more enjoyable. It’s like having a personal tutor available at any time, ready to illuminate the path towards musical proficiency. The combination of a vast sound library and interactive learning tools presents an ideal platform for budding musicians to start their musical curiousity to on the right note.

    We also consider portability an necessary feature for a beginner’s keyboard. Our model’s design ensures it’s light enough for easy transport yet strong enough to withstand the rigors of travel. This means learners can bring their music wherever they go, from practice sessions at a friend’s house to performances at school. The flexibility to play anywhere encourages consistent practice, an indispensable part of mastering any instrument.

    Yamaha P-45

    Starting on the piano curiousity to excites us all. Choosing the right instrument makes this adventure even more thrilling. Our initial option offers everything a beginner needs without overwhelming them. It boasts fully weighted keys, a feature necessary for developing the proper finger technique from the start. This model, celebrated for its simplicity, ensures learners grasp the basics without distraction.

    Explore our selection of quality instruments, tailored for newcomers. Their affordable nature does not compromise on giving an authentic playing experience. It strips back the non-necessary, focusing on what truly matters — touch and sound.

    For those of us venturing into music, it’s an ideal starting point. Its design emphasizes the essentials, making each practice session rewarding. We believe in making learning enjoyable and straightforward. With this model, we’re convinced beginners will find a reliable companion in their musical curiousity to.

    Yamaha PSR-E373

    For beginners stepping into the world of music, finding the right instrument can be a game-changer. We understand the importance of a keyboard that is not only affordable but also packed with features that encourage learning and creativity. This model stands out for its value, offering a variety of sounds and functions that cater to beginners.

    Also, its user-friendly design makes it easy for newcomers to navigate and explore different melodies and rhythms. The vast array of sounds allows beginners to experiment and find their style. For those looking to explore deeper into their musical curiousity to, finding the perfect fit is necessary, and our choices aim to make that search a bit easier by presenting options that blend quality with ease of use.

    Among our top picks for beginners, this option shines, thanks to its blend of functionality and budget-friendliness. With its versatile features, beginners can enjoy a wide range of musical genres and styles, making the learning process engaging and fun. This makes it an excellent choice for those excited to start their musical curiousity to on the right note. Explore more details at Portland Music Company.

    Affordable Yamaha Keyboards for First-Time Players

    When starting on the piano curiousity to, finding the right instrument is necessary. We understand how overwhelming it can be with so many options out there. That’s why we recommend Yamaha keyboards for beginners. They offer a range of models that fit perfectly into the category of quality, affordability, and user-friendliness. For those just beginning, a model like the Yamaha EZ-300 stands out. It’s packed with over 600 sounds and designed to grow with you as you learn.

    For beginners, the ease of use is a top priority. Yamaha keyboards shine here with their intuitive interfaces. These keyboards are not just tools for playing; they’re learning aids too. With built-in lessons and easy-to-navigate functions, they are perfect for self-taught musicians and those taking formal lessons. If you have a small space at home or you’re looking for something portable, there’s a Yamaha keyboard that fits the bill, ensuring you don’t have to compromise on quality for the sake of convenience or budget.

    Also, affordability doesn’t mean you have to give up on features that make playing enjoyable. Some Yamaha models come with weighted keys for a realistic piano feel, stands, and headphones for a complete setup right innovative. This makes them an excellent choice for initial-time players looking for a straightforward, cost-effective way to start their musical curiousity to.

    Yamaha YPT270 61-Key Portable Keyboard

    Starting with the keyboard, we believe it’s significant for beginners to find an option that’s easy to use yet capable of growing with them as they improve. That’s where our choice comes into play. It’s designed to be both portable and packed with features that encourage learning and enjoyment from day one. Whether at home or on the road, this keyboard is a companion that fits into your life seamlessly.

    Its wide range of sounds and built-in lessons offer a fantastic foundation for anyone new to music. Plus, it can connect to a variety of music apps, making practice fun and interactive. For those excited to explore more, the option to explore sounds and compositions opens up a world of creativity.

    At last, for us, affordability without compromising on quality is key. We make definitely you get a reliable instrument that won’t very expensive. This balance makes our selection an excellent starting point for musical journeys.

    Yamaha EZ300 61-Key Portable Keyboard

    For those stepping into the world of music, our keyboard offers over 600 sounds. This feature enriches the learning experience, providing variety and depth suitable for any beginner. With these many voices, students can explore different genres and styles, making practice sessions more engaging and fun.

    We also include a feature that makes learning and playing along to your favorite songs easy and enjoyable. This addition helps to build a practical understanding of music, improving both timing and rhythm. For more details on our range, you can check out our broad selection, which is designed to suit the needs of every entry-level player.

    Effortlessly portable, it’s a suitable option for those who are always on the move. If you’re heading to a lesson or performing for friends, this keyboard’s compact design ensures you can bring your music wherever you go. Our commitment to bridging the gap between hardware and software further enhances this portability, allowing for seamless transitions between practice environments.

    Top-Rated Yamaha Keyboards for Learning Piano

    Top-Rated Yamaha Keyboards for Learning Piano

    We understand that starting your musical curiousity to can feel overwhelming, especially regarding choosing the right instrument. That’s why we recommend starting with Yamaha keyboards, famous for their quality and beginner-friendly features. The Yamaha EZ-300, for instance, stands out as an excellent choice for new musicians. It offers over 600 voices, enabling learners to explore different sounds and genres effortlessly.

    For those looking for a keyboard that combines affordability with high quality, Yamaha offers several models tailored to initial-time players. Models like the Yamaha P-45 and the Yamaha PSR-E373 are perfect for beginners, providing features such as fully weighted keys and built-in lessons to make easier the learning process. These keyboards not only fit your budget but also grow with you as you progress in your musical curiousity to.

    Also, Yamaha’s range includes compact options for those with limited space and portable keyboards for musicians on the go. The addition of built-in lessons in models like the Yamaha EZ-300 further simplify the learning path for self-taught beginners, making it easier to practice and improve without the need for a physical instructor. With Yamaha, you’re not just buying an instrument; you’re investing in a complete learning experience that caters to your pace and style.

    Yamaha Piaggero NP-15

    We understand how challenging it can be for beginners to find the right keyboard. That’s why we often recommend a model that’s perfect for those just starting out on their musical curiousity to. It’s designed with simplicity in mind, ensuring a smooth learning curve for new players.

    Among its features are lightweight design and portability, making it easy to carry from place to place. If you’re practicing at home, taking it to lessons, or performing in front of a small crowd, this keyboard supports your musical aspirations wherever you go. Its range of built-in sounds allows for creative exploration, encouraging players to experiment with different styles and genres.

    For those interested in this beginner-friendly keyboard, you can find more details to help make an good choice. Its affordability and ease of use make it a top choice among newcomers, and we’re confident it will serve well in nurturing your musical talents.

    Yamaha PSR-SX600

    We believe the starter model offers a perfect mix of features and value for beginners. Its array of voices, from pianos to strings, allows learners to explore a variety of sounds. This makes practice sessions not just educational but fun, too.

    With a focus on simplicity, it comes equipped with intuitive controls that make it easy for initial-timers to navigate. The keyboard ensures that beginners won’t feel overwhelmed as they learn the basics of music production. For more information, you can check out detailed reviews here.

    Its affordability is perhaps one of its strongest points. By offering high-quality features at a reasonable price, we make definitely that starting your musical curiousity to doesn’t very expensive. This approach helps us make definitely that music education is accessible to everyone.

    Beginner-Friendly Yamaha Keyboard with Weighted Keys


    We understand how necessary it is for beginner pianists to find the right instrument. Starting on the curiousity to of learning piano can be daunting, but the right Yamaha keyboard can make all the difference. That’s why we recommend models with weighted keys for those who are starting out. Weighted keys offer a touch and feel similar to that of an acoustic piano, making the transition smoother for beginners.

    Among the vast range of options, Yamaha electric keyboards under $500 provide an excellent balance between cost and quality. Not only are these keyboards affordable for initial-time players, but they also come equipped with a variety of features designed to aid in learning. From built-in lessons to compact options that fit in small spaces, Yamaha has made definitely there’s a perfect match for every beginner’s needs.

    Also, we suggest looking for Yamaha keyboard bundles for beginners. These bundles often include a stand and headphones, which are necessary accessories for any budding pianist. This way, new musicians can start their musical curiousity to with everything they need, allowing for an easy, enjoyable learning experience. Yamaha’s dedication to creating beginner-friendly options ensures that there’s a suitable keyboard for every aspiring pianist, regardless of their space or budget limitations.

    Yamaha P-145

    We’ve taken a closer look at our options and found that for budding musicians wanting quality sound, one model stands out. This instrument combines ease of use with advanced features. It’s especially crafted to support learners in their musical curiousity to from the start.

    With upgraded specs, this model offers an enhanced experience. Learning becomes more enriching because of its authentic sound quality and responsive keys. It’s like having a concert piano at your fingertips, but designed for those just starting out.

    Also, for those on the move or with limited space, its compact size is a big plus. You can easily take it where your music takes you. For insights on beginner-friendly instruments, exploring keyboards and pianos will prove valuable. This model’s thoughtful design bridges the gap between starting learners and their aspirations to master the piano, making it an excellent choice for newcomers.

    Yamaha CP88

    We understand the importance of having a keyboard that not only serves the needs of beginners but also offers a level of quality that supports progression. For learners aiming for excellence in their musical curiousity to, our focus is on providing instruments that are effortless to play and rich in features. This ensures a seamless transition as skills evolve.

    Also, we prioritize ease of use alongside sophisticated functionality. Our selection includes keyboards that are intuitively designed, allowing users to explore and expand their musical vocabulary without getting bogged down by overly complex operations. For more details on such keyboards, consider exploring our options that cater to both the budding musician and the more seasoned player looking to improve their repertoire.

    Basically, our goal is to support the musical curiousity to from beginner to advanced levels, ensuring every step is met with the right tools for success. The versatility of our keyboards makes them a perfect fit for anyone looking to start on or continue their musical expedition.

    Yamaha Keyboard Bundles for Beginners with Stand and Headphones


    Starting on the curiousity to of music can be exciting. We understand how significant it is for beginners to have the right tools. That’s where affordable Yamaha keyboards come in. They are perfect for initial-time players. With features designed to make learning easy and fun, these keyboards are a great choice. They have built-in lessons that guide you through the basics of piano playing. This helps self-taught beginners to improve at their own pace.

    For those who are tight on space, compact Yamaha keyboard options are available. They fit well in small study areas, bedrooms, or living spaces, making practice convenient and accessible. Also, for new musicians looking for an all-in-one solution, our bundles come with stands and headphones. This setup encourages practice sessions without disruptions, fostering a better learning environment. You can check out some great options here. These bundles are an ideal start for anyone aspiring to play the piano, offering great value and the necessary tools to begin your musical curiousity to.

    When choosing your initial instrument, consider Yamaha electric keyboards for beginners under $500. These models provide a quality introduction to piano playing without a hefty price tag. Paired with entry-level Yamaha keyboards with learning functions, beginners have a strong platform for growth. The selection of sounds and rhythms available on these keyboards not only makes practicing enjoyable but also allows you to explore different music styles. This diversity keeps the learning process engaging and productive.

    Yamaha PSR-E373 Bundle

    Our choice for those starting their musical curiousity to often includes this key instrument. It packs an impressive number of features that are both engaging and useful for beginners. The selection of sounds and rhythms opens up a world of creative possibilities, making practice sessions both fun and educational.

    We understand the importance of quality and affordability. This package hits the mark by combining a rich set of functionalities with a price that doesn’t very expensive. It’s designed to grow with you as you progress in your musical curiousity to, offering more complex options and controls as you develop your skills.

    Also, the ease of use makes it a straightforward choice for those just finding their feet within the sphere of music. So, if you’re practicing at home or taking your initial steps in composing, this selection offers flexibility and opportunity for all. It stands out as a fitting start for budding musicians, providing a solid foundation upon which to build their talents.

    Yamaha P-515B Bundle

    For those stepping into the world of piano playing, finding the right instrument is necessary. Our choice leans towards a model that combines the needs of a beginner with the potential to satisfy even the most seasoned pianists. It’s known for its exceptional sound quality and realistic key action, which mimics the feel of an acoustic piano very closely.

    Explore our favorite picks, and you’ll find that this piano not only has a excellent sound engine but also offers a wide range of features. These include built-in lessons for beginners, making it easier to start your musical curiousity to. The instrument’s ability to grow with the player over the years is a significant advantage.

    The durability and the thoughtful design make definitely that it remains a reliable partner in music, whether for practice at home or performances. It strikes the perfect balance between a beginner’s needs and professional aspirations, making it a solid investment for anyone serious about learning the piano.

    Conclusion

    After exploring the best Yamaha keyboard models for beginner pianists, affordable options for initial-time players, and top-rated keyboards for learning piano, it’s clear that Yamaha offers a wide range of beginner-friendly keyboards with weighted keys. If you’re looking for a keyboard bundle with stand and headphones, an electric keyboard under $500, or an easy-to-use setup for new musicians, Yamaha has you covered. Plus, their entry-level keyboards with learning functions, compact options for small spaces, and keyboards with built-in lessons for self-taught beginners make Yamaha a top choice for those starting their musical curiousity to.