Blog

  • How to Increase Piano Playing Speed with a Metronome

    How to Increase Piano Playing Speed with a Metronome

    Learning to play the piano can be a challenging but rewarding experience. One of the most important aspects of piano playing is timing. To play music accurately, pianists need to have a good sense of rhythm and be able to keep time. This is where a metronome can be a valuable tool.

    A metronome is a device that produces a steady beat at a set tempo. It can be used to help musicians develop their timing and improve their ability to play at a consistent speed. By practicing with a metronome, pianists can increase their playing speed and accuracy, and develop a better sense of rhythm. In this article, we will explore how to use a metronome to increase piano playing speed.

    Understanding the Metronome

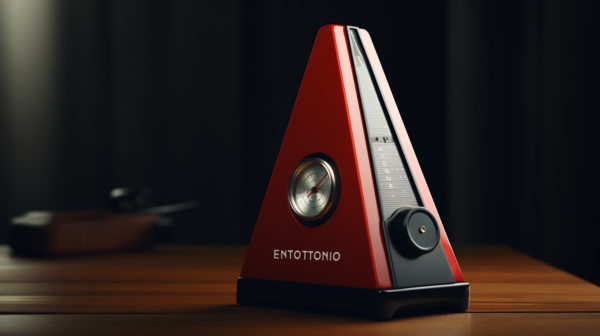
    A metronome is a tool that helps piano players keep a steady beat while playing. It produces a regular pulse or click at a set tempo, measured in beats per minute (BPM). The metronome has been used for centuries in music practice, and it is still an essential tool for many musicians today.

    Traditionally, metronomes were mechanical devices that used a pendulum to produce the pulse. These traditional metronomes are still available today, but they have largely been replaced by electronic metronomes. Electronic metronomes use quartz technology to produce a more accurate and consistent pulse.

    Digital metronomes are the most popular type of electronic metronome. They are small devices that can fit in a pocket or attach to a music stand. They can be programmed to produce a wide range of tempos, and they often have additional features like volume control and different sound options.

    When using a metronome, it is important to choose the right tempo for the piece you are playing. A slow tempo is usually best for beginners, while more advanced players may prefer a faster tempo. It is also important to start with a tempo that is comfortable and gradually increase the speed as you become more proficient.

    In addition to helping players keep a steady beat, the metronome can also be used to improve playing speed. By gradually increasing the tempo, players can build speed and accuracy over time. However, it is important not to rush the process. It takes time and practice to build speed, and players should always focus on playing accurately and with good technique.

    Overall, the metronome is a valuable tool for piano players of all levels. It helps players develop a sense of rhythm and timing, and it can be used to build speed and accuracy over time. Whether using a traditional or electronic metronome, players should always focus on playing with good technique and gradually increasing the tempo as they become more proficient.

    Importance of a Metronome in Piano Practice

    A metronome is an essential tool for any pianist looking to improve their sense of rhythm, timing, and control. It is a device that produces a steady beat at a set tempo, allowing the pianist to practice playing at a consistent speed.

    One of the most significant benefits of using a metronome during practice sessions is that it helps musicians develop accuracy and precision in their playing. When a pianist practices with a metronome, they are forced to play in time with the beat, which helps them develop a strong sense of rhythm. This, in turn, helps them play more accurately and with greater control.

    Another advantage of using a metronome is that it helps pianists improve their timing and speed. By setting the metronome to a specific tempo, pianists can practice playing at a consistent speed and gradually increase the tempo as they become more comfortable. This allows them to develop their speed and timing gradually, without sacrificing accuracy.

    Using a metronome also helps pianists develop a more efficient practice routine. By practicing with a metronome, they can focus on specific sections of a piece and work on them until they can play them accurately and consistently. This allows them to make the most of their practice time and achieve better results in less time.

    Overall, a metronome is an invaluable tool for pianists looking to improve their playing. By helping them develop a strong sense of rhythm, timing, and control, it can help them become better musicians and achieve their goals more quickly and efficiently.

    Choosing the Right Metronome

    When it comes to choosing the right metronome, there are several options available. Traditional metronomes, electronic metronomes, and metronome apps for tablets and smartphones are all viable options. The right choice will depend on the player’s needs and preferences.

    Traditional metronomes are mechanical devices that produce a ticking sound. They are powered by a clockwork winding mechanism and do not require external power or batteries. These metronomes often have a swinging pendulum that helps the player keep time. They can be a good choice for those who prefer a tactile and visual cue for keeping time.

    Electronic metronomes are battery-powered devices that produce a beeping sound. They often have a volume control and can be programmed to produce different sounds and tempos. These metronomes can be a good choice for those who prefer a consistent and precise sound.

    Metronome apps are available for tablets and smartphones. They can be downloaded for free or purchased for a small fee. These apps often have a wide range of features, including volume control, different sounds and tempos, and the ability to save and share presets. They can be a good choice for those who want the convenience of a digital device and the ability to customize their metronome settings.

    When choosing a metronome, it is important to consider the player’s needs and preferences. Traditional metronomes can be a good choice for those who prefer a tactile and visual cue, while electronic metronomes and metronome apps can be a good choice for those who want a consistent and precise sound. It is also important to consider the volume control, as some metronomes can be quite loud and distracting.

    Setting the Metronome

    Setting the metronome is the first step to increasing piano playing speed. A metronome is a device that produces a regular pulse or beat, which is measured in beats per minute (BPM). Before setting the metronome, it is important to understand the time signature of the piece being played.

    The time signature indicates the number of beats in each measure and the type of note that receives one beat. For example, in a 4/4 time signature, there are four beats in each measure, and a quarter note receives one beat. In a 3/4 time signature, there are three beats in each measure, and a quarter note receives one beat.

    To set the metronome, first, determine the tempo of the piece. The tempo is the speed at which the music is played, and it is measured in BPM. The tempo can be found at the beginning of the piece, indicated by a word such as “Allegro” or “Adagio,” or by a specific BPM marking.

    Once the tempo is determined, set the metronome to the desired BPM. It is important to start with a slower tempo and gradually increase the speed as the player becomes more comfortable with the piece.

    The volume of the metronome should be set at a level that is audible but not distracting. The pulse of the metronome should be felt but not overpowering.

    Overall, setting the metronome is an important step in increasing piano playing speed. By starting with a slower tempo and gradually increasing the speed, the player can build muscle memory and accuracy, leading to faster and more precise playing.

    Practicing with a Metronome

    When it comes to increasing piano playing speed, practicing with a metronome is an essential tool. A metronome is a device that produces a steady beat that can help a pianist keep time while playing. Here are some tips for practicing with a metronome to increase piano playing speed:

    Starting with Slow Practice

    When using a metronome to increase piano playing speed, it’s important to start with slow practice. This allows the pianist to focus on accuracy and timing, rather than speed. The metronome can help the pianist keep a steady tempo, which is essential for playing at faster speeds.

    Increasing Speed Gradually

    Once the pianist has mastered a piece of music at a slower tempo, it’s time to start increasing the speed gradually. The metronome can be set to a slightly faster tempo, and the pianist can practice at this speed until they are comfortable. Then, the tempo can be increased again, and so on, until the desired speed is reached.

    Maintaining Rhythm and Control

    When practicing with a metronome, it’s important to maintain rhythm and control. The metronome can help the pianist stay on beat, but it’s up to the pianist to maintain control of their playing. This means playing each note accurately and with the correct timing.

    Practicing Complex Rhythms

    Practicing complex rhythms can be challenging, but using a metronome can help. The metronome can help the pianist keep time while practicing complex rhythms, which can make it easier to memorize the rhythm and play it accurately.

    Using Metronome in Practice Sessions

    Using a metronome in practice sessions can be helpful for pianists of all skill levels. It can help beginners develop a sense of timing and rhythm, and it can help advanced pianists increase their speed and accuracy. When practicing with a metronome, it’s important to relax and focus on the music. The metronome should be used as a tool to help the pianist keep time, but it shouldn’t become a distraction.

    In conclusion, practicing with a metronome is an effective way to increase piano playing speed. By starting with slow practice, increasing speed gradually, maintaining rhythm and control, practicing complex rhythms, and using a metronome in practice sessions, pianists can improve their accuracy, timing, and overall playing ability.

    Advanced Techniques

    Subdivision and Counting

    Once a pianist has become comfortable with playing along with a metronome, they can begin to experiment with more advanced techniques. One such technique is subdivision, which involves dividing the beats of the metronome into smaller parts. For example, if the metronome is set to 60 beats per minute, a pianist could practice playing sixteenth notes by playing four notes for every click of the metronome.

    Counting is another technique that can help a pianist increase their speed and accuracy. By counting out loud while playing along with the metronome, a pianist can develop a stronger sense of rhythm and timing. For example, a pianist could count “1 and 2 and 3 and 4 and” while playing along with a metronome set to 120 beats per minute.

    Playing with Different Volume Levels

    Another technique that can help a pianist improve their playing speed is practicing playing with different volume levels. By practicing playing softly and loudly, a pianist can develop greater control over their touch and dynamics. This can help them play more expressively and with greater nuance.

    Practicing Scales and Chords

    Practicing scales and chords is another effective way to increase piano playing speed. By practicing these fundamental building blocks of music, a pianist can develop greater finger dexterity and hand coordination. They can also practice playing these scales and chords at different tempos, gradually increasing the speed over time.

    By incorporating these advanced techniques into their practice routine, a pianist can continue to improve their piano technique and increase their playing speed. With regular practice and dedication, a pianist can achieve their goals and become a more skilled and confident player.

    Using Metronome for Performance Preparation

    When preparing for a performance, using a metronome can be an invaluable tool for musicians. It helps them to achieve greater control over their timing, rhythm, and speed, which are all crucial elements of a successful performance.

    One of the most important ways a metronome can be used for performance preparation is by helping the musician to maintain a consistent tempo throughout a piece of music. This is especially important when playing with other musicians, as it ensures that everyone is playing at the same speed and in time with each other. It can also be useful when recording, as it ensures that the timing of the performance is consistent and accurate.

    Another way a metronome can be used is by allowing the musician to practice at different speeds. By gradually increasing the tempo, they can build up their speed and control over a piece of music. This is particularly useful when working on difficult sections of a piece, as it allows the musician to focus on the timing and rhythm without being distracted by other technical aspects of the music.

    Using a metronome can also help the musician to develop greater control over their timing and rhythm. By practicing with a metronome, they can learn to play with greater precision and accuracy, which can help to improve their overall piano playing.

    Finally, a metronome can be useful for musicians who are working with a conductor or composer. By practicing with a metronome, they can become more familiar with the tempo variations that may be required in a piece of music, and can be better prepared to respond to the conductor’s or composer’s direction during a performance.

    In summary, using a metronome for performance preparation is an effective way for musicians to improve their timing, rhythm, and speed, and to achieve greater control over their piano playing. It can be particularly useful when working with other musicians, recording, or preparing for a performance with a conductor or composer.

    Additional Tools and Resources

    In addition to using a metronome, there are a variety of other tools and resources that can help piano players increase their speed and improve their overall playing ability. Here are a few options to consider:

    Metronome Apps

    While traditional metronomes are still widely used, many piano players are turning to metronome apps that can be downloaded onto a smartphone or tablet. These apps often offer more features and flexibility than traditional metronomes, including the ability to customize rhythms and tempos, and to save and share practice sessions. Some popular metronome apps include Pro Metronome, Metronome Plus, and Tempo.

    Tuners

    In addition to keeping time, a good tuner can help ensure that a piano is in tune and sounding its best. There are a variety of tuner apps available, as well as standalone tuning devices that can be used with a keyboard or other instrument.

    Sheet Music

    Having access to a wide range of sheet music can help piano players develop their skills and explore different styles and genres. There are many websites and apps that offer free or low-cost sheet music, including IMSLP, Musopen, and Virtual Sheet Music.

    Recording Devices

    Recording practice sessions can be a valuable tool for piano players who want to track their progress and identify areas for improvement. A simple smartphone or tablet can be used to record audio or video, or a dedicated recording device can be used for higher-quality recordings.
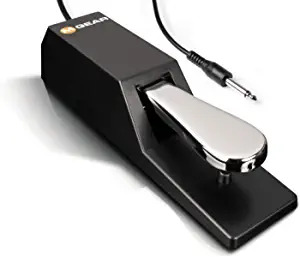
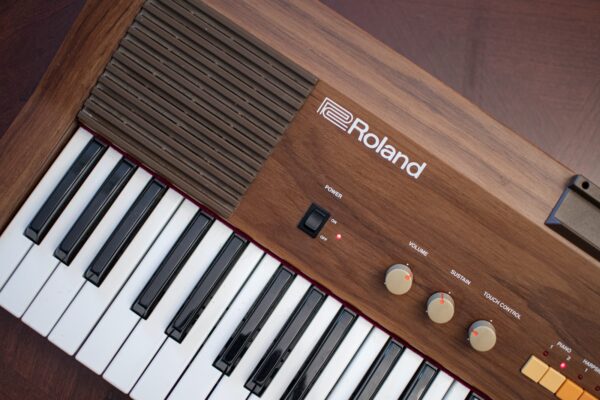
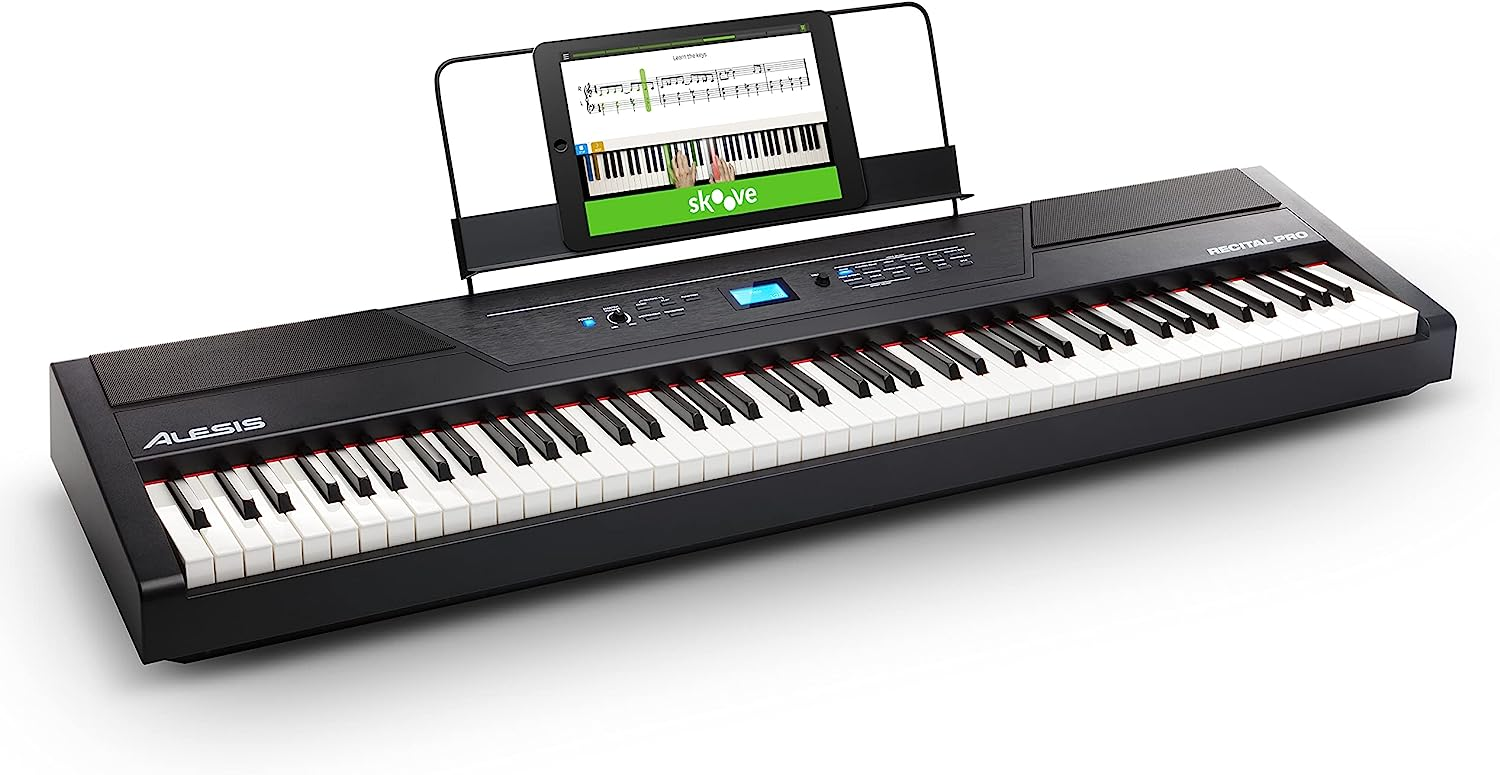
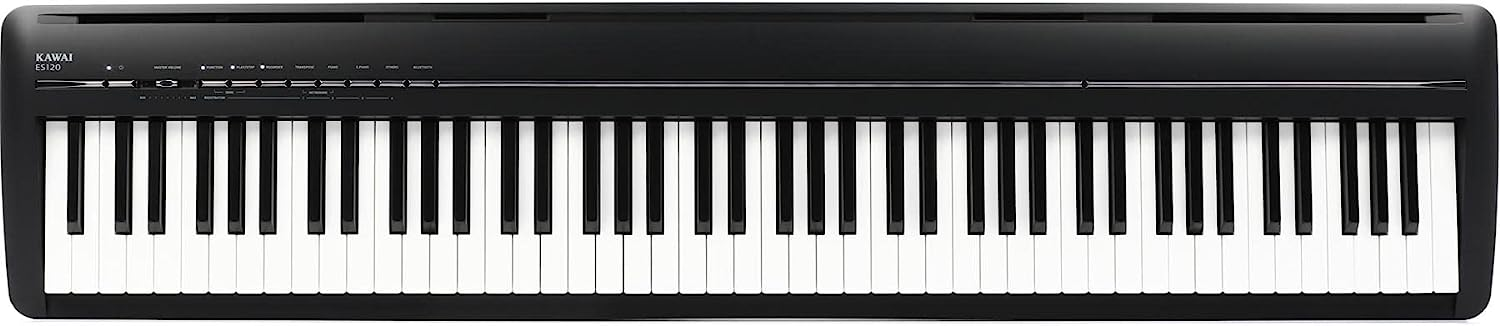
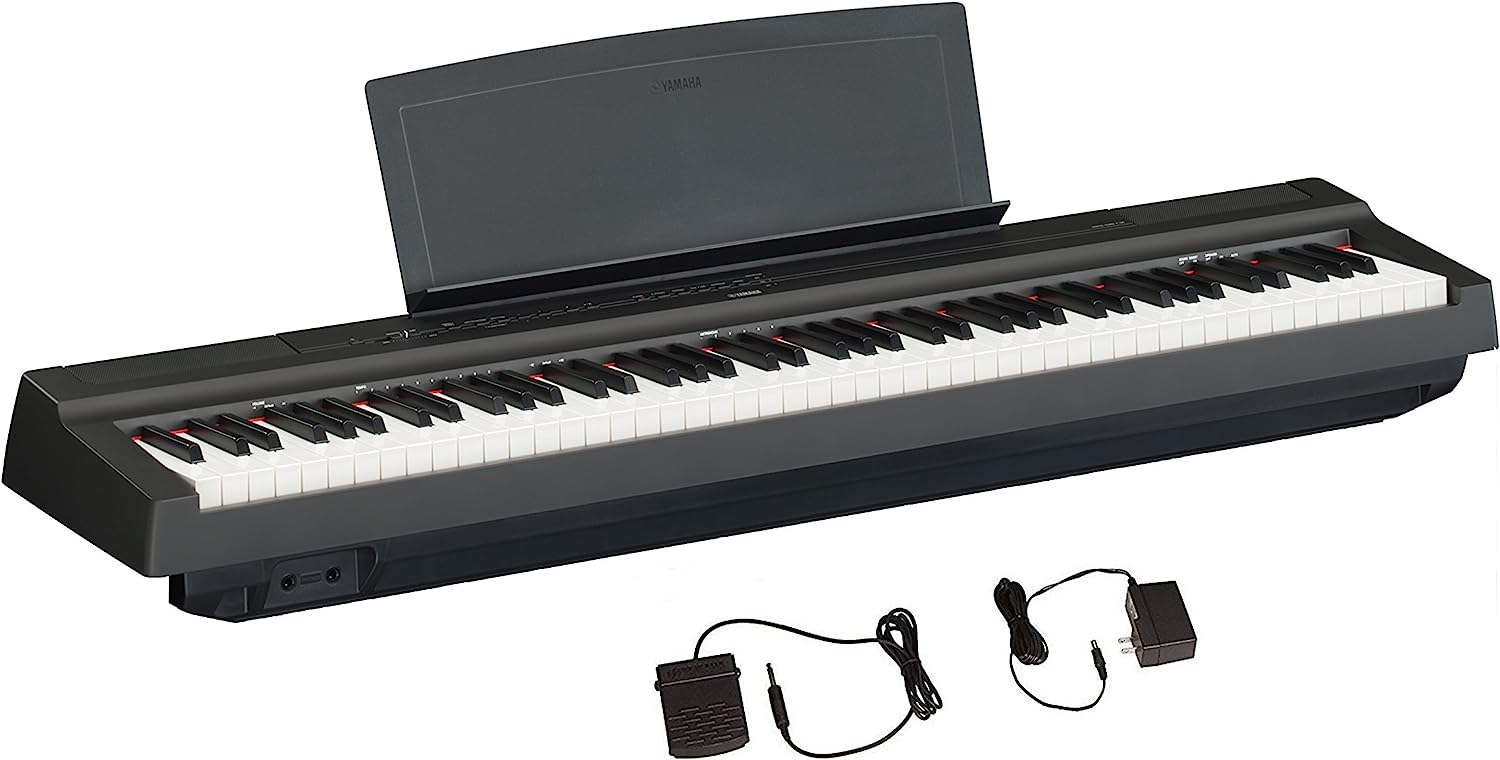
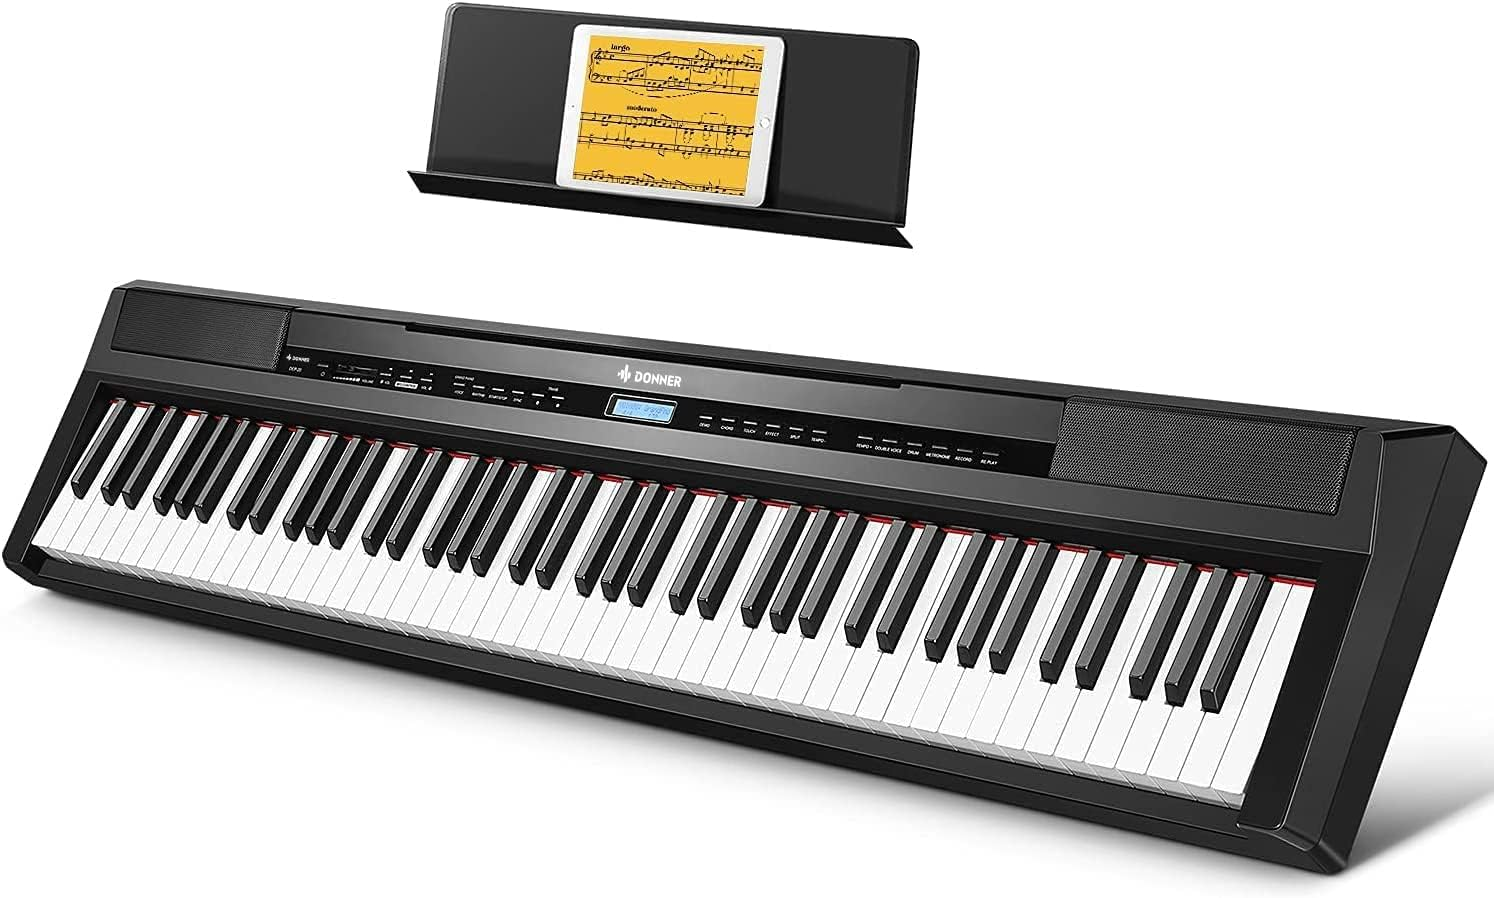
    Keyboard Devices

    While traditional pianos are still the gold standard for many players, there are a variety of keyboard devices that can be used for practice and performance. These include digital pianos, MIDI controllers, and synthesizers, which offer a range of features and styles to suit different needs and preferences.

    Overall, there are many tools and resources available to help piano players improve their skills and increase their playing speed. By experimenting with different options and finding what works best for them, players can take their playing to the next level and achieve their musical goals.

    Conclusion

    Using a metronome is a great way to increase piano playing speed. It helps pianists develop a sense of timing and rhythm, which is essential for playing faster pieces accurately. By practicing with a metronome, pianists can gradually increase their playing speed without sacrificing accuracy.

    Some tips for using a metronome effectively include starting slow, focusing on accuracy, breaking down pieces into smaller sections, and gradually increasing the tempo. It’s also important to practice regularly and consistently to see improvement over time.

    While using a metronome can be challenging at first, with practice, it becomes an essential tool for pianists looking to improve their speed and accuracy. It’s important to remember that everyone progresses at their own pace, and it’s okay to start slow and work your way up gradually.

    Overall, incorporating a metronome into piano practice can be a game-changer for pianists looking to improve their playing speed and accuracy. With patience, dedication, and consistent practice, pianists can achieve their goals and become more confident in their abilities.

    Frequently Asked Questions

    How do you use a metronome to increase speed?

    Using a metronome to increase piano playing speed is a great way to improve your timing and rhythm. First, choose a piece of music you want to play and set the metronome to a slow tempo. Play the piece at this tempo, making sure to stay in time with the metronome. Once you feel comfortable playing the piece at this tempo, gradually increase the metronome speed. Continue doing this until you reach your desired tempo.

    What is a good metronome speed for piano?

    The ideal metronome speed for piano playing depends on the piece of music being played. Generally, slower pieces of music require slower tempos, while faster pieces require faster tempos. A good starting point for beginners is around 60 beats per minute (BPM), and then gradually increasing the tempo as they become more comfortable with the piece.

    Is it good to practice piano with metronome?

    Practicing piano with a metronome is highly recommended, as it helps to improve timing and rhythm. It also helps to develop a sense of consistency in playing, which is essential for playing with other musicians. Using a metronome can also help to identify areas of weakness in your playing, allowing you to focus on improving those areas.

    How can I improve my piano tempo?

    Improving piano tempo requires regular practice with a metronome. Start by playing a piece of music at a slow tempo and gradually increasing the speed as you become more comfortable with the piece. Focus on playing with a consistent rhythm and timing, and practice playing with both hands at the same time. It’s also important to practice playing different types of music to develop a variety of skills.

    Best metronome for piano beginners

    For beginners, a digital metronome with a clear and easy-to-read display is recommended. The Korg TM-60 is a popular choice, as it has a large display and can also be used as a tuner. The Boss DB-90 is another great option, as it has a variety of features and can be used to create custom rhythms.

    Metronome for piano app

    There are many metronome apps available for smartphones and tablets that are specifically designed for piano players. Some popular options include the Pro Metronome app, which has a variety of features and can be customized to suit individual needs, and the Metronome Beats app, which has a simple and easy-to-use interface.

  • Best Roland Keyboards for Beginners: Top Picks for Easy Learning

    Best Roland Keyboards for Beginners: Top Picks for Easy Learning

    When it comes to learning a new instrument, having the right gear can make all the difference. For beginners interested in learning the keyboard, Roland offers a range of options to suit different needs and budgets. In this article, we’ll be focusing on the best Roland keyboards for beginners.

    Roland is a well-known brand in the music industry, with a reputation for producing high-quality instruments. Their keyboards are no exception, and they offer a range of features to help beginners get started on their musical journey. Some of these features include built-in lessons, touch-sensitive keys, and a variety of sounds and effects to experiment with.

    When choosing a keyboard, one of the most critical things to consider is the number of keys. While a full-sized keyboard has 88 keys, beginners may benefit from a smaller keyboard with fewer keys to start with. Another important factor is the touch sensitivity of the keys, which can affect how the keyboard responds to the player’s touch.

    After researching and testing different models, we’ve identified the best Roland keyboards for beginners. These keyboards offer a range of features to help beginners learn and grow as musicians, from built-in lessons to a variety of sounds and effects. Whether you’re just starting or looking to upgrade, these keyboards are sure to inspire you on your musical journey.

    Best Roland Keyboards For Beginners

    We know how daunting it can be when you’re just starting out on your musical journey. That’s why we’ve put together a list of the best Roland keyboards for beginners. Whether you’re looking to learn the basics or hone your skills, these keyboards offer a range of features and functions to help you on your way. From compact and portable options to full-sized models with weighted keys, we’ve got you covered. Check out our top picks below and get ready to make beautiful music!

    Roland F107 Digital Piano

    Roland F107 Digital Piano

    If you’re looking for a beginner-friendly digital piano with an attractive modern design, the Roland F107 is a great option.

    Pros

    • The slim and stylish design looks great in modern living spaces.
    • The 88-note PHA-4 Standard keyboard offers authentic acoustic grand piano touch and response.
    • With 256 notes of polyphony, you can play complex pieces with no compromise.

    Cons

    • The piano is quite heavy, weighing in at 119 pounds.
    • The F107 is only available in black, so it may not match all decor styles.
    • The piano may be too basic for advanced players looking for more features.

    We recently had the chance to try out the Roland F107 digital piano and were impressed with its performance. The streamlined design is based on the award-winning F701 and blends perfectly with contemporary furnishings. The piano’s sound engine and keyboard action are found in higher-end Roland pianos, so you get best-in-class tone and touch.

    We were particularly impressed with the deep expression from Roland’s acclaimed SuperNATURAL Piano technology. The 88-note PHA-4 Standard keyboard offers authentic acoustic grand piano touch and response, making it a joy to play. The 256 notes of polyphony ensure that you can play complex pieces with no compromise.

    The F107 also features onboard Bluetooth, allowing you to connect a smartphone or tablet to play along with favorite songs and work with MIDI music apps. You can also control F107 features, explore lessons, and more with the companion Roland Piano App. The piano also has dual headphones jacks and Twin Piano mode for playing along with a friend or teacher.

    Overall, we think the Roland F107 digital piano is a great option for beginners looking for an affordable and attractive modern piano. Its best-in-class tone and touch make it a joy to play, and the onboard Bluetooth and companion app offer a range of features to enhance your musical enjoyment.

    Roland GO 61-key Music Creation Piano Keyboard with Integrated Bluetooth Speakers

    Roland GO 61-key Music Creation Piano Keyboard with Integrated Bluetooth Speakers

    We highly recommend the Roland GO 61-key Music Creation Piano Keyboard with Integrated Bluetooth Speakers for beginners who want to start playing music in a fun and inspiring way.

    Pros

    • The Loop Mix function allows you to build songs by simply playing notes on the keyboard, making it easy for beginners to create fully produced songs.
    • With over 500 pro-quality sounds, including pianos, synths, strings, bass, brass, and more, there’s a diverse range of pro sounds to explore.
    • The keyboard has Bluetooth audio/MIDI support for connecting with your smartphone or tablet, allowing you to jam along with music from your favorite apps.

    Cons

    • The keyboard is not as sturdy as some other models, so it may not hold up as well over time with heavy use.
    • The keys are not weighted, so the keyboard may not feel as realistic as some other models.
    • The keyboard does not come with a sustain pedal, so you may need to purchase one separately if you want to use one.

    We were impressed with the Roland GO 61-key Music Creation Piano Keyboard with Integrated Bluetooth Speakers. The Loop Mix function was especially fun to use, and we were able to create fully produced songs right away, even with no previous music experience. The range of pro sounds was also impressive, and we were able to explore a wide variety of different sounds and styles. The Bluetooth connectivity was also a nice touch, allowing us to jam along with music from our smartphones and tablets.

    Overall, we think the Roland GO 61-key Music Creation Piano Keyboard with Integrated Bluetooth Speakers is an excellent choice for beginners who want to start playing music in a fun and inspiring way. If you’re looking for a keyboard that’s easy to use, has a wide range of pro sounds, and allows you to create fully produced songs right away, this is definitely a keyboard worth considering.

    Roland FP-30X Digital Piano

    Roland FP-30X Digital Piano

    We highly recommend the Roland FP-30X Digital Piano for beginners who want to balance affordability with superior performance.

    Pros

    • Authentic acoustic-style piano touch with PHA-4 Standard keyboard
    • Wide variety of onboard sounds for every musical genre
    • Three months of free piano lessons from Pianote

    Cons

    • Sustain pedal needs to be upgraded or eliminated
    • Sound can be odd and less like a piano than expected
    • Bluetooth capabilities can disconnect at times

    The Roland FP-30X Digital Piano is a slim and stylish portable piano that builds on the entry-level FP-10 with an enhanced sound engine, more powerful onboard speakers, and increased polyphony. The SuperNATURAL Piano sound engine provides rich expression, from pianissimo to fortissimo, and the powerful 22-watt stereo speaker system offers room-filling sound. The dedicated setting for optimizing the sound when placed on a desktop is a nice touch.

    The optional KSC-70 stand and KPD-70 three-pedal unit allow for upright performance and traditional playing styles. The dual headphones outputs and quiet keyboard action let you play when it suits you, without disturbing others.

    The Roland FP-30X Digital Piano includes a wide variety of onboard sounds for every musical genre, including electric pianos, organs, strings, and synthesizers. The PHA-4 Standard keyboard provides authentic acoustic-style piano touch, and the piano comes in a home-friendly compact footprint with easy-to-transport weight.

    Turn your piano goals into a reality with three months of free piano lessons, compliments of our partner Pianote, the ultimate online piano lessons experience. If you own a Roland piano, you’ll get unlimited access to everything inside Pianote—from step-by-step lessons, to detailed song tutorials, and even access to live lessons and support from real piano teachers. Learn to play your Roland piano from the comfort of your own home, anytime you like. Plus, access your lessons from any internet-ready computer, tablet, or phone.

    In conclusion, the Roland FP-30X Digital Piano is an excellent choice for beginners who want to balance affordability with superior performance. The piano provides rich expression, a wide variety of onboard sounds, and authentic acoustic-style piano touch.

    Roland RP107 Digital Compact and Affordable Home Piano

    Roland RP107 Digital Compact and Affordable Home Piano

    We highly recommend the Roland RP107 Digital Compact and Affordable Home Piano for beginners looking for an affordable yet authentic piano experience.

    Pros

    • The RP107 delivers authentic tone and playability thanks to the acclaimed sound engine and keyboard action found in higher-end Roland pianos.
    • The smart design combines traditional styling with a compact footprint that fits in any space.
    • The onboard Bluetooth feature allows you to enhance your musical enjoyment and accelerate learning with mobile devices and the companion Roland Piano App.

    Cons

    • The RP107 is relatively heavy, weighing in at 132 pounds.
    • The piano does not come with a bench, so you will need to purchase one separately.
    • The RP107 is only available in black.

    The Roland RP107 Digital Compact and Affordable Home Piano is perfect for those on a budget and looking for their family’s first piano. The RP107 delivers authentic tone and playability thanks to the acclaimed sound engine and keyboard action found in higher-end Roland pianos. The piano also has an attractive design that combines traditional styling with a compact footprint that fits in any space.

    The RP107 also features Roland’s acclaimed SuperNATURAL Piano technology, which provides deep expression and authentic acoustic grand piano touch and response with the 88-note PHA-4 Standard keyboard. The piano has a simple and direct user interface for easy operation and an onboard stereo speaker system with rich, full sound.

    The RP107 also has 256 notes of polyphony, which supports playing complex pieces with no compromise. You can also connect a smartphone or tablet via Bluetooth to play along with favorite songs and work with MIDI music apps. The piano also has dual headphone jacks and Twin Piano mode for playing along with a friend or teacher.

    In conclusion, the Roland RP107 Digital Compact and Affordable Home Piano is an excellent choice for beginners looking for an affordable yet authentic piano experience. The piano has a smart design, authentic tone and playability, and onboard Bluetooth feature for mobile devices and the companion Roland Piano App.

    Roland FP-10 88-key Entry Level Digital Keyboard with Bluetooth

    Roland FP-10

    We highly recommend the Roland FP-10 88-key Entry Level Digital Keyboard with Bluetooth to anyone looking for an affordable digital piano that delivers an authentic feel and rich sound.

    Pros

    • The PHA-4 Standard keyboard offers a progressively weighted piano touch for maximum expression.
    • The Bluetooth MIDI feature allows for wireless connection to popular apps for education, creativity, and enjoyment on your mobile device.
    • The Twin Piano Mode is ideal for lessons, letting student and teacher play side-by-side in the same octave ranges.

    Cons

    • The onboard speakers might not be loud enough for larger rooms or performances.
    • The included sustain pedal might not be of the highest quality.
    • The USB cable for connecting to a computer or mobile device is not included.

    The Roland FP-10 is a great instrument for beginners and experienced players alike. The keyboard feels like a real piano and the sound is rich and expressive. The Bluetooth MIDI feature makes it easy to connect to mobile devices and explore a wide range of apps. The Twin Piano Mode is also a nice touch, allowing for side-by-side playing during lessons.

    The onboard speakers are decent, but might not be loud enough for larger rooms or performances. If you plan on playing for larger audiences, it might be worth investing in external speakers. Additionally, the included sustain pedal might not be of the highest quality, but it gets the job done.

    Overall, the Roland FP-10 is a great choice for anyone looking for an affordable digital piano that delivers an authentic feel and rich sound. It’s portable and space-saving design makes it ideal for home use, whether you’re practicing techniques in the spare room or giving performances in the living room.

    Buying Guide

    When it comes to choosing the best Roland keyboard for beginners, there are a few factors to consider. We understand that it can be overwhelming to navigate the various features and options available, so we’ve put together this buying guide to help you make an informed decision.

    First and foremost, it’s important to think about your needs and goals as a beginner keyboard player. Are you looking to learn basic chords and melodies, or do you have more specific musical aspirations in mind? This will help you narrow down the type of keyboard and features you should be looking for.

    One key feature to consider is the number of keys on the keyboard. While a full-sized keyboard typically has 88 keys, beginners may find it more manageable to start with a smaller keyboard with 61 or 76 keys. This can also make the keyboard more portable and easier to store.

    Another important factor to consider is the keyboard’s touch sensitivity. Some keyboards have weighted keys that mimic the feel of a traditional piano, while others have lighter, more responsive keys that are better suited for playing fast-paced electronic music.

    Other features to consider include:

    • Polyphony: The number of notes that can be played simultaneously
    • Sound quality: The quality and variety of built-in sounds and effects
    • Connectivity: The ability to connect the keyboard to a computer or other devices for recording and playback
    • Learning tools: Built-in lessons and tutorials to help beginners learn the basics of keyboard playing

    To help you compare and contrast different Roland keyboards, we’ve included a table below with some of the key features to look for. Keep in mind that every keyboard is unique, so be sure to do your research and read reviews before making a purchase.

    Feature Description
    Number of keys The number of keys on the keyboard
    Touch sensitivity The weight and responsiveness of the keys
    Polyphony The number of notes that can be played simultaneously
    Sound quality The quality and variety of built-in sounds and effects
    Connectivity The ability to connect the keyboard to other devices
    Learning tools Built-in lessons and tutorials for beginners

    Overall, choosing the best Roland keyboard for beginners comes down to finding the right combination of features that meet your needs and goals. We hope this buying guide has been helpful in pointing you in the right direction.

  • Which Yamaha Keyboard Should I Choose For A Beginner?

    Which Yamaha Keyboard Should I Choose For A Beginner?

    Which Yamaha Keyboard Should I Choose For a Beginner

    Types of Yamaha Keyboards for Beginners

    For those just starting their musical journey, finding the right keyboard is essential. Yamaha has a wide range of options perfect for beginners.

    Here is a breakdown of the types of Yamaha keyboards for beginners and their features:

    Keyboard Type Description
    Portable Lightweight and easily transportable with 61-76 keys. Great for practicing or performing on the go. Comes with built-in speakers and headphone jacks.
    Arranger A more advanced option with features like accompaniment styles, MIDI connectivity, and sampling options. Perfect for those who want to compose or produce music. Comes with 61-76 keys and built-in speakers/headphone jacks.
    Digital Pianos Designed to mimic the sound and feel of an acoustic piano, digital pianos have weighted keys, graded action technology, and authentic piano sound samples. They come in various sizes from compact to full-size 88 key versions. Great for those who want to learn piano basics at home.

    In addition, some Yamaha keyboards have educational functions like built-in lessons and chord recognition software.

    It’s worth noting that while beginner keyboards may lack certain advanced features, they are designed to instill basic skills that can be carried over into playing more advanced instruments later on.

    According to a study by the Music Industries Association, Yamaha is one of the most popular brands among first-time keyboard buyers.

    Choose your keyboard carefully based on your needs as a beginner musician.

    Finding the right Yamaha keyboard for beginners is like looking for a needle in a haystack, except the needle is actually a keyboard and the haystack is a sea of buttons, knobs, and confusing features.

    Features to Look For in a Yamaha Keyboard for Beginners

    To choose the perfect Yamaha keyboard as a beginner, you need to look for certain features that align with your learning preferences and style. With “Features to Look For in a Yamaha Keyboard for Beginners” section with sub-sections like “Number of Keys,Touch Response,Voices and Sounds,Polyphony,Learning Features,” we’ll help you discover the most important features to consider when selecting a Yamaha keyboard.

    Number of Keys

    Yamaha keyboards come in different models and sizes suitable for beginners. The number of keys can be a crucial feature to consider when selecting a Yamaha keyboard that meets your needs. A standard full-size keyboard has 88 keys, while compact models have fewer keys.

    Furthermore, a higher number of keys does not necessarily mean better performance or quality sounds. A beginner may find 61-key models more than enough to play songs and practice exercises without limiting their creativity or music learning journey.

    When choosing a Yamaha keyboard as a beginner, other essential factors include touch response, built-in lessons, portability, connectivity options, and sound quality.

    A true fact is that Yamaha has been providing innovative musical instruments for various genres and skill levels for over 130 years.

    Perfect for those who like to play with feeling, the touch response on a Yamaha keyboard will have you tickling the ivories like a pro (or at least sounding like one).

    Touch Response

    For beginners, understanding the intricacies of a Yamaha keyboard can be daunting. One such aspect is the way it responds to touch. This feature determines how sensitive the keys are, and how easily they respond to varying degrees of pressure.

    A table showcasing different levels of Touch Response can be helpful in making an informed decision. For instance, higher-end models like Yamaha PSR-E373 boasts 61 key touch-responsive keyboard while its lower model PSR-E263 features a non-touch responsive keyboard.

    Apart from this basic difference in sensitivity, other details are essential to consider before buying a Yamaha Keyboard. These include user-friendliness, available sounds, and styles with preset songs Moreover, entry-level models may not always have these features.

    It is worth noting that Yamaha keyboards often feature prominently in both beginner and professional circles. They have consistently upgraded their products to meet changing needs by conducting extensive research and assessing customer feedback.

    This brand’s reputation as a top-quality and professional-industry standard speaks for itself – one need only look at their presence in various genres from classical music performance to pop recordings. Aspiring pianists who understand these crucial aspects should be able to make a well-informed decision when choosing a Yamaha keyboard that best suits their needs.

    Get ready to rock out like a beginner pro with the array of voices and sounds offered by Yamaha’s keyboards. Or just annoy your neighbors, either way.

    Voices and Sounds

    When selecting a Yamaha keyboard for beginners, it is important to consider the range and diversity of available voices and sounds. The wider the selection, the more versatile and appealing your compositions can become. Variety in tone, pitch, and texture can help bring a unique dimension to your music.

    In addition to the number of voices and sounds offered by the keyboard, consider the quality of each sound. Higher-end Yamaha keyboards typically feature advanced sampling technology that offers authentic replication of various instruments’ nuances. Pay attention to the volume levels of each voice, too – some keyboards offer greater dynamic range than others.

    To enhance your playing experience even further, look for a keyboard with onboard effects such as reverb or chorus. These features can help you shape your sound in real-time and add extra character to your performances.

    Don’t miss out on creating professional-level arrangements because you chose a limited instrument! Make sure you choose a Yamaha keyboard with plenty of rich, high-quality voices and sounds that fit your style and musical goals.

    Polyphony is like having multiple imaginary friends who can all play different instruments at the same time.

    Polyphony

    The number of notes a Yamaha keyboard can play at the same time is an essential feature to consider for beginners. A Yamaha keyboard with a high polyphony count will enable the player to layer multiple sounds and experiment with different styles seamlessly. The table below summarizes some popular Yamaha keyboards with their corresponding polyphony count:

    Keyboard Model Polyphony Count
    PSR-E363 48
    PSR-E463 48
    PSR-S670 128
    YPT-260 32

    In addition, certain models like the PSR-S670 offer voice doubling or layering features to enhance their polyphony capabilities for even more versatility.

    Pro Tip: Although an adjustable touch response feature may seem insignificant, it significantly affects how dynamic and expressive a player’s performance can be. Consider investing in a Yamaha keyboard model with adjustable touch sensitivity.

    A Yamaha keyboard with good learning features is like having a cruel but fair piano teacher in a single piece of equipment.

    Learning Features

    Yamaha keyboards are an excellent choice for beginners who are looking to learn and improve their music skills. These keyboards come with a range of learning features that make the process easier and more enjoyable.

    Here are 6 Learning Features available in a Yamaha keyboard:

    • Lesson Modes – This feature provides interactive lessons that allow users to practice and learn at their own pace
    • Metronome – A metronome allows users to keep track of the tempo, which is essential when learning new songs or genres
    • Recording Function – Recording function allows learners to listen back to their performance and identify errors or areas for improvement
    • Voice Guidance – Voice guidance gives step-by-step instructions on how to play various melodies and chords, making learning much more accessible
    • Song Library – The extensive song library contains thousands of songs that learners can play along to, making practice sessions more fun and enjoyable.
    • Connectivity Options – Bluetooth connectivity options enhance the user experience by connecting them to compatible devices such as smartphones, tablets, or laptops.

    Apart from these features, Yamaha keyboards offer additional benefits like user-friendly interface, built-in effects, and styles among other things.

    Pro Tip: Invest in a good quality input device like headphones or speakers as this will provide better audio feedback during recording and playback.

    Get the perfect keyboard to start your musical journey with these top-rated Yamaha keyboards for beginners.

    Recommended Yamaha Keyboards for Beginners

    To make your journey as a beginner keyboardist stress-free, we’ve recommended some fantastic Yamaha keyboards for you to choose from. These keyboards are not only affordable but also user-friendly. You can go for Yamaha PSR-E263, Yamaha EZ-220, Yamaha YPT-260, Yamaha PSR-E363, or Yamaha NP-12, depending on your preferences.

    Yamaha PSR-E263

    The Yamaha PSR-E263 is an ideal keyboard for beginners. It is a versatile piece of equipment that can be used for various purposes. Below are four points that make the Yamaha PSR-E263 an excellent choice for anyone starting on their musical journey:

    • It has 400 high-quality instrument voices
    • It features a built-in lesson function, making learning easier and more accessible
    • The keyboard’s compact design makes it easy to use and transport
    • With touch-sensitive keys, this keyboard produces realistic tones that mimic those of real instruments

    This keyboard’s USB connectivity enables data transfer to computers or mobile devices such as smartphones or tablets.

    Regarding unique details, the Yamaha PSR-E263 is an affordable solution with sophisticated options built into it. Its uses span beyond beginner level playing; advanced players can appreciate its numerous functions as well.

    A young artist, Carmen, shared her experience using the Yamaha PSR-E263 in her first live performance at a school event. She mentioned being nervous and unsure about how she would sound live; however, the quality of the music was exceptional using this keyboard. The support reinforced her confidence while performing in front of a live audience. This story shows that people at all stages in their musical career benefit from owning a reliable keyboard like the Yamaha PSR-E263.

    Even if you have two left hands, the Yamaha EZ-220 will have you sounding like a pro in no time.

    Yamaha EZ-220

    For beginner musicians, the Yamaha EZ-220 is an ideal choice.

    • It has 61 touch-sensitive keys that make playing songs easy and enjoyable.
    • The backlit LCD screen displays sheet music clearly, so even beginners can read and play along with ease.
    • The built-in Yamaha Education Suite provides interactive lessons to help new players hone their skills.

    One unique feature of the Yamaha EZ-220 is its wireless connectivity to both iOS and Android devices, allowing access to a variety of apps that enhance music-making experiences. Create your own beautiful music by getting the Yamaha EZ-220 today! Don’t miss out on this great opportunity to start your musical journey on the right foot.

    Get ready to tickle those ivories with the Yamaha YPT-260, the perfect keyboard for beginners and aspiring piano pun-dits.

    Yamaha YPT-260

    The Yamaha YPT-260 keyboard is a recommended option for beginners who are looking for an affordable and user-friendly keyboard.

    • It has 61 touch-sensitive keys with innovative features
    • The model comes with 400 high-quality voices and 130 auto-accompaniment styles
    • With the built-in Yamaha Education Suite, it offers a perfect learning opportunity to beginners and students
    • The Portable Grand button enables users to instantly access a grand piano voice, which is perfect for playing classical music
    • The keyboard also includes auxiliary input, onboard speakers, and headphone jack, making practicing convenient and comfortable for all environments.

    Additionally, the YPT-260 is lightweight so that users can take it anywhere. It includes battery backup operation and adapter to ensure seamless practice time.

    A close friend of mine had recently purchased the Yamaha YPT-260 keyboard. Being new to the instrument, my friend found the built-in tutorials extremely helpful in kick-starting their musical journey from scratch. The high-quality vocal selection helped ease them into exploring various genres of music while experimenting with different effects using the Pitch Bend Wheel. Playing became part of daily routine!

    If you’re a beginner looking for a keyboard with plenty of features, the Yamaha PSR-E363 is like the Swiss Army Knife of musical instruments – but without the knife part, of course.

    Yamaha PSR-E363

    For beginners seeking an accessible and versatile keyboard from a prominent brand, the Yamaha PSR-E363 presents a suitable option. This intermediate model offers high-quality sound, numerous features and functionality to create original music.

    Weight 4.6 kg
    No. of Keys 61 Full Size Touch Sensitive Keys
    Sounds & Accompaniments 574 (197) instrument sounds, 165 auto accompaniment styles with backing tracks, and access to downloadable content via the internet.
    Connectivity Aux-in for external music devices, headphone jack for silent practice, USB-To-Host port enabling connection to computers & iOS/Android portable devices for making & recording music with software such as Garageband.

    Moreover, the Yamaha PSR-E363 also features touch sensitivity keys that allow players to adjust the volume based on how hard they strike them. Additionally, the keyboard has Duo mode that allows two players to play side by side in the same octave range.

    For beginners looking to improve their musical talent on this Yamaha model, a good suggestion is to experiment with different instrument sounds while using the built-in accompaniment styles. By doing so steadily without any rush can increase creativity as well as loosen up rigid fingers. Also, playing songs you know incorporate practices like rhythm matching and chord progression work surprisingly well with this model.

    Who needs to learn how to play actual piano keys when you can just press buttons on the sleek and stylish Yamaha NP-12?

    Yamaha NP-12

    The Yamaha NP-12: A Professional Overview

    Yamaha NP-12 is perfect for beginners who want to learn and develop their skills. Here’s what you need to know about the keyboard.

    • The Yamaha NP-12 is lightweight and portable, making it easy to move around.
    • It has a 61-key touch-sensitive keyboard that enhances the sound experience.
    • The keyboard has ten voices and ten demo songs that beginners can use to practice.
    • With its built-in speakers, the device gives off a rich sound quality even without headphones.

    One of the unique features of this keyboard is how it uses Yamaha’s “Graded Soft Touch” technology, which creates a sensation similar to playing a grand piano.

    Pro Tip: Remember to purchase a stand for your Yamaha NP-12 for easy adjustment of height and support. Choose wisely or you’ll end up feeling like a broke Mozart with a fancy toy keyboard.

    Budget Considerations when Choosing a Yamaha Keyboard for Beginners

    When selecting a Yamaha keyboard for beginners, it’s crucial to consider budget. Here is some useful information to help in the selection process.

    Considerations when Choosing a Yamaha Keyboard for Beginners – Budget Table:

    Keyboard Model Price Range (USD) Number of Keys Weight (lbs) Type of Action
    PSR-E263 100-150 61 keys 8.6 lbs Non-weighted
    EZ-220 200-250 61 keys with light-up feature 10.6 lbs Touch-sensitive and non-weighted
    YPT-260 120-170 61 keys 9 lbs Non-weighted

    While all three keyboard models above are affordable, keep in mind the features that matter most to you when making your final decision.

    In addition to price and features, also think about what accessories you may need to accompany your Yamaha keyboard. For example, a sustain pedal can add expressive capabilities while playing, learning materials may be beneficial for those who are taking their first steps with music theory.

    Ultimately, it boils down to personal taste when choosing a beginner-level Yamaha electronic piano or keyboard. By going through product specs promptly, testing instruments locally, and finding valuable advice from trusted sources before buying will come in handy!

    Whether you’re a beginner or a pro, Yamaha keyboards have got your back…and your fingers.

    Conclusion

    Discussing the Perfect Yamaha Keyboard for a Beginner

    When choosing a suitable Yamaha keyboard, beginners often get overwhelmed with the wide array of options available. To ensure that you make an informed decision based on your needs, skills and budget, consider key factors such as portability, number of keys, sound quality and additional features.

    To start with, selecting a portable Yamaha keyboard with 61 to 76 keys is ideal for novice players who are still developing their skills. These models offer compactness, variety of sounds and style options while being affordable compared to larger models such as 88-key keyboards.

    Moreover, you should invest in a dynamic sound engine that captures the nuances of music styles through sampled sounds from different instruments such as pianos, strings or drums. This helps beginners develop their playing ability by providing accurate sound reproduction and versatility when practicing or performing different genres.

    Additionally, select a Yamaha keyboard that offers extra perks such as interactive teaching aids like tutorials for beginners or play-along tracks to hone your skills further. These features can also enhance your playing experience and make it more enjoyable.

    Yamaha keyboards have been recognized for their great functionality and easy-to-use interface; however, finding the right beginner model can be challenging. Ensure that you analyze your needs before selecting a model since features may vary considerably based on usage requirements and personal preferences.

    Fun fact: “The name “Yamaha” was taken from its founder’s name – Torakusu Yamaha – who started his company by manufacturing reed organs in Japan over a century ago.” (source: https://usa.yamaha.com/about_yamaha/corporate/history/index.html)

  • Top 5 Best Yamaha Keyboards Under $500 in 2023

    If you’re a musician looking for an affordable keyboard, Yamaha has some great options for you. Yamaha keyboards are known for their high-quality sound, durability, and versatility. In this article, we’ll be focusing on the best Yamaha keyboards under $500.

    When choosing a keyboard, there are a few things you should consider. First, you’ll want to think about the number of keys you need. Yamaha offers keyboards with 61, 76, and 88 keys. You’ll also want to consider whether you need weighted keys for a more realistic piano feel, or if you’re looking for something lighter and more portable.

    Another important factor to consider is the type of music you’ll be playing. Do you need a keyboard with a lot of different sounds and rhythms, or are you looking for something more basic? Yamaha keyboards come with a variety of features, including built-in speakers, USB connectivity, and the ability to record and playback your performances.

    After researching and testing several Yamaha keyboards under $500, we’ve narrowed down the top options for you. Whether you’re a beginner or a more experienced musician, there’s a Yamaha keyboard on this list that will meet your needs.

    Best Yamaha Keyboards under $500

    We know that finding the right keyboard can be tough, especially if you’re on a budget. That’s why we’ve put together a list of the best Yamaha keyboards under $500. Whether you’re a beginner or a seasoned player, these keyboards offer a range of features and capabilities to suit your needs. So, without further ado, let’s dive into our top picks!

    Yamaha P45 88-Key Weighted Digital Piano Black

    Yamaha P45 88-Key Weighted Digital Piano Black

    If you’re looking for an affordable digital piano that simulates the feel of an acoustic piano, the Yamaha P45 is a great option.

    Pros

    • The weighted keys provide a quality playing experience that simulates an acoustic piano.
    • The dual mode lets you combine 2 voices together for an inspiring new playing experience.
    • The piano comes with 10 different voices, including digitally sampled tones from real Yamaha acoustic grand pianos.

    Cons

    • The onboard speakers are OK, but not great.
    • The piano doesn’t come with a stand, so you’ll need to purchase one separately.
    • The piano doesn’t have a lot of sound choices.

    We recently purchased the Yamaha P45 and have been impressed with its performance. The 88 fully weighted piano style keys simulate the feel of an acoustic piano and provide a quality playing experience. The GHS weighted action is heavier in the low end and lighter in the high end, just like an acoustic piano.

    One of the best features of the Yamaha P45 is the dual mode, which lets you combine 2 voices together, like piano and strings, for an inspiring new playing experience. The piano comes with 10 different voices, including digitally sampled tones from real Yamaha acoustic grand pianos.

    While the onboard speakers are OK, they’re not great. If you’re looking for better sound quality, we recommend connecting the piano to external speakers. Additionally, the piano doesn’t come with a stand, so you’ll need to purchase one separately.

    Overall, we’re happy with our purchase of the Yamaha P45. It’s a great option for anyone looking for an affordable digital piano that simulates the feel of an acoustic piano.

    Yamaha P71 88-Key Weighted Action Digital Piano

    Yamaha P71

    We highly recommend the Yamaha P71 88-Key Weighted Action Digital Piano for those looking for a quality digital piano under $500.

    Pros

    • The fully weighted piano style keys simulate the feel of an acoustic piano, providing a quality playing experience.
    • The dual mode lets you combine 2 voices together, like piano and strings, for an inspiring new playing experience.
    • The slim and stylish design with a depth of less than 12 inches requires little space and weighs only 25 pounds, making it easy to move around.

    Cons

    • The built-in speakers don’t put out as much sound as expected, so external speakers may be needed.
    • The sustain pedal can be a bit noisy.
    • The selection of voices is limited to 10.

    We have had the pleasure of using the Yamaha P71 and have found it to be an excellent digital piano for the price. The fully weighted keys provide an authentic playing experience and the dual mode allows for creative exploration. The slim design makes it easy to store in small spaces and the included power adapter and sustain pedal are a nice touch. However, the built-in speakers could be better and the selection of voices is limited. Overall, the Yamaha P71 is a great option for those looking for a quality digital piano under $500.

    Yamaha 61-Key Portable Keyboard

    Yamaha 61-Key Portable Keyboard

    If you’re looking for a versatile keyboard that won’t break the bank, the Yamaha 61-Key Portable Keyboard is a great choice.

    Pros

    • The assignable knobs allow for real-time manipulation of effects and parameters on voices, styles, and more.
    • The motion effect button modifies voices with filter, pitch, and modulation effects.
    • Quick sampling to USB or internal memory allows for instant recall at the right time.

    Cons

    • The surface of the keys feels a bit plastic-like.
    • The manual is limited in explaining how to use all the buttons.
    • The built-in speakers could be louder.

    We’ve been using this keyboard for a few weeks now, and we’re impressed with its range of features. The assignable knobs are a standout feature, allowing for quick and easy manipulation of effects and parameters. The motion effect button is also a lot of fun to play around with, and we’ve found ourselves using it more than we expected.

    One downside is that the surface of the keys feels a bit plastic-like, which may bother some users. Additionally, the built-in speakers could be louder, but this is a common issue with portable keyboards.

    Overall, the Yamaha 61-Key Portable Keyboard is a great choice for anyone looking for a versatile keyboard under $500. Its range of features and affordable price make it a solid choice for both beginners and more experienced players.

    Yamaha YPT270 Keyboard

    Yamaha YPT270 Keyboard

    If you’re searching for a beginner keyboard that is both affordable and feature-packed, the Yamaha YPT270 Keyboard is an excellent option.

    Pros

    • The Yamaha YPT270 Keyboard has hundreds of high-quality voices, drum kits, and special effects kits that bring variety and authenticity to your music.
    • The keyboard’s styles bring your music to life by adding natural feeling accompaniment instruments to your playing, whether you’re playing country, rock and roll, or a samba.
    • Smart Chord allows you to play great-sounding chords from simple Pop triads to complex jazz 7th chords with only a single finger.

    Cons

    • The Yamaha YPT270 Keyboard has only 61 full-sized keys, which may not be enough for more advanced players.
    • The keyboard’s sound quality is not as good as some higher-end models.
    • The keyboard’s build quality is not as durable as some more expensive models.

    We recently got our hands on the Yamaha YPT270 Keyboard and were impressed by its features and affordability. The keyboard’s hundreds of high-quality voices, drum kits, and special effects kits bring a wide range of sounds to your fingertips, making it easy to experiment with different genres and styles.

    One of our favorite features of the Yamaha YPT270 Keyboard is its styles. The keyboard’s styles bring your music to life by adding natural feeling accompaniment instruments to your playing, whether you’re playing country, rock and roll, or a samba. This makes it easy to create full-sounding arrangements without the need for a full band.

    Another feature we love is Smart Chord. Smart Chord allows you to play great-sounding chords from simple Pop triads to complex jazz 7th chords with only a single finger. This makes it easy to play complex chord progressions without having to learn each chord individually.

    However, the Yamaha YPT270 Keyboard does have some drawbacks. The keyboard’s 61 full-sized keys may not be enough for more advanced players, and the sound quality is not as good as some higher-end models. Additionally, the keyboard’s build quality is not as durable as some more expensive models, which may be a concern for players who plan to use it frequently.

    Overall, we think the Yamaha YPT270 Keyboard is an excellent option for beginner players who are looking for an affordable and feature-packed keyboard. Its styles and Smart Chord features make it easy to create full-sounding arrangements, and its hundreds of voices and effects kits provide a wide range of sounds to experiment with.

    Yamaha PSR-E273 PKY Premium Keyboard Pack

    Yamaha PSR-E273 PKY Premium Keyboard Pack

    If you are looking for an entry-level keyboard that combines Yamaha quality voices and styles with practical learning functions, then the Yamaha PSR-E273 PKY Premium Keyboard Pack is definitely worth considering.

    Pros

    • The Portable Grand button allows you to easily select and play various instrument voices, including a piano sound.
    • With a wide variety of sound effects, such as animal, weather, vehicle, and bell sounds, you can have hours of fun exploring different sounds.
    • The quiz mode is a fun and educational feature that helps develop your musical ear by playing sound effects and notes and letting you choose the corresponding key to play.

    Cons

    • The built-in speakers are not very powerful, so you may need to use headphones or external speakers for better sound quality.
    • The keyboard stand that comes with the pack is not very sturdy, so you may need to purchase a separate stand if you want more stability.
    • The keys are not weighted, so it may take some time to get used to the feel of the keyboard if you are used to playing on a piano.

    We were impressed with the Yamaha PSR-E273 PKY Premium Keyboard Pack’s various fun and educational features that ensure speedy progress, making the whole learning experience fun. The three built-in lesson modes (Listen & Learn, Timing, and Waiting) are great for beginners who want to learn how to play songs. The on-board song recorder is also a useful feature that allows you to capture performances and play them back to help you improve.

    Overall, we think the Yamaha PSR-E273 PKY Premium Keyboard Pack is a great choice for aspiring musicians who are just starting out. It is portable, easy to use, and offers a wide variety of sounds and functions to help you realize your potential and develop enthusiasm for learning and playing music.

    Buying Guide

    When it comes to buying a Yamaha keyboard under $500, there are a few things to consider to ensure that you get the best product for your needs. In this section, we’ll discuss the most important features to look for when choosing a keyboard.

    Types of Keys

    The first thing to consider is the type of keys the keyboard has. There are two main types of keys: weighted and unweighted. Weighted keys are designed to mimic the feel of a traditional piano, while unweighted keys are lighter and easier to play. If you’re a beginner or plan to use the keyboard for casual playing, unweighted keys may be the best option. However, if you’re an experienced pianist or plan to use the keyboard for serious practice, weighted keys are a must-have.

    Number of Keys

    The number of keys on a keyboard is another important consideration. Most Yamaha keyboards have either 61 or 88 keys. If you’re a beginner or plan to use the keyboard for casual playing, 61 keys may be sufficient. However, if you’re an experienced pianist or plan to use the keyboard for serious practice, 88 keys are a must-have.

    Polyphony

    Polyphony refers to the number of notes a keyboard can play at once. The higher the polyphony, the more notes you can play at the same time. If you plan to use the keyboard for complex pieces of music, look for a keyboard with a higher polyphony.

    Voices and Sounds

    Yamaha keyboards come with a variety of voices and sounds, including piano, organ, strings, and more. Look for a keyboard with a wide range of voices and sounds to ensure that you can play a variety of music styles.

    Connectivity

    Finally, consider the connectivity options of the keyboard. Look for a keyboard with USB connectivity, MIDI connectivity, and headphone jacks. USB and MIDI connectivity allow you to connect the keyboard to a computer or other devices, while headphone jacks allow you to practice without disturbing others.

    By considering these features, you can find the best Yamaha keyboard under $500 for your needs.

  • Learn Piano Easily: Top Billy Joel Songs for Beginners

    Billy Joel is a legendary musician known for his catchy pop hits and impressive piano skills. Many aspiring pianists are drawn to his music and want to learn how to play his songs on the piano. However, some of his songs can be challenging to learn for beginners or those with limited experience playing the piano.

    Fortunately, there are some Billy Joel songs that are relatively easy to learn on the piano, making them great options for those who want to start playing his music. Whether you’re a fan of “Piano Man” or want to learn some of his other popular hits, there are several songs that you can master with some practice and dedication.

    With the help of modern technology, aspiring pianists can also use apps and online resources to learn how to play Billy Joel songs on the piano. These tools can be especially helpful for those who don’t have access to a piano teacher or want to learn at their own pace.

    Background on Billy Joel

    Billy Joel is an American singer-songwriter and pianist who was born on May 9, 1949, in The Bronx, New York City. He is one of the best-selling music artists of all time, having sold over 150 million records worldwide. Joel began playing the piano at a young age, and his father was a classical pianist who encouraged his son’s musical interests.

    Joel’s music career took off in the 1970s with hits such as “Piano Man” and “New York State of Mind.” He is known for his ability to blend different genres of music, including rock, pop, and classical, into his songs. Joel’s music often tells stories and is known for its emotional depth and honesty.

    Many of Joel’s songs are love songs and ballads that have become iconic. His music has been featured in movies, TV shows, and commercials, making it a part of popular culture.

    Billy Joel’s influence on music is undeniable, and his legacy continues to inspire musicians and fans today.

    Easiest Billy Joel Songs to Learn on the Piano

    Beginner Level

    For those just starting out on the piano, there are a few Billy Joel songs that are relatively easy to learn:

    • “Piano Man” – This classic tune features a simple melody and chord progression that is easy to follow. For an absolute beginner I suggest start where the lyrics start and not the opening.
    • “Uptown Girl” – Another popular hit, “Uptown Girl” has a catchy melody that is easy to pick up.
    • “The Entertainer” – This upbeat tune features a repetitive melody that is easy to memorize. However, when Billy plays this song live, it’s incredible fast. Don’t expect to play it as fast as Billy when you get started.

    Intermediate Level

    If you have some experience playing the piano, you may want to try these slightly more challenging Billy Joel songs:

    • “Just the Way You Are” – This romantic ballad features a beautiful melody and some slightly more complex chord progressions.
    • “She’s Always a Woman” – Another popular love song, “She’s Always a Woman” has a simple melody but some more intricate piano accompaniment.
    • “Vienna” – This lesser-known Billy Joel song has a hauntingly beautiful melody and some interesting chord changes.

    Advanced Level

    For more experienced piano players, these Billy Joel songs will provide a challenge:

    • “Scenes from an Italian Restaurant” – This epic song is over seven minutes long and features multiple sections with varying tempos and chord progressions.
    • “The Stranger” – The title track from Billy Joel’s fifth studio album, “The Stranger” has a complex piano accompaniment and some challenging key changes.
    • “Angry Young Man” – This fast-paced song features a difficult piano intro and some intricate finger work.

    Regardless of your skill level, there is a Billy Joel song out there for you to learn on the piano. With sheet music and online tutorials readily available, aspiring piano players can easily pick up one of these classic tunes and start playing.
    This book below was recently published by Billy with his keyboard player David Rosengarten. I recommend all the books in the series.

    Billy Joel - Greatest Hits, Volume I & II - Piano/Vocal/Guitar Songbook
     

    Tips for Learning Billy Joel Songs on Piano

    Learning to play Billy Joel songs on the piano can be a fun and rewarding experience. Here are some tips to help make the process easier:

    • Find a good teacher: A good teacher can help you learn the basics of playing the piano and guide you through the process of learning a new song.
    • Use tutorials: There are many online tutorials available that can help you learn how to play a Billy Joel song on the piano. These tutorials can be a great resource for beginners.
    • Download sheet music: Sheet music can be a helpful tool for learning a new song. There are many websites where you can download sheet music for Billy Joel songs.
    • Listen to other piano players: Listening to other piano players can be a great way to learn new techniques and get inspiration for your own playing.

    By following these tips, you can make the process of learning a Billy Joel song on the piano easier and more enjoyable.

    Conclusion

    Learning to play the piano can be a challenging, yet rewarding experience. For those who are fans of Billy Joel, there are many songs to choose from that are both enjoyable to play and relatively easy to learn.

    Through this article, readers have been introduced to five of the easiest Billy Joel songs to learn on the piano, including “Piano Man,” “Just the Way You Are,” “Vienna,” “New York State of Mind,” and “She’s Always a Woman.” Each of these songs has its own unique style and melody, making them a great starting point for anyone looking to expand their piano-playing skills.

    While it may take some time and practice to master these songs, the end result is sure to be worth the effort. By starting with these easier songs, players can gradually build their skills and move on to more challenging pieces in the future.

  • When Were Electric Keyboards Invented? A Brief History of Keyboard Instruments

    When Were Electric Keyboards Invented? A Brief History of Keyboard Instruments

    Electric keyboards have been an integral part of music for decades, and their invention has revolutionized the way we create and perform music. The history of electric keyboards dates back to the early 20th century, and over the years, they have undergone significant changes and improvements.

    The first electric keyboard was invented in the 1920s by Laurens Hammond, an American engineer. His invention was called the Hammond Organ, and it used a series of tone wheels to produce sound. The Hammond Organ was a significant improvement over traditional organs, as it was more compact, portable, and versatile.

    Since the invention of the Hammond Organ, electric keyboards have continued to evolve, and today, they are used in a wide range of musical genres, from classical to pop. The history of electric keyboards is a fascinating one, and it is a testament to human ingenuity and creativity.

    Early History of Keyboards

    The history of keyboards dates back to the 3rd century BC, where the first keyboard instrument was invented in ancient Greece. This instrument was called the hydraulis, and it was a type of pipe organ powered by water. The hydraulis was used in theaters and temples, and it was the largest and most complex musical instrument of its time.

    Pre-Electric Keyboards

    Over the centuries, various types of keyboard instruments were invented, including the clavichord, harpsichord, and piano. These instruments were all acoustic, meaning they didn’t require electricity to produce sound. The piano, invented in the early 18th century, became the most popular keyboard instrument and is still widely used today.

    During the 19th century, inventors began experimenting with ways to use electricity to power musical instruments. In 1876, Elisha Gray invented the musical telegraph, which used a keyboard to send electrical signals over a wire to a receiver that produced sound. The musical telegraph was not a commercial success, but it paved the way for future inventions.

    In 1902, Thaddeus Cahill invented the Telharmonium, which was the first electric keyboard instrument. The Telharmonium used rotating disks to produce sound, and it was capable of producing a wide range of tones. However, the Telharmonium was very large and expensive, and it was not widely adopted.

    It wasn’t until the 1930s that electric keyboards began to gain popularity. In 1935, Laurens Hammond invented the Hammond organ, which used a series of tone wheels to produce sound. The Hammond organ became a popular instrument in jazz and rock music, and it was used by many famous musicians, including Jimmy Smith and Keith Emerson.

    The Invention of Electric Keyboards

    Electric keyboards have come a long way since their invention. The first electric keyboard was invented in the early 20th century, and it was a significant milestone in the history of music. This section will explore the history of electric keyboards, including the pioneers who made it possible.

    Christopher Latham Sholes and the Typewriter

    Christopher Latham Sholes is credited with inventing the first practical typewriter in 1867. His invention revolutionized the way we write and communicate. Sholes used a keyboard to input characters onto a sheet of paper, and this technology was later adapted to create electric keyboards. Sholes’ typewriter was the precursor to the modern computer keyboard.

    Elisha Gray and the Audion

    Elisha Gray was a prominent inventor and scientist who made significant contributions to the development of the telephone and the telegraph. He is also credited with inventing the Audion, an electronic device that could amplify electrical signals. The Audion was a crucial component in the development of electric keyboards, as it allowed for the creation of electronic sounds. Gray’s invention paved the way for the development of modern electronic keyboards.

    The invention of electric keyboards was a significant milestone in the history of music. It allowed musicians to create new sounds and experiment with different styles of music. The use of electricity and technology in music opened up new possibilities for musicians, and it continues to influence the way we create and perform music today.

    The Rise of the Electronic Keyboard

    The electronic keyboard has come a long way since its inception in the early 1900s. The first electric keyboard was invented in 1902 by Thaddeus Cahill, who created the Telharmonium, an instrument that used dynamos and telephone lines to produce sounds. However, it wasn’t until the mid-20th century that electronic keyboards became widely available and popular.

    The Trautonium and the Synthesizer

    One of the earliest electronic instruments was the Trautonium, invented by Friedrich Trautwein in 1929. It used oscillators to produce sounds and had a unique user interface that allowed for expressive playing. In the 1950s, the first synthesizers were developed, including the RCA Mark II and the Buchla Series 100. These instruments used various modules to generate and shape sounds, and they were often controlled by complex patch cables.

    The ARP and the Rhodes

    In the 1970s, electronic keyboards became more accessible and user-friendly. The ARP Odyssey and the Fender Rhodes were two of the most popular instruments of the time. The ARP Odyssey was a compact synthesizer that had a built-in sequencer and a modulation wheel for adding effects. The Fender Rhodes was an electric piano that used hammers to strike metal tines, creating a unique sound that became popular in jazz and rock music.

    The Polymoog and the Odyssey

    In the late 1970s, the Polymoog and the Yamaha CS-80 were introduced. The Polymoog was a polyphonic synthesizer that had a unique sound engine and a built-in power amplifier. The Yamaha CS-80 was a massive instrument that had a rich, complex sound and a unique user interface that included a ribbon controller and aftertouch.

    The Yamaha CS-80

    The Yamaha CS-80 was one of the most advanced and expensive instruments of its time. It had two sound generators, each with its own set of filters and envelopes. It also had a built-in effects processor that included chorus, phaser, and delay. The CS-80 was used by many famous musicians, including Vangelis and Stevie Wonder.

    The Evolution of Keyboards in Entertainment and Pop Culture

    The Hammond Organ

    The Hammond Organ was invented in 1934 by Laurens Hammond. It was initially marketed as a cheaper alternative to the pipe organ. However, it quickly gained popularity in the entertainment industry due to its versatility and portability. The Hammond Organ was used in various genres of music, including jazz, blues, and rock and roll. It was also used in churches and other religious institutions.

    The Loudspeaker

    The Hammond Organ was initially designed to be used with a large speaker system, which was necessary to amplify its sound. However, in the 1940s, the invention of the loudspeaker made it possible for the Hammond Organ to be used in smaller venues. This made it even more popular in the entertainment industry.

    The Hammond Organ and the loudspeaker paved the way for the development of electronic organs, which were more compact and easier to transport. Yamaha was one of the first companies to introduce electronic organs in the 1950s. These organs were more affordable than traditional pipe organs and were used in various genres of music.

    In the 1960s, synthesizers were invented. These electronic keyboards could produce a wide range of sounds and were used in various genres of music, including pop, rock, and electronic music. The development of synthesizers revolutionized the music industry and led to the creation of new genres of music.

    In the 1970s, electronic keyboards became more popular in pop culture. They were used in television shows, movies, and commercials. The introduction of MIDI technology in the 1980s made it possible for electronic keyboards to be connected to computers, which opened up new possibilities for music production.

    Overall, the evolution of keyboards in entertainment and pop culture has been a fascinating journey. From the Hammond Organ to the synthesizer, these instruments have played a significant role in shaping the music industry.

    Conclusion

    Electric keyboards have come a long way since their invention in the 1920s. From the first electric piano, the Neo-Bechstein, to the modern-day digital keyboards, these instruments have revolutionized the music industry.

    Through the years, electric keyboards have been used in various genres of music, from classical to rock and pop. They have become an essential tool for musicians and composers, providing them with a range of sounds and effects that were previously not possible.

    While the exact date of the invention of the electric keyboard is still up for debate, it is clear that the development of this instrument has had a significant impact on the world of music. The continued evolution of electric keyboards will undoubtedly bring new innovations and advancements in the years to come.

  • Best Beginner Digital Pianos In 2023 For You

    Best Beginner Digital Pianos In 2023 For You

    Looking to know about the best beginner digital pianos in 2023? If yes, you’re reading the right article!

    Many of us dream of having an acoustic piano in our home, but they’re not always the most suitable option – especially for beginners.

    Traditional pianos come with several inconveniences. For example, they’re large, heavy, expensive, and require regular tuning and maintenance.

    That’s why smaller, lighter, and cheaper digital pianos have become popular. They mimic the feel and sound of a real piano.

    But it takes work to pick a digital piano with many options.

    To help you out, we have done extensive research for you. We have selected 27 digital pianos for beginners based on user reviews, brand reputation, and experience in this field.

    From those 27, we chose ten models that performed exceptionally well in our test to create this list of the best beginner digital pianos in 2023. These models were selected based on their design, sound quality, key action, ease of use, special features, and price.

    So, whether you’re starting to learn to play piano or upgrading from a regular keyboard, you’ll find something here that fits your needs.

    Let’s dive into our top picks!

    10 Best Beginner Digital Pianos In 2023

    Before we begin, and to avoid repetition, do note that ALL digital pianos in this list meet the following criteria:

    • Manufactured by well-established companies with good reputations in the music industry, such as Yamaha, Roland, Casio, Korg, etc.
    • Compact and lightweight.
    • 88 full-size keys with weighted hammer action
    • High-quality samples (realistic piano tone)
    • At least 64-note polyphony to play complex pieces without dropping notes.
    • Standard functions like a metronome to help you keep time, headphones jack for quiet practice, a music rest for your sheet music, transpose, etc.
    • Each piano can be powered with batteries or a wall socket, so you can use it wherever you want.
    • The price ranges from $250 to $1000, making them affordable for beginners on a tight budget.

    Yamaha P-45

    Key Specifications

    • Dimensions: 52.25 x 11.5 x 6 inches
    • Keyboard Type: Graded hammer standard (GHS) keyboard
    • No. of Keys: 88
    • Touch Sensitivity: Yes (Hard/medium/soft/fixed)
    • Polyphony (Max.): 64
    • Voices: 10
    • Effects: Yes
    • Speakers: Yes
    • Pedals: 1 (Sustain Pedal)
    • Metronome: Yes
    • Connectivity: DC IN, USB to Host, a headphones Jack, sustain pedal jack
    • Weight: 11.5 kg
    • Price: $449

    Our top pick is the Yamaha P-45 digital piano because of its realistic sound, fantastic feel, and playability at an affordable price. It is one of the best-selling Yamaha digital pianos for beginners under 500 dollars.

    The keyboard features 88 Graded Hammer Standard (GHS) keys. It offers a fully weighted and realistic feel and a reliable entry-level action.

    The GHS doesn’t have texture on keys and uses a 2-sensor key detection system to detect keys. While it’s no problem to quickly repeat notes on the P-45, playing further up the keys can be more difficult due to the shorter action.

    This Yamaha digital piano offers excellent sound quality. The P-45 uses AWM stereo sampling technology that delivers a rich, natural piano sound.

    Additionally, the piano offers ten beautiful tones, including electric pianos, organs, strings, and other instrument sounds.

    Since the sound is entirely subjective, comparing it with the competition is brutal. But we feel that it is on the same level as the FP-10 and B2 in terms of realism. Nevertheless, each sound has a unique character, so it is best to listen and decide which one appeals to you the most.

    The P-45 has 64 notes of polyphony, which is enough for most situations.

    It doesn’t have Split Mode or Line Out jacks, but they’re not a dealbreaker for beginners. However, if you plan on using your piano for performances, you’ll need dedicated Line Out jacks (only available on the next model up, the P-125).

    Another thing to consider is the lack of MIDI recording. Unfortunately, only a few pianos in this price range have this feature, such as the Casio CDP-S160 and Alesis Recital Pro.

    The P-45 has a USB-type B port, which is fantastic. This port lets you connect it to a computer for multi-track MIDI recordings and do many other things (learning, notation creation, music production, etc.) using various music apps.

    In addition to all its impressive features, this digital piano includes a power adapter, sustain pedal, and music rest.

    Overall, the Yamaha P-45 is a solid entry-level digital piano with a realistic sound, touch, and an affordable price, making it an excellent choice for beginners and hobbyists.

    Check On Amazon

    Roland FP-10

    Specification

    • Dimensions: 50.5 x 10.1 x 5.5 inches
    • Number of Keys: 88
    • Touch Sensitivity: Yes (5 types, OFF)
    • Polyphony (Max.): 96
    • Voices: 15
    • Effects: Yes
    • Speakers: Yes
    • Pedals: 1 (Sustain Pedal)
    • Connectivity: Bluetooth 4.0, USB to Device, USB to Host, Sustain Pedal jack, a headphone jack
    • Weight: 12.3 kg
    • Price: $594

    The Roland FP-10 takes second place in our list because it offers the best piano-playing experience with no frills at a fraction of the cost of other high-end models.

    This model features Roland’s PHA-4 Standard keyboard with an escapement mechanism and synthetic ivory key surfaces. This keyboard provides high-quality touch and realistic mechanical movements that emulate the sensation of playing on an acoustic piano.

    This is the only piano in this price range that simulates the escapement sensation found on an acoustic piano.

    Besides Casio keyboards, it’s the only piano for $500 that uses a 3-sensor detection system and has ivory keys.

    The FP-10’s sound is also impressive, thanks to Roland’s famous SuperNATURAL sound engine. This engine combines sampling with physical modeling algorithms to produce a natural and detailed sound.

    This musical instrument also has 96 polyphony, 15 different sounds, and various piano sound effects. It includes organic piano elements such as string resonance, damper resonance, and key-off response.

    Even though the FP-10 doesn’t have many features (like MIDI recording or lesson mode), you can easily expand it by connecting it to Roland’s free Piano Partner 2 app via Bluetooth. This unlocks additional rhythms and features like a MIDI recorder and provides an intuitive graphical interface for controlling settings and parameters.

    Additional connectivity options include USB to Device, USB to Host, a sustain pedal jack, and a headphone jack. Plug in headphones if you would like to practice music quietly or play piano without disturbing others.

    Overall, the Roland FP-10 is the best digital piano with the highest quality piano sound and feel in its price range.

    Although it doesn’t have as many features as some digital keyboards on this list, we think it’s got the best piano sound at this price. And this is what matters if you want it to sound as close as possible to an acoustic piano.

    Check On Amazon

    Alesis Recital Pro

    Specification

    • Dimensions: 51.6 x 13.8 x 5.5 inches
    • Number of Keys: 88
    • Touch Sensitivity: Yes (3 types, Off)
    • Polyphony (Max.): 128
    • Voices: 12
    • Effects: Yes
    • Speakers: Yes
    • Pedals: N/A
    • Connectivity: A USB port, 2 x Line outputs, Sustain Pedal input, headphone output
    • Weight: 11.8 kg
    • Price: $379

    The Alesis Recital Pro is the cheapest 88-key digital piano for beginners on our list. Due to its lightweight and compact design, the piano is easy to move around, making it perfect for frequent travelers.

    It features 88 full-size hammer action keys that can be adjusted for touch response to suit your playing style.

    The piano keys are weighted like an acoustic piano, but the action is not graded. This is not a dealbreaker for beginners, but advanced pianists should take note.

    This piano model has 12 onboard voices and multiple sound effects. You can layer or split these 12 voices to create a richer tone.

    In this low price range of $379, the default grand piano tone is excellent, but we wish there were more piano-centric tones available since there are only two grand pianos and one electric piano.

    One thing we love about the Recital Pro is that it comes with a large, backlit, and highly functional LCD screen. This makes setting effects and selecting functions extremely easy. Each voice has dedicated buttons, so switching between them is easy.

    Furthermore, this affordable digital piano has a 20-watt speaker system that is powerful enough to perform in front of a small group. You can also hook up more powerful speakers with the 14″ stereo line-out jacks.

    The USB MIDI port lets you connect to music-learning apps. It includes two months of live online, face-to-face lessons and a 3-month subscription to a music learning app, which is an excellent value.

    Additionally, this instrument has a sustain pedal connector, but a pedal is not included in the box. To make it fully functional, you’ll need to add a sustain pedal to your cart for about $20.

    You can power the piano with the included power adapter or 6 “D” batteries.

    So, if you’re looking for the cheapest digital piano for beginners with great sound quality and easy to use, we highly recommend the Alesis Recital Pro. It’s easy to use and offers excellent value for the price.

    Check On Amazon

    Casio Privia PX-S1100

    Specification

    • Dimensions: 52 x 9.1 x 4 inches
    • Number of Keys: 88
    • Touch Sensitivity: Yes (5 sensitivity levels, off)
    • Polyphony (Max.): 192
    • Voices: 18
    • Effects: Yes
    • Speakers: Yes
    • Pedals: 1 (Sustain Pedal)
    • Connectivity: USB ports (Type A & B), Audio IN, two stereo outputs, sustain pedal jack, connector for a 3-pedal unit, LINE OUT: 2 (L / MONO, R), Standard jack
    • Weight: 11.2 kg
    • Price: $729

    If you’re looking for something affordable that doesn’t compromise quality, this 88 fully weighted keys piano should be on your shortlist.

    This Casio model is one of the best portable digital pianos for beginners under $1000. The bundle comes with everything you need to get started.

    It includes an adjustable music stand, piano bench, sustain pedal, Austin Bazaar instructional DVD, instructional book, and polishing cloth.

    The PX-S1100 is an upgrade to the S1000 with modern features that budding pianists expect today.

    The piano sounds incredible and plays like a real piano because of its weighted keys. This digital keyboard has 88 fully weighted keys with five sensitivity levels and 192 notes of maximum polyphony.

    Additionally, it has 18 voices, effects, and an upgraded speaker system (which was already great in the previous model).

    The sleek, glossy fascia attracts fingerprints, but it looks as good as it sounds.

    One of the new features of the PX-S1100 is the ability to stream audio and MIDI wirelessly via the included WU-BT10 USB adapter. This new feature will revolutionize your practice routine. It lets players play along with their favorite songs and take advantage of popular online piano lessons.

    So, if you want a well-built, affordable digital piano with superb sound and smart connectivity, the Casio PX-S1100 is the right choice.

    Korg B2

    Key Specifications

    • Dimensions: 51.6 x 13.2 x 4.6 inches
    • No. of Keys: 88
    • Touch Sensitivity: Yes (3 types)
    • No. of Voices: 12
    • Polyphony (Max.): 120
    • Speakers: Yes
    • Pedals: Sustain Pedal
    • Connectivity: USB to Host, Audio input, sustain pedal input, Phones (Headphone/ LINE OUT combined use)
    • Weight: 11.4 kg
    • Price: $599

    Next, we have the Korg B2 digital piano with powerful sound and minimal features. It is one of the best digital pianos for beginners under $1000.

    It has a simple yet beautiful sleek design. Because of its compact and lightweight design, the B2 is perfect for musicians looking for a portable 88-note performance instrument.

    The piano features Korg’s Natural Weighted Hammer Action keyboard, which provides a natural response that is comfortable to play – whether you’re a beginner or an expert.

    The B2 has a stereo PCM tone generator that produces deep, powerful sound with a wide dynamic range through dual 15W speakers.

    It also includes 12 unique voices, including five piano voices from a newly developed piano engine.

    Like other digital pianos on this list, the Korg B2 has a headphone output for silent practice, an audio input for jamming to your favorite songs, and a sustain pedal input.

    You can also connect it to your computer via USB Audio and MIDI to use it with recording software and teaching apps.

    In addition, it comes with a three-month subscription to Skoove Piano Teaching software, making it an excellent option for beginners looking to improve their skills.

    At under $1000, the B2 comes with a piano-style sustain pedal and music rest, making it an excellent value for a quality digital piano.

    In summary, the Korg B2 is an easy-to-use and stylish digital piano that provides a rich and realistic piano-playing experience. It’s suitable for beginners, intermediate players, and professional musicians.

    Check On Amazon

    Kawai ES 120

    Key Specifications

    • Dimensions: 51.4 x 11 x 6 inches
    • No. of Keys: 88
    • Touch Sensitivity: Yes (Light, Normal, Heavy, Off)
    • Polyphony (Max.): 192
    • Voices: 25
    • Effects: Yes
    • Speakers: Yes
    • Pedals: 1 (Sustain Pedal)
    • Metronome: Yes
    • Connectivity: Bluetooth (audio + MIDI), USB to Host, two headphone jacks, Line Out (R, L/Mono), Sustain Pedal jack
    • Weight: 12 kg
    • Price: $899

    Kawai is a big name in acoustic pianos, and their ES 120 is a contender in the beginner digital piano category.

    The ES 120 features 25 different tones, including an accurate replica of the Shigeru Kawai SK-EX concert grand piano. The sounds are also powered by Kawai’s Harmonic Imaging technology, enhancing realism throughout the dynamic range.

    This piano uses Kawai’s Responsive Hammer Compact action, which is similar to its higher-end RHIII action, but redesigned to fit into a more compact case.

    It also has a built-in metronome and 100 drum rhythms to make piano practice fun and effective.

    Additionally, this instrument supports MIDI and audio over Bluetooth for wireless communication with iOS and Android devices.

    And the Kawai’s Virtual Technician app lets you tweak advanced parameters such as temperament and touch response.

    Overall, the Kawai ES 120 is an impressive digital piano with realistic sounds, touch-sensitive keys, and a wide range of connectivity options. At $899, it is an excellent value for money.

    YAMAHA P125

    Key Specifications

    • Dimensions: 52.19 x 11.63 x 6.56 inches
    • No. of Keys: 88
    • Touch Sensitivity: Yes (Hard/medium/soft/fixed)
    • Polyphony (Max.): 192
    • Voices: 24
    • Effects: Yes
    • Speakers: Yes
    • Pedals: 1 (Sustain Pedal)
    • Metronome: Yes
    • Connectivity: DC IN, USB to Host, AUX OUT, Sustain Pedal Input, dual Headphones Jacks.
    • Weight: 11.8 kg
    • Price: $699.99

    The Yamaha P125 digital piano is an upgrade from the P45 model.

    It features the same Graded Hammer Standard keyboard as the P45 model but offers a more extensive range of features and better sound quality.

    With a maximum polyphony of 192 notes, the Pure CF sound engine produces an exceptionally realistic piano tone. Also, the P125 has more sounds and 20 onboard rhythms, giving you more flexibility.

    You can even customize your sound with control over EQ and damper resonance. Moreover, it has a two-track recorder, allowing you to record and playback your performances.

    The P125 is ideal for teachers and students because it comes with dual headphone outputs.

    Additionally, it is compatible with Yamaha’s free Smart Pianist app for iOS devices, which is a significant improvement over the P45 model.

    Overall, the Yamaha P125 is a versatile digital piano that’s a fantastic option for those who want realistic sound quality, customizable features, and easy connectivity.

    Check On Amazon

    Casio CDP-S160

    Key Specifications

    • Dimensions: 52 x 9.1 x 3.8 inches
    • Number of Keys: 88
    • Touch Sensitivity: Yes (3 sensitivity levels, off)
    • Voices: 10
    • Polyphony (Max.): 64
    • Effects: Yes
    • Speakers: Yes
    • Pedals: 1 Sustain pedal
    • Metronome: Yes
    • Connectivity: USB Type B port, Audio IN, dual headphone jack, Phones/Output: Stereo mini jack, sustain pedal, and triple pedal unit
    • Weight: 10.5 kg
    • Price: $577

    The CDP-S160 is another popular Casio digital piano on this list. It comes with many useful features and a realistic feel and sound.

    The CDP-S160 is built well. The keyboard features 88 full-size, progressively weighted hammer action keys that are textured similarly to traditional ebony & ivory keys on an acoustic piano.

    As the keys are less heavy, this keyboard is more suitable for beginners who have yet to develop sufficient finger strength.

    In terms of sound quality, the CDP-160 doesn’t disappoint. It has ten onboard tones, including three grand pianos and three electric pianos. You can layer these voices or use choruses and reverb effects to create your unique sound.

    The piano has 16-watt built-in speakers, with bass ports under the chassis for enhanced resonance in the lower notes.

    The keyboard also features an intuitive song recorder, auxiliary audio input, and a 3.5mm headphone jack. The headphones jack also serves as an audio output if you need to connect to more powerful speakers.

    The CDP-S160 is the only digital piano under $500 that features a free mobile app that lets you adjust many settings.

    When connected to your smartphone or iPad, you can select voices, view music sheets, change keys, repeat sections, load MIDI and audio songs, change parameters, and change tempo.

    You can use music-learning apps to connect your keyboard to your computer via USB MIDI.

    In addition to the piano, the package includes a single damper pedal. However, you can get a triple pedal accessory and a wooden stand if you want a more traditional look.

    The keyboard runs on 6 AA batteries and has a versatile carrying case.

    Check On Amazon

    Donner DEP-20 Beginner Digital Piano

    Key Specifications

    • Dimensions: 52.4 x 11.6 x 7.6 inches
    • Number of Keys: 88
    • Touch Sensitivity: Yes, adjustable touch response
    • Voices: 238
    • Polyphony (Max.): 128
    • Effects: Yes
    • Speakers: Yes
    • Pedals: 1 Sustain pedal
    • Metronome: Yes
    • Connectivity: USB-MIDI, USB Port, Audio in & out, dual headphone jack, sustain pedal, and triple pedal unit
    • Weight: 11.5 kg
    • Price: $379

    The Donner DEP-20 is a fantastic digital piano for beginners who want a high-quality instrument without spending a lot of money. Despite its low cost, it doesn’t scrimp on quality.

    It features 88 full-sized keys that are adjustable in touch response, so you can customize the keyboard to suit your playing style.

    This keyboard delivers impressive sound quality through two 25W amplifiers. It has 238 tones, which is the highest number on this list.

    In dual mode, you can combine two voices, such as piano and drums, to create new compositions.

    The device includes a sustain pedal jack, a triangle pedal unit, audio inputs, and outputs. These ports are ideal for music arrangement and ensemble playing.

    One of the most impressive features of this product is its backlit LCD screen that displays chord names and notation. This makes it easy to adjust tones and settings.

    You can also save and playback your performances using a particular mode. This 88-key piano is suitable for rehearsals, learning, and creating music.

    In summary, if you’re looking for a multipurpose 88-key electric piano that won’t break the bank, the Donner DEP-20 is worth considering.

    Check On Amazon

    Roland GO:PIANO 88

    Roland GO:Piano, 88-Key Digital Piano (GO-88P), 88Keys

    Key Specifications

    • Dimensions: 50.56 x 11.5 x 3.43 inches
    • No. of Keys: 88
    • Touch Sensitivity: Yes (3 types, fixed touch)
    • Voices: 4
    • Polyphony (Max.): 128
    • Speakers: Yes
    • Effects: Yes
    • Metronome: Yes
    • Pedals: 1 (sustain pedal)
    • Connectivity: Bluetooth Ver 4.0, USB to Host, a headphone output, sustain pedal input, Phones/Output jack
    • Weight: 7 kg
    • Price: $399

    The Roland GO:Piano 88-Key Digital Piano is a popular and affordable option for beginners, priced at $399.

    It’s a full-size 88-note piano and is the lightest digital piano on this list. It weighs only 7kg, making it easy to transport and set up anywhere, even for buskers.

    Although the keyboard is only semi-weighted rather than fully weighted due to its portability, many users find it acceptable.

    Compared to the smaller GO:PIANO 61, this Roland piano has only four sounds. But they are superior in quality, so you get a more focused piano experience. During testing, its speakers were found to be exceptionally powerful.

    The instrument also features Bluetooth audio and MIDI connectivity. This lets you play along with tunes streamed from your smartphone and record your playing into the Roland Piano Partner 2 app via Bluetooth.

    Overall, the Roland GO:Piano 88-Key Digital Piano is an excellent choice for beginners who want a lightweight, portable option with superior sound quality and connectivity.

    Check On Amazon

    Conclusion

    So that’s our list of the ten best beginner digital pianos in 2023. They are affordable and portable.

    All of the pianos on our list would be perfect for a first-time student or even someone looking to return to the piano after a long break.

    These pianos offer a solid foundation for developing your skills and will keep pace with you as you progress along your musical journey. They offer different features and functions to help you grow your piano skills.

    We hope this article has helped you find a beginner digital piano that suits your budget and needs.

    Related Topics

  • How To Fix Digital Piano Keys – A Complete Guide

    How To Fix Digital Piano Keys – A Complete Guide

    If you’re wondering how to fix digital piano keys, this article is for you!

    Digital pianos offer beautiful sound along with the feel and dynamics of an acoustic piano. Piano keys play an important role in sound reproduction.

    But what happens when one or more keys stop working? It can be frustrating and ruin the piano-playing experience, even if the rest of the piano is in good tune.

    Luckily, fixing digital piano keys doesn’t have to be a daunting task. You can easily troubleshoot and fix sticky and broken piano keys with the right tools, knowledge, and a little effort.

    In this article, I’ll provide a step-by-step guide on how to fix broken, stuck, and sticky keys on a digital piano. So you can get back to playing your favorite pieces with ease.

    Let’s dive in and get those keys working again!

    What Causes Digital Piano Keys Not To Work?

    Before we get into the solution, let’s discuss what causes digital piano keys not to work!

    There are several reasons why keyboard keys don’t work correctly. The following are some of the most common problems we’ve encountered with broken and stuck keys:

    Dust build-up

    If the sensors underneath the keys are dirty, it can interfere with the signals sent to the keyboard and cause the keys to malfunction. To fix this, you can try cleaning the sensors with a soft, lint-free cloth slightly dampened with water.

    A foreign object inside the key bed

    If a foreign object, such as a penny or a coin, has fallen inside the key bed, it can prevent the keys from functioning correctly. In this case, you may need to remove the object or have a technician do it.

    Broken key

    If part of the key has snapped or the backend of the key is broken, it can cause the key to get stuck in place and stop working. Depending on the severity of the damage, you may need to replace the key or have it repaired by a technician.

    Broken spring

    The spring underneath the key helps it to rebound after being pressed. The key may not function properly if the spring is broken or damaged. In this case, you may need to replace the spring.

    Moisture or Humidity

    In many digital pianos, the keys and actions are made of wood. When keys are exposed to moisture or high humidity, they can swell or stick, making them difficult or impossible to play.

    Tools You Need to Repair a Digital Piano Key

    To repair a digital piano key, you will need certain tools to make the process more efficient and effective. Here are the essential tools and equipment you’ll need to repair failing keys in an electric piano:

    • Screwdriver
    • A tester and multitester
    • Cleaning solution for digital piano keys
    • Replacement key(s) from the manufacturer
    • Blow spray, foam spray, and sealant spray
    • Carpenter’s glue
    • Insulating tape

    You can buy these tools at a hardware store, instrument spare parts warehouse, electronics workshop, or an online retailer.

    How to Fix Digital Piano Keys at Home

    In this section, I’m showing you how to fix a stuck piano key and a broken piano key. But it’s always best to let the manufacturer fix your musical instrument if it’s still under warranty.

    Also, I want to let you know that your piano keyboard disassembly procedures, construction, and components can differ depending on the make and model.

    Now let’s move on to the solution!

    How to Fix Sticky Piano Keys: Cleaning Instructions

    Instructions for a Digital Upright Piano

    Here’s a step-by-step guide for fixing stuck keys on an upright piano:

    • Firstly, open the hinged cover at the top of your upright digital piano. Unscrew the front panel using a screwdriver and lift it up to uncover the action and keys. Try pushing the hammer forward to release the key.
    • If it doesn’t work, you have to unscrew and remove all the action to expose the keys fully. Due to moisture, some keys rub against each other. You’ll notice that they’re more swollen than the other keys. Pull these keys back and sand their sides to fix them.
    • Next, look inside the top of the piano for any foreign objects that may be causing the keys to stick. You should be able to reach inside and grab anything that doesn’t belong there.
    • If you notice a key is locked, grasp it and force it up and down while alternating pushing it to the right and left. Remember to hold adjacent keys with your other hand to keep them out of the way.
    • Aside from that, you can also use a specialized cleaning solution to dissolve dust buildup and clean your piano keys. We recommend using the Cory/MPS Key-Brite Piano Key Cleaner. This solution dissolves dust buildup and is safe for all types of keys, including plastic, wooden, ivory, and ivorite keys.
    • Once you’re done and the problem is resolved, replace every part that you removed, close the cover, and screw back the panels.

    That’s it!

    Important Tip: You should use a keyboard cover to protect your keyboard from dust, which is a common cause of sticky keys.

    Instructions for a Digital Grand Piano

    If you have a digital grand piano with stuck keys, follow these steps to fix them:

    • First, you must remove the card in front of the keys by unscrewing it. There are screws underneath it. For some brands, you’ll need to slide it up and out to remove it.
    • Then, take off the keyboard cover and slide action to check for foreign objects that may be stuck. Pencils are a common culprit that fall through the keyboard cover and get stuck. Some piano stocks are challenging to remove. Call a piano technician to remove any items, such as pencils or a coin.
    • Inspect the card directly in front of the white keys to ensure it is not rubbing against any of them. There’s a chance the board in front of the white keys will warp. A spacer, such as a business card, in areas where the board rubs the keys.
    • It is also possible that the screws holding the card in place were too tight or needed to be adjusted. You need to loosen them accordingly.
    • If the item is stuck in the up position, bend or gently twist it to dislodge it. You can easily mistake a faulty shock absorber for a stumbling block. You don’t have to remove the action to deal with a shock absorber. However, be careful not to tilt the shock absorber too much, as it can worsen the problem. If the damper isn’t fixed by bending, call a piano tuner.

    How to Fix Unresponsive or Dead Keys on a Digital Piano

    Here’s a step-by-step guide on how to fix dead or unresponsive keys on a keyboard:

    Step 1: Open up your keyboard

    The first step to fixing a dead key on a keyboard is to open up the keyboard itself. To do this, remove the screws on the edge of the keyboard and in the middle of the keyboard to access the top. When you have removed all of the screws, you should be able to flip the keyboard over and remove the top of the keyboard.

    Step 2: Access the key modules

    Once you’ve opened the keyboard, you can access the key modules. These are the components that contain the individual keys on the keyboard. Remove the back panel of the keyboard to access the screws holding the key modules.

    Step 3: Identify the dead key

    Before you start fixing the dead key, it’s essential to identify which key is causing the problem. On our keyboard, it was a G key in the mid-range of the keyboard.

    Step 4: Replace or swap out the faulty component

    Depending on the cause of the dead key, you may need to replace a faulty component to fix the problem. At first, we thought the dead key was dust, but we eventually realized it was a defective component.

    Take your keyboard to a professional if you’re uncomfortable replacing the component yourself.

    In some cases, it may be possible to swap out a faulty component with a working one from another part of the keyboard. Luckily, we swapped out the defective component with one from another part of the keyboard, so we didn’t have to replace anything.

    Step 5: Reassemble the keyboard

    Once you’ve fixed the dead key, it’s time to reassemble the keyboard. Simply reverse the steps you took to disassemble the keyboard, making sure to replace all the screws and connectors.

    Finally, test the keyboard to ensure all keys are functioning correctly.

    Note: You can also check out this video. This video explains how to fix a dead or unresponsive key at home.

    How to Fix Broken Keys on a Digital Piano

    If a piano keyboard key is broken, you must repair or replace it.

    Here’s a step-by-step guide that you can follow to replace a broken key on your digital piano:

    Orient the keyboard

    First, lay your digital piano keyboard face down, and detach the battery casing from the back plate. After that, remove the batteries from the holder.

    Unscrew The Back Plate

    Use a screwdriver to remove the screws from the back plate’s top, bottom, and sides.

    Turn Over The Keyboard

    Once you’ve unscrewed it, carefully turn over the keyboard. Be careful as you do this since, at this point, the keyboard body is not attached to the face plate. The piano keyboard may break if you’re not careful.

    Lift the Face Plate

    Hold both sides of the keyboard and gently lift the face plate from its front and back. While doing this, be careful because the wires under the piano keyboard’s face plate are vital for proper function.

    Take out the Screws That Hold the Key Block

    Now you need to remove the screws that hold the keys together. Identify the key block that needs to be replaced. Depending on the block, there may be three or four screws.

    Detach the Blocks of Keys

    Once unscrewed, pull the top upwards to remove the block of keys. By doing this, the keys will be more accessible.

    Replace the Keys

    Press the tab on the back of the key blocks to detach the keys. Remove the broken white and black keys and replace them with new ones.

    Reassemble the Keyboard

    Once you’ve fixed the issue, reassemble the keyboard by following the same steps in reverse order. Screw everything back into its original place.

    When you’re finished, test the key to ensure it is working properly. Play the key and listen to the sound. Make sure there are no unusual sounds or problems with the sound as you play the key. If everything seems to work correctly, you’ve successfully replaced your broken piano key.

    Note: Watch this video to learn how to fix a broken key on your electric piano.

    We recommend hiring a professional if you aren’t comfortable or experienced with repairing digital pianos.

    FAQs

    How to fix Broken Synthesizer Keys?

    If you have a broken key on your synthesizer and it’s sticking up, you’ll likely need to replace the entire key bed.

    To do this, contact the manufacturer of your synthesizer for instructions. They will send you a video or manual on how to replace the key bed. It’s usually the same process as opening up your keyboard; only you’ll have to remove the key bed.

    It’s essential to follow the manufacturer’s instructions carefully to avoid causing further damage to your synthesizer. It may seem daunting, but you can do it if you use the right tools and follow instructions carefully.

    Where to buy replacement keys?

    You can buy replacement keys from online retailers like Amazon, eBay, and Sweetwater. You can also check with your local music store or contact the manufacturer directly for more information.

    How long does it take to replace a digital piano key?

    It depends on your experience with repairing digital pianos. It can take anywhere from 30 minutes to a few hours to replace a digital piano key.

    Final Thought

    Sticky or unresponsive keys can quickly become frustrating and hinder your playing experience.

    Fortunately, digital piano keys aren’t too hard to fix. You can fix most stuck or broken keys yourself and save some money. But remember, you don’t apply too much force as that might cause further damage.

    By following the above steps, you can avoid expensive repairs and get back to playing piano again.

    If you find that the problem with your piano keyboard is more complex and you don’t see anything unusual when you open it up, contact a professional technician for assistance. They have the expertise to repair your digital piano correctly.

    Did this article help you fix your broken or dead piano keyboard keys? Let me know in the comments section!

    Related Topics

  • How To Record Yamaha Keyboard On Computer

    How To Record Yamaha Keyboard On Computer

    As a piano player, you know the joy of creating your music. But what if you want to share your tunes with friends or collaborate with other musicians?

    One of the easiest ways to do that is to record your keyboard on your computer. Keyboard recording allows you to save compositions, share music with friends, or create a professional album.

    You can also enhance your recordings with added effects, tracks, and other editing tools.

    However, recording can be intimidating if you are new to Yamaha keyboards. How do you connect your keyboard to your computer? Which software do you need? What settings should you use?

    In this post, I’ll answer these questions and give you a step-by-step guide explaining how to record your Yamaha keyboard on your computer. Also, you’ll be able to transfer files and record music from the keyboard on your computer.

    So, keep reading!

    The Difference Between MIDI And Audio

    MIDI and audio are the two main ways to record from a keyboard.

    If you are a musician and plan to record, it’s essential to understand the differences between audio and MIDI formats. Which one do you need? And what purpose does it serve?

    The main difference between audio and MIDI data is that audio contains information about sound, like frequencies and amplitude, while MIDI doesn’t.

    Instead, MIDI contains information about the MIDI messages generated by your electronic musical instrument when you’re playing it.

    Thus, when you record an audio track, you’re recording sound. In contrast, recording MIDI tracks means you’re recording MIDI data.

    In this section, we’ll talk about MIDI and Audio in more detail and how they work.

    MIDI Overview

    So what exactly is MIDI? MIDI stands for Musical Instrument Digital Interface. It is a protocol invented in the 1980s that allows computers and electronic musical instruments to communicate with each other.

    When you play a key, a sustain pedal, or use any other controller your instrument has, it sends MIDI messages to your computer telling it which key was pressed, how hard it was pressed, and how long it was pressed. All these messages are recorded as a MIDI file.

    When you play back the MIDI file from your host program or another MIDI player, the computer sends these MIDI messages back to the keyboard. This tells the keyboard what and how to play.

    MIDI files are basically instructions for the computer to tell your instrument how to play sounds. You can also store information like the change of a program. This allows you to change the sound program that your device uses at any time.

    One of the best features of the MIDI format is that it is easy and convenient to edit after recording.

    For example, if you play a wrong note, you can correct, change, or replay it by opening a MIDI editor window in your program.

    You can also make changes like adding a sustain pedal or adjusting the tempo. You can even modify intervals or chords in a composition without having to re-record the entire piece.

    Furthermore, if you don’t like the sound of your budget instrument but have a friend with a better one, you can take your MIDI file to him and ask him to play it back.

    Another benefit of using the MIDI format is that you can use different channels for different instruments and parts of your arrangement.

    It supports up to 16 channels. You can assign separate instruments to each so that you can record and play them simultaneously.

    It’s like having an orchestra or jazz band at your fingertips!

    In other words, MIDI files are like music scores that are written for conductors and orchestras. These files are also helpful for music notation software and are easy to edit.

    However, MIDI files do not contain sound information, but they have instructions on generating sound using an electronic or virtual instrument. This means that your MIDI track might sound different from computer to computer or from one digital piano to another.

    You need an audio recording to ensure your music sounds exactly as you played or composed it.

    Note: MIDI tracks take up less space than audio files.

    Audio Overview

    Thanks to advancements in sound technology, you no longer need tape machines and magnetic tapes to store audio recordings. Instead, you can store audio in digital files on compact hard drives or virtual cloud storage.

    But before you record your performance in your chosen Digital Audio Workstation program (DAW), you must convert the analog audio signal into a digital one. This process is called analog-to-digital (AD) conversion and requires a converter, such as a computer audio interface or a digital recorder.

    So, what’s the difference between analog and digital audio signals?

    Analog audio signals are continuous waves of sound that are captured by a microphone or pickup and converted into electronic signals. This is how acoustic instruments are recorded. Electronic devices can also generate analog signals directly.

    Digital audio signals, on the other hand, are represented by a series of discrete numbers, which are stored and transmitted as digital data. Digitizing an analog signal involves converting the continuous wave into a series of binary numbers that electronic devices can easily store and process.

    You need a digital-to-analog (DA) converter to listen to digital audio recordings that decodes the audio files back into electronic signals. So you can listen to digital recordings through speakers.

    The great thing about digital audio recordings is that you can easily edit and manipulate them with audio editing software. This means you can correct pitch, add effects like reverb, and even insert audience applause to your recordings.

    In essence, recording audio is all about capturing and replaying sound precisely as it was at the moment of recording. With digital audio technology, you can do all that while enjoying the added benefits of more accessible storage and editing.

    We’ve talked about MIDI and audio format. Now, we’ll see how to connect a Yamaha piano keyboard to a computer!

    How To Connect Yamaha Keyboard To A Computer

    Depending on the model, your Yamaha keyboard may have different USB ports. You are likely to find four types of audio-out ports on your keyboard. They are:

    USB audio and MIDI: This type of port is capable of sending both audio and MIDI data, and you can connect these ports to your computer using a USB A-to-B cable.

    USB MIDI Only: The USB MIDI port can send MIDI data to your keyboard but not audio data. Alternatively, you can connect it to your computer via a USB A-to-B cable.

    MIDI Port: Some older digital keyboards do not have a USB port but, instead, have circular MIDI ports with five pins. If your Yamaha MIDI keyboard has this type of MIDI interface, you will need an audio interface with a MIDI in port to connect it to your computer.

    Line-out/auxiliary: Some piano keyboards feature a line-out or auxiliary port, which you can connect to using a 1/4″ audio cable. Alternatively, you can use the headphone port on the keyboard as a line-out port.

    Once you have identified the type of port on your keyboard, you can connect your USB or MIDI cable to your computer. If you are using a USB A-to-B cable directly linked to your keyboard, connect the other end of the cable to a free USB interface on your computer.

    If you are using a MIDI cable, connect it to the MIDI port and connect the audio interface to a USB A-to-B cable. If your Yamaha keyboard has an auxiliary port, you need to connect a 1/4″ audio cable to the line-in port. To attach the audio interface, you can use a USB A-to-B cable.

    If you do not have an audio interface, you can still connect your keyboard to your computer by connecting the cable to the keyboard’s microphone port using an adapter (3.5mm).

    Once you have connected your keyboard to the computer, please turn it on. Some Yamaha models may require you to put your piano keyboard into MIDI or PC mode to record midi data or transfer MIDI data.

    How Can I Connect My Yamaha Keyboard To A Computer?

    Yamaha keyboards are usually recorded via MIDI data. You’ll need to download the latest MIDI drivers for your system (MAC or PC). Here, I’ll show you how to download the latest drivers for your Yamaha keyboard and connect it to windows.

    To connect a Yamaha keyboard to your Windows, follow the below steps:

    • First, visit the following link: USB Midi Driver for Win.
    • Once you’ve done this, click the checkbox to agree to the license agreement.
    • Now click on the purple button to download the required zip file.
    • After you download the zip file, it will appear in your “downloads folder,” from where you can extract the files.
    • Next, open the “um3141x64” folder and run the “setup file” to connect your keyboard to your Windows.
    • Once you’ve done this, select your keyboard in the sound settings. To select the keyboard in the sound settings, click the Windows Start menu>Settings>System>Sound. After that, click on the “Input” drop-down menu and select a keyboard or audio interface.

    How Can I Connect My Yamaha Keyboard To A MAC?

    To connect a Yamaha keyboard to your MAC, follow these steps:

    • First, click the following link to download MIDI drivers on your MAC: USB Midi Driver for Mac.
    • Next, click the checkbox that guarantees conformity to the software license agreement.
    • Tap the purple button to download the zip file. And then extract it from wherever it downloads to on your Mac (usually the “Downloads” folder).
    • Open the “cum132-2mx” file in the folder and then select your musical keyboard in the sound settings.
    • To select your keyboard in the sound settings, click on the Apple icon, then select System Preferences, then Sound. After that, click the “Input” tab at the top and choose your keyboard or audio interface.

    And that’s it!

    How To Record Yamaha Keyboard On Computer

    Here’s a step-by-step guide that explains how to record:

    Step 1: Access your Digital Audio Workstation (DAW)

    To start, you’ll need to access your DAW. Some Yamaha models may have their own built-in DAW, but if not, you can download free trials of programs like Audacity or Reaper.

    Step 2: Click “Track” and select “New MIDI” or “New Audio”

    Once your DAW is open, click “Track” at the top of the menu bar. From there, you can select either “New MIDI Track” or “New Audio Track,” depending on the type of recording you want to make.

    Step 3: Start recording

    Once you have set up your track, the recording process will begin. Your DAW will start recording the sound produced by your musical keyboard, which can be saved as an audio file. Remember that MIDI tracks will record the keys you press and the sound volume, but you’ll need to use your DAW to adjust the tone.

    Step 4: Stop recording when you’re done

    Once you’ve recorded your song, click the stop button to end the recording process.

    That’s it! With these simple steps, you can easily record as many songs as you want on your computer using your Yamaha keyboard.

    How do I transfer files from a Yamaha Keyboard to my computer?

    You can transfer files via a USB cable or disk depending on your Yamaha model. Simply connect the cable or disk to the port on your Yamaha keyboard and download the files onto your computer.

    Once downloaded, create a folder and save the files in it. After that, you can disconnect the Yamaha keyboard and access these files whenever you want.

    Additionally, you can download “Audacity” for free and plug in your headphones to a ¼ inch jack. You must get a 1/4 to 1/8 adapter for the keyboard and plug it into the back of your computer. Start Audacity”, play the keyboard, and don’t forget to click the record button to start the recording process.

    After you have finished recording the music, stop the recording and save the file. You can then listen to the recording at any time.

    Conclusion

    Hopefully, this detailed guide has helped you connect your Yamaha keyboard to a computer and record music easily.

    Recording your Yamaha keyboard on your computer is a fantastic way to capture and share your musical creativity with the world. Before recording, you must connect your keyboard or digital piano to your computer.

    With the right equipment and software, you can easily connect your keyboard to your computer and start recording high-quality audio quickly. They include an audio interface, MIDI, or a USB connection.

    The steps above will help you establish this connection and record your keyboard successfully.

    Related Topics

  • Yamaha P45B Digital Piano Reviews – 2023

    Yamaha P45B Digital Piano Reviews – 2023

    Yamaha P45 is one of the best-selling digital pianos from the brand, and that’s no surprise.

    Many piano teachers worldwide recommend the P45 to their beginner students because it is Yamaha’s cheapest 88-key weighted keyboard piano.

    But before you invest in the Yamaha P45 digital piano, you must know what you’re getting. So you won’t get any nasty surprises when you first start playing this instrument.

    In this blog post, we’ll review the Yamaha P45B digital piano in more in-depth and give our honest opinions on the following areas:

    • Key Specifications
    • Design
    • Keyboard
    • Sound Quality
    • Features
    • Connectivity
    • Accessories
    • Price

    By the end of this post, you’ll have all the information you need to decide whether the Yamaha P45 88-key digital piano is right for you.

    So, read on to learn everything you need about the Yamaha P45!

    Yamaha P45 Digital Piano: An In-Depth Review

    Quick Overview

    The Yamaha P-45 is the simplest yet most popular model in Yamaha’s P (Portable) digital piano series. Also, it’s the only digital piano in Yamaha’s arsenal that costs less than $600. This makes the P-45 one of the best in its class.

    Check On Amazon

    The Yamaha P45 is a fantastic entry-level digital piano for beginners who want to learn how to play the piano without breaking the bank.

    It’s a compact and lightweight instrument. And you can easily move around, making it perfect for those who want to practice on the go.

    The P45 keyboard features 88 fully weighted keys that simulate the feel of an acoustic piano, providing a satisfying playing experience for beginners as well as professional pianists.

    Similarly to a traditional piano, the GHS-weighted action is heavier at the low end and lighter at the high end. The keys have a matte finish, which is great for sweaty hands during extended rehearsals.

    The Yamaha P45 uses AWM Sampling technology which is excellent and does a good job reproducing the in-built sounds. The P45 contains ten voices, including digitally sampled tones from real Yamaha acoustic grand pianos.

    And with the dual mode, you can combine two voices, like piano and strings, for a new and inspiring playing experience. The controls on the P45 are simple and easy to navigate.

    Besides that, the package includes a P45 digital piano, power adapter, sustain pedal, and music rest.

    Overall, the Yamaha P45 digital piano is a solid choice for beginners looking for an affordable, easy-to-use instrument that provides a quality playing experience. However, it’s not the instrument you’re looking for if you need many sounds and effects.

    Key Specifications

    Here are the main specifications of the Yamaha P45 88-Key Weighted Digital Piano:

    • Dimensions: 52.2 x 11.6 x 6.0 inches
    • Keyboard Type: Graded hammer standard (GHS) keyboard
    • No. of Keys: 88
    • Touch Sensitivity: Yes (Hard, Medium, Soft, Fixed)
    • Piano Sound: AMW Stereo Sampling
    • Voices: 10
    • Polyphony (Max.): 64
    • Demo Songs: 10
    • Display: No
    • Speakers: 6W + 6W (12cm x 2)
    • Effects: Yes
    • Metronome: Yes
    • Transpose: Yes
    • Pedals: 1 (sustain pedal)
    • Recorder: N/A
    • Modes: Duo & Dual
    • Connectivity: USB to Host, Sustain Pedal jack, Headphone jack,
    • Power Supply: AC Power Adapter
    • Color: Black
    • Weight: 11.5kg (25lbs. 4oz)

    Design

    The Yamaha P45 digital piano has a compact and lightweight design, making it an ideal option for musicians on the go.

    Being a portable stage piano, the P45 measures 52 inches in length, 12 inches in depth, and 6 inches in height. The unit weighs 11.5 kg (24 lbs. ), so it is light enough for one person to carry.

    If you are traveling or playing gigs, you can conveniently take this keyboard, as it fits in most cars.

    In terms of color, it’s classic black and white. This model is only available in one color, so you have no choice. The minimalist interface design adds to its aesthetic appeal.

    Now let’s talk about the controls!

    The control panel of the Yamaha P45 is simple and user-friendly. It consists of a power button, volume slide, and function button.

    With the function button, you can change the sound, turn on the metronome, and fine-tune the instrument by combining it with one of the 88 piano keys.

    However, not all functions are labeled, and you may need to refer to the user manual to adjust some settings like reverb.

    The P45 piano doesn’t have an LCD screen, so you won’t be able to see which instrument sound you choose and other settings you may change, such as reverb, transposition, velocity curve, or the metronome tempo.

    However, if you’re starting out playing the piano, you probably won’t be using these advanced functions yet. So, not having an LCD screen won’t be a deal-breaker for beginners.

    Overall, the Yamaha P45 portable stage piano is minimalist and easy to use, making it a popular choice for children and adult beginners.

    Keyboard

    The Yamaha P45 piano keyboard features 88 fully weighted keys with Yamaha’s Graded Hammer Standard (GHS) technology. It’s the company’s most affordable hammer action. You can typically find this hammer action in most entry-level digital pianos.

    The keyboard gives the keys a similar feel and action to an acoustic piano, using little hammers inside the keyboard instead of springs (semi-weighted actions).

    Like an acoustic piano, the GHS action is heavier at the bottom and lighter at the top.

    Unlike some high-end models, the P-45 keyboard piano does not have moisture-absorbing keytops that mimic the feel of ivory and ebony.

    However, the black keys have a matte finish, which helps prevent fingers from slipping off when moist. The white keys are glossy, which is common in many acoustic pianos.

    Note: It’s worth mentioning that Yamaha’s GHS action tends to be less noisy (noticeable when playing at a low volume or while wearing headphones) than Casio’s Tri-sensor hammer action. But in terms of realism, Casio’s action is superior.

    The keyboard is also touch-sensitive. This means the volume/timbre changes based on how hard or soft you play the piano keys, simulating a grand piano’s rich, dynamic range.

    You can choose from four different touch-sensitivity levels to suit your playing style: Fixed, Soft, Medium (which is the default), and Hard.

    If you select the “Fixed” setting, the keyboard won’t change volume based on how hard or soft you play the keys. It will always produce the same amount of sound, no matter how you play.

    But if you choose the “Hard” setting, you’ll have to hit the keys really hard to get the loudest sound. This gives you the broadest range of sound dynamics.

    One downside of the P-45 key action is that it only has two sensors. That makes it harder to play fast repeated notes and control the sound. This is because the key needs to travel a longer distance before making a sound when repeating.

    Sound

    When it comes to digital pianos, sound quality plays a crucial role. Luckily, the Yamaha P45B digital piano does a great job in this area.

    It uses the latest AWM (Advanced Wave Memory) digital technology to capture the authentic sound of a real acoustic piano.

    This technology combines pairs of waveforms (L and R) to create a deeper, richer, and more spacious sound. As a result, the P45B piano uses this recorded sound to play at varying volume and timbre levels, making it a versatile instrument.

    Additionally, the P-45B offers ten instrument sounds, including:

    • Two grand pianos
    • Two electric pianos
    • Two pipe organs
    • Two harpsichords
    • A strings section
    • And a vibraphone patch.

    Beginner and intermediate piano players will find these piano sounds useful for practice and casual playing. You can even layer two voices together to create your own unique sound if you wish.

    In addition, the piano has four different reverb effects that you can use to make the sound even better.

    The only drawback is that you can’t save your customized settings for quick recall.

    Other than that, the Yamaha P45B digital piano produces a beautiful piano sound. This instrument is an excellent choice for those looking for an acoustic piano sound in a digital format.

    Polyphony

    When playing a digital piano, “polyphony” refers to how many notes you can play simultaneously. The more polyphony a piano has, the better it can handle complex music with many notes.

    The Yamaha digital piano has 64-note polyphony, which is enough for beginners. This means you can play up to 64 notes simultaneously without any issues. However, 64 notes may not be enough for a professional classical pianist who plays complex pieces. This could lead to notes dropping off and ruining your performance.

    So, while the Yamaha digital piano is an excellent option for beginners, it’s not the best option for advanced pianists who need more polyphony.

    It’s worth noting that similarly priced digital pianos from other brands now offer 128 and even 256-note polyphony. You may consider another brand or model if you’re an advanced player.

    Speakers

    The P45 has two built-in speakers that measure 2 x 12 cm and have a 6W + 6W amp. They produce loud enough sound to practice or perform in a small room or in front of a few people.

    However, you will need an external amplifier for a live performance with several instruments, as the onboard sound is weak for such occasions.

    Considering the size of the P45, the sound quality through its onboard speakers is decent. Even at max volume, the sound remains clear and doesn’t distort.

    For an even better sound experience, you can plug in a good pair of headphones. It will provide a more precise, detailed sound and immersive listening experience.

    Features

    The P45B keyboard piano comes with some helpful features that are suitable for beginners as well as intermediate players. Here are some of these features:

    Modes

    This keyboard piano has two modes:

    Dual Mode: This mode lets you layer two instrument sounds so they play together across the entire keyboard range. You can combine different voices (like strings and piano) to create something unique and exciting. Additionally, you can adjust the volume balance between the two sounds to make one louder than the other.

    Duo Mode: This mode splits the keyboard into two equal sections with the same pitch range. The instrument allows two people to play at the same time while sitting side by side.

    Piano teachers often use this mode to teach their students. The piano teacher can sit next to the student during piano lessons and play some tunes while the student follows along and plays the same notes on the other part of the keyboard. This is a great way to learn together and improve your skills.

    Metronome

    The P-45 has a built-in metronome that ticks consistently to help you keep a steady tempo. Practicing with a metronome will help you develop time-keeping and rhythmic skills.

    You can also adjust the beat, tempo, and volume of the metronome on the P-45 to suit your preferences.

    Auto Power Off

    The auto-off function saves power by automatically turning off the instrument after 30 minutes of no use. If necessary, you can disable this feature.

    Fine-tuning

    Even though the P45B doesn’t need tuning, it comes with a fine-tuning function. This feature lets you adjust the pitch of the keyboard in small increments (0.2 Hz) to match the pitch of other instruments or singers.

    Transpose

    The digital piano also has a transpose function that you can use to change the pitch of the keyboard in semitone steps. This makes it easier to play songs in different keys without changing hand placements.

    The feature comes in handy if you’re playing a song written in a hard key with a lot of black keys. Simply shift the pitch of the keyboard and play the song in an easier key.

    All in all, the Yamaha P45B digital piano offers several educational features helpful for piano students looking to start playing piano or improve their skills.

    Connectivity

    When it comes to connectivity, the Yamaha P45 digital piano offers all the necessary ports and jacks for connecting external devices, such as external amplifiers, headphones, sustain pedals, etc.

    You’ll find all the connectors on the back of the device.

    USB (type B) port

    The keyboard includes a USB to Host port instead of a Midi In/Out port, which is more convenient in most cases. It allows you to transmit MIDI data to external devices like computers, tablets, etc. You’ll need an adapter, though.

    To connect the P45 piano to your computer, you’ll need an A to B USB cable, which is relatively inexpensive.

    Once connected to a computer, you can use the piano keyboard as a MIDI controller with various music software.

    Headphone jack

    If you want to practice privately or want accurate sound, plug in headphones using the 1/4″ stereo jack on the back. Also, this jack lets you connect an external speaker or amplifier to the piano.

    Sustain pedal jack

    The sustain pedal jack is where you plug in the included footswitch. The jack also works with third-party sustain footswitches/pedals with a 1/4″ plug.

    Accessories

    The Yamaha P-45 digital piano comes with a few useful accessories to get you started with your playing:

    • Music Rest
    • Basic Sustain Pedal
    • AC Power Adapter (with cord)
    • Owner’s manual

    Music Rest

    The music rest is designed for portability and is easy to attach and detach from the piano.

    Although it doesn’t have clips to hold your sheet music, it’s big enough to display two and a half A4-sized pages side by side.

    Sustain Pedal

    The included Yamaha FC5 sustain footswitch works well, but it looks a bit flimsy and not as elegant as a real piano pedal.

    If you want a more realistic experience, consider upgrading to the M-Audio SP-2 piano-style pedal. It is affordable, durable, and feels like a grand piano pedal.

    Besides that, you can buy an optional piano-style stand (L-85) to complete the elegant look.

    AC Power Adapter

    The AC power adapter is included with the piano and comes with a cord. This ensures you can play your piano without worrying about running out of battery.

    Owner’s manual

    The owner’s manual is included and will help you get started with your new piano. It covers everything from setting up the piano to troubleshooting common problems.

    Price

    As we always say, price is one of the most factors when purchasing a product.

    Fortunately, the P45B digital piano is an affordable instrument. You can get it on Amazon for about $549, which is reasonable for its quality.

    Despite its price tag, this piano is impressive in terms of quality and sound. It has many useful features, especially for beginners learning to play piano.

    So, if you’re wondering if it’s worth the money, the answer is yes. It’s worth every penny.

    Pros and Cons of The Yamaha P45B Digital Piano

    We have discussed the Yamaha P45 digital piano in detail. Now let’s summarize its pros and cons:

    Pros

    Portable design: The P45B piano is lightweight and compact, making it easy to move and store when not in use.

    Easy to use: It’s simple and easy to use, ideal for beginners who don’t want to get bogged down in complex settings.

    Good Key Action: Even though the key action is not perfect for professional musicians, it is pretty decent for beginners.

    Excellent piano sound: The P45B simulates the sound of an acoustic piano beautifully. It also comes with ten high-quality instrument sounds.

    Various connectivity options: This piano has multiple connectivity options, allowing you to connect it to external devices like headphones, amplifiers, and computers. This expands the piano’s versatility.

    Inexpensive: It is an affordable digital piano that anyone can afford.

    Cons

    No built-in recording function: The Yamaha P45B doesn’t have a built-in recording function, so you’ll need to use external devices to record your performances.

    Flimsy sustain footswitch: The included sustain pedal is slightly flimsy and doesn’t look very nice.

    Doesn’t include a stand and bench: It doesn’t include a keyboard stand and a piano bench, so you’ll need to purchase those separately.

    Who Should Buy Yamaha P45 Digital Piano?

    If you’re a beginner piano player looking for your first digital piano at an affordable price to start your musical journey, the Yamaha P45B is your best bet.

    It’s designed to cater to beginners who want to learn the piano without breaking the bank. It has all the necessary features and a good key action to help you develop your skills during the early stages of learning.

    It is also a good choice for those who want to try piano playing but are unsure if it is for them. Since it has an affordable price point, you won’t lose much if you decide to give up later.

    However, if you’re an intermediate or advanced-level player, we cannot recommend the Yamaha P45. Two primary reasons account for this:

    Firstly, the limited polyphony of the P45 can make it challenging to play more complex classical pieces. That’s because any sound older than the last 64 will be cut off, which can be frustrating for more experienced players.

    Secondly, the duo sensor used in the key action of the P45 can make it challenging to play repeated notes quickly and with control, which can also be a significant drawback for intermediate or advanced pianists.

    These downsides won’t affect beginners. They may become frustrating as you progress and improve your skills. Therefore, it’s essential to consider your level and musical goals before purchasing a digital piano, including the Yamaha P45.

    Conclusion

    I hope this article has helped you determine whether you should get the Yamaha P45B digital piano in 2023.

    The P45 model is ideal for beginners since it has all the features a beginner needs without adding unnecessary frills. It’s affordable and offers fantastic sound and touch for the price.

    But if you’re an intermediate player or professional musician, the P45 is not your thing. Instead, I’d suggest looking for other digital pianos, such as the Yamaha P-125, the Casio PX-160, Alesis Recital Pro, and the Korg B1 digital keyboards.

    Overall, I strongly recommend the Yamaha P45 to beginners on a budget looking for a quality digital piano for under $600.

    Related Topics